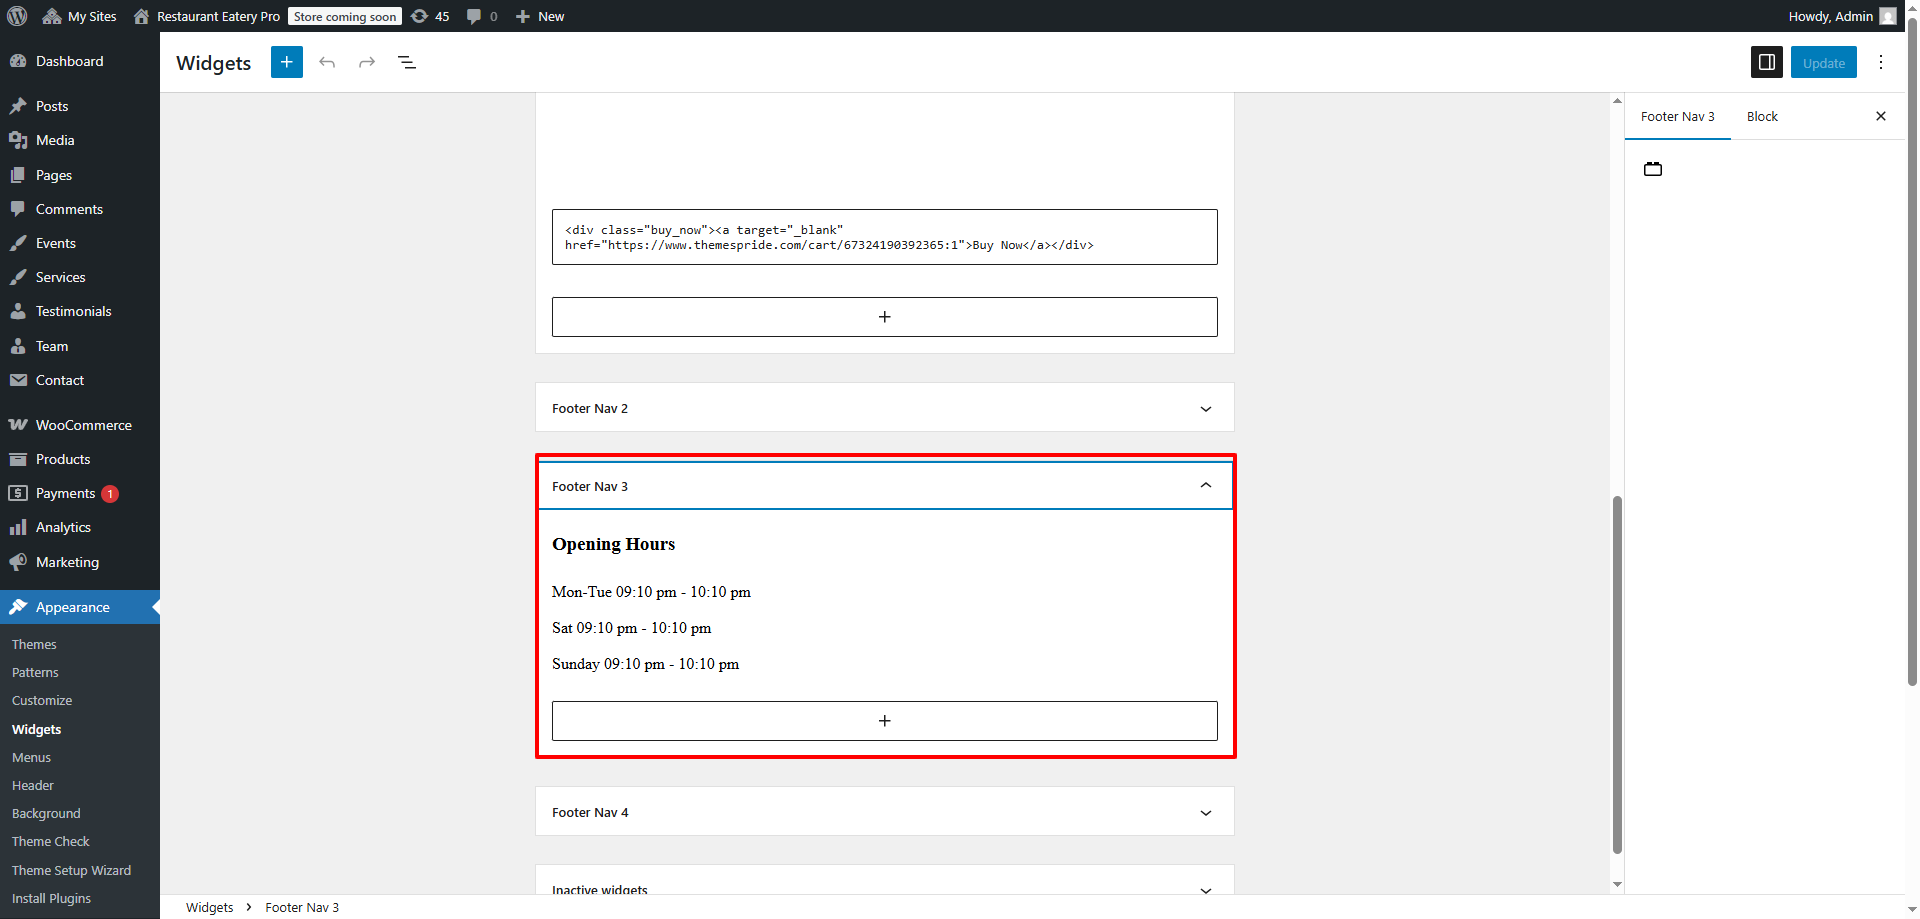
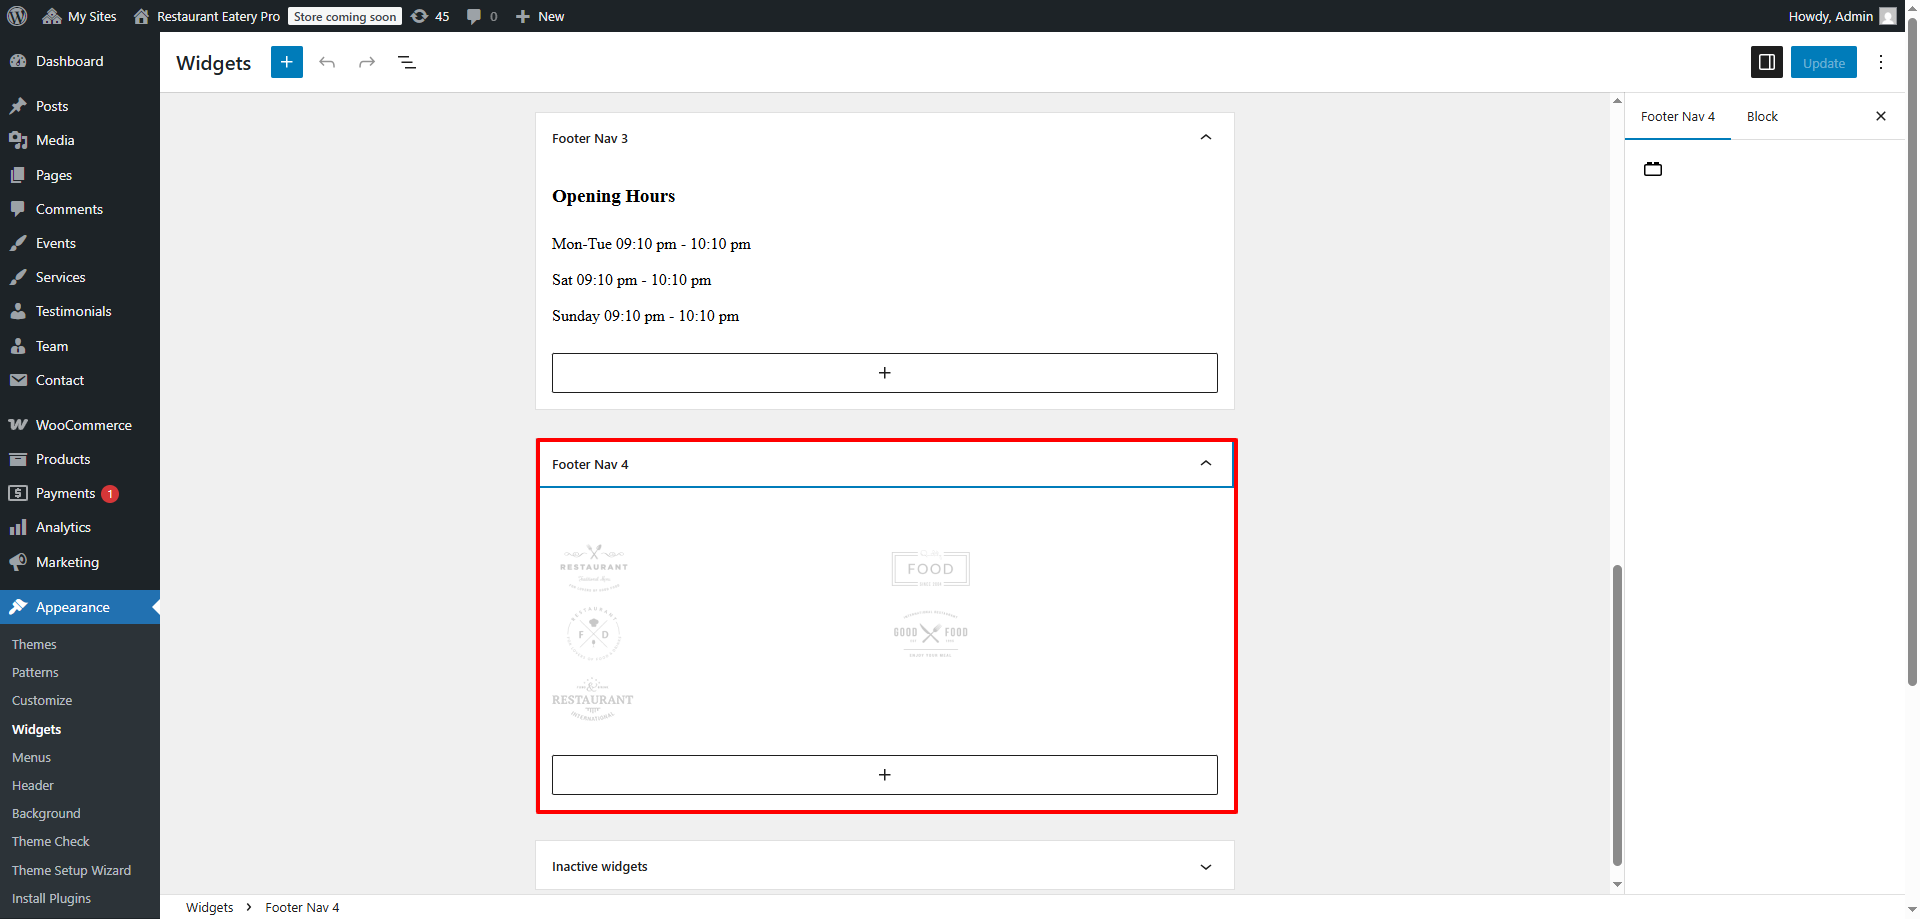
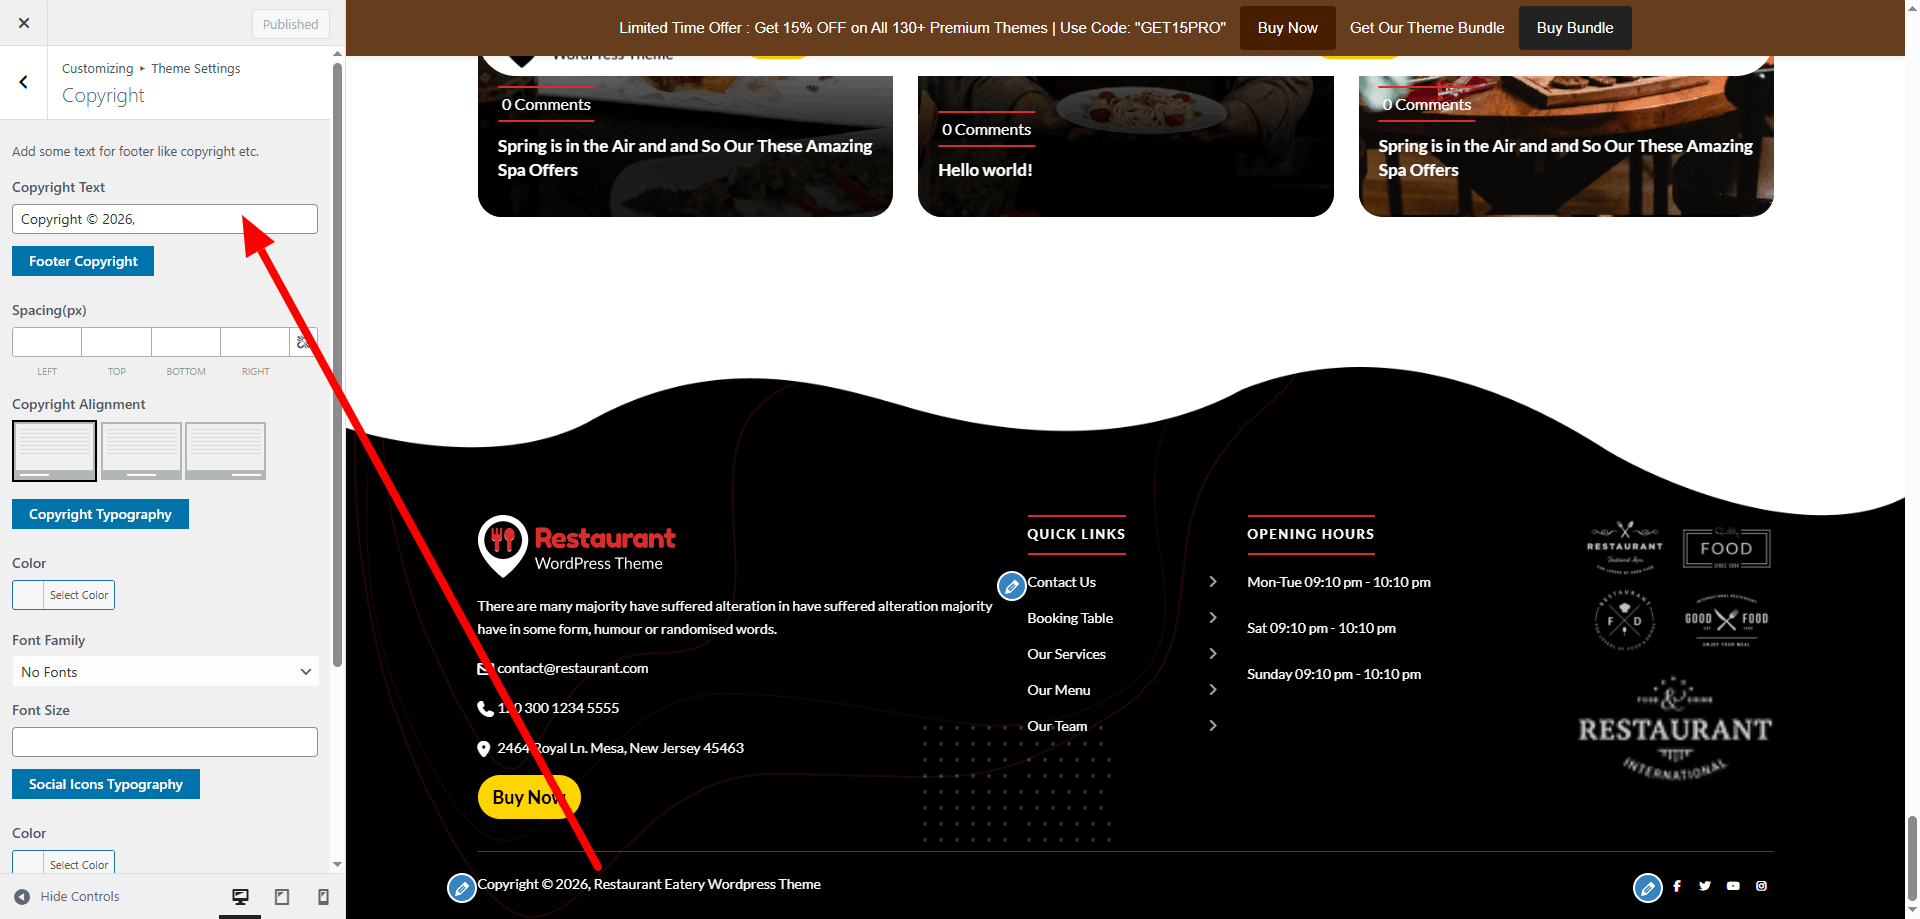
Restaurant Eatery Pro

Help and Support

Template Installation

The template installation process is very simple. The installation process can be done in two different ways.

1- By wordpress admin

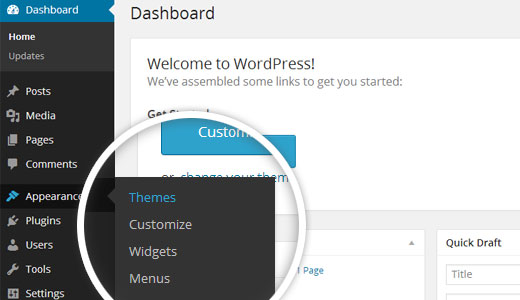
Open Your wordpress dashboard.

1. open Appearance - Themes as shown in the screesnhot below.

2. Now click the "Add New" button.
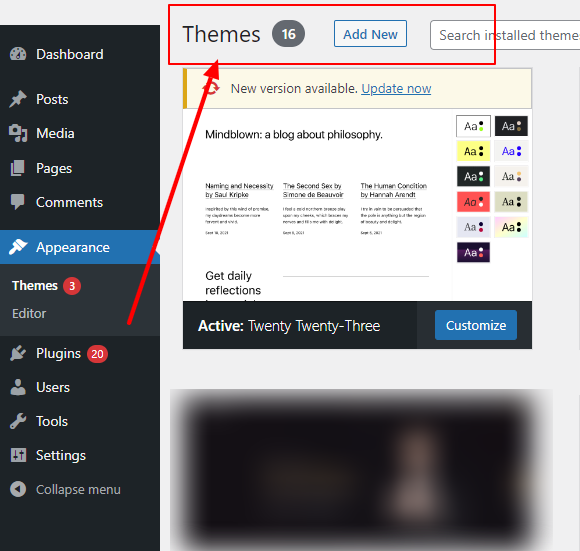
3. Now click on the upload button.

4. Load the theme file restaurant-eatery-pro_1.0.zip (Version may vary) and proceed with the installation.
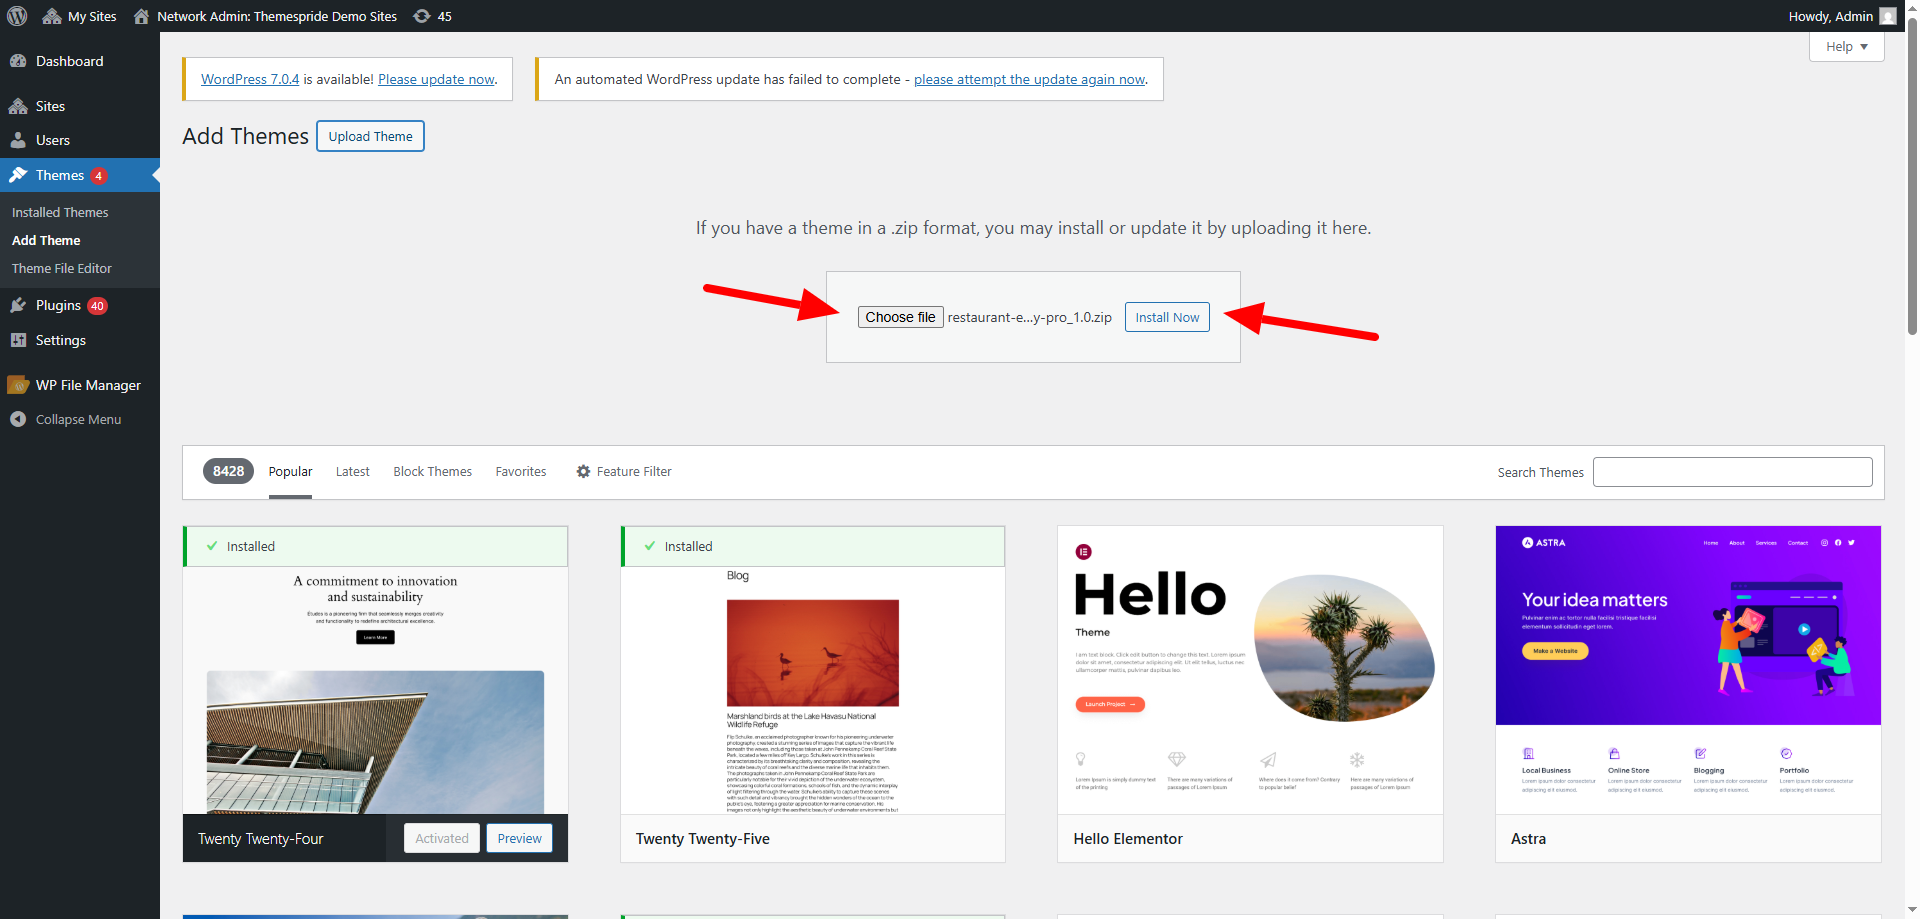
5. Now WordPress will install your theme and show you the message to "Activate" the theme.

2-Via FTP

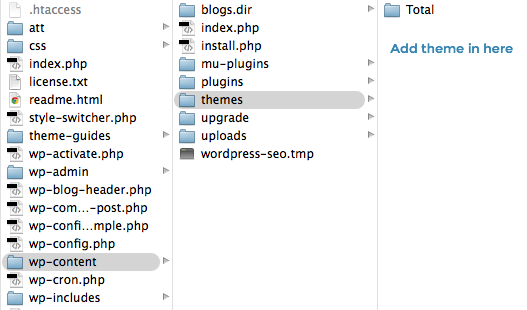
Login to your FTP and upload the the theme folder at wp-content - themes.
As soon you activate the theme you will navigate to the Theme Setup Wizard page.

Demo Importer

To get the demo content exactly like we have shown on our demo page, checkout the below steps.

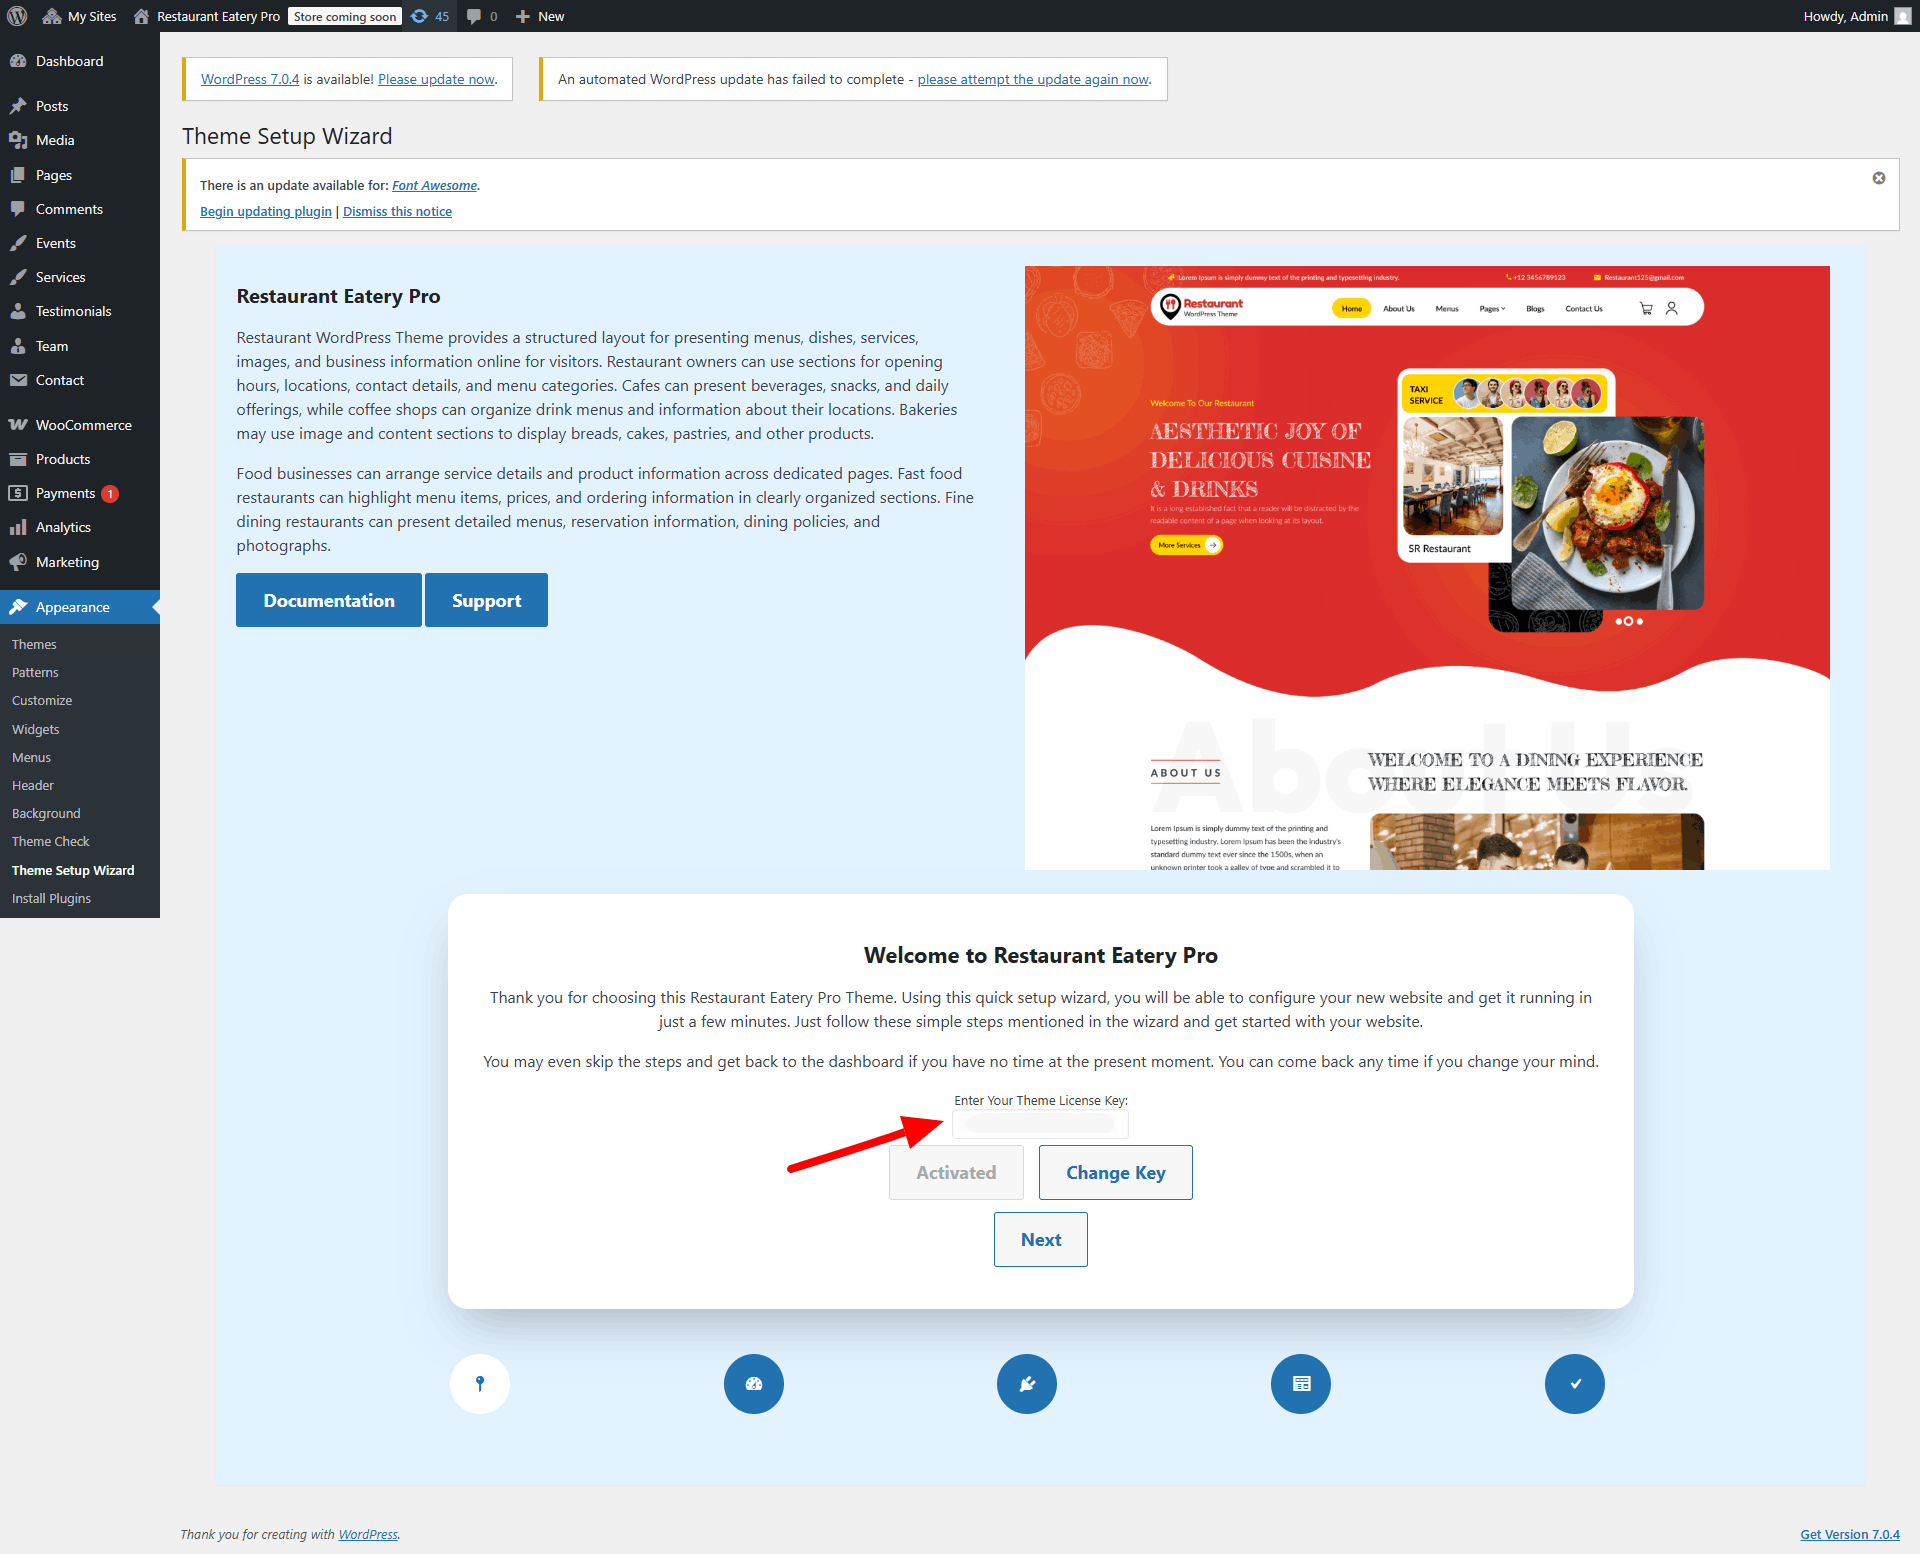
Open Theme Setup Wizard present under Apparance menu.

You need to enter the key here that you have recieved through email.
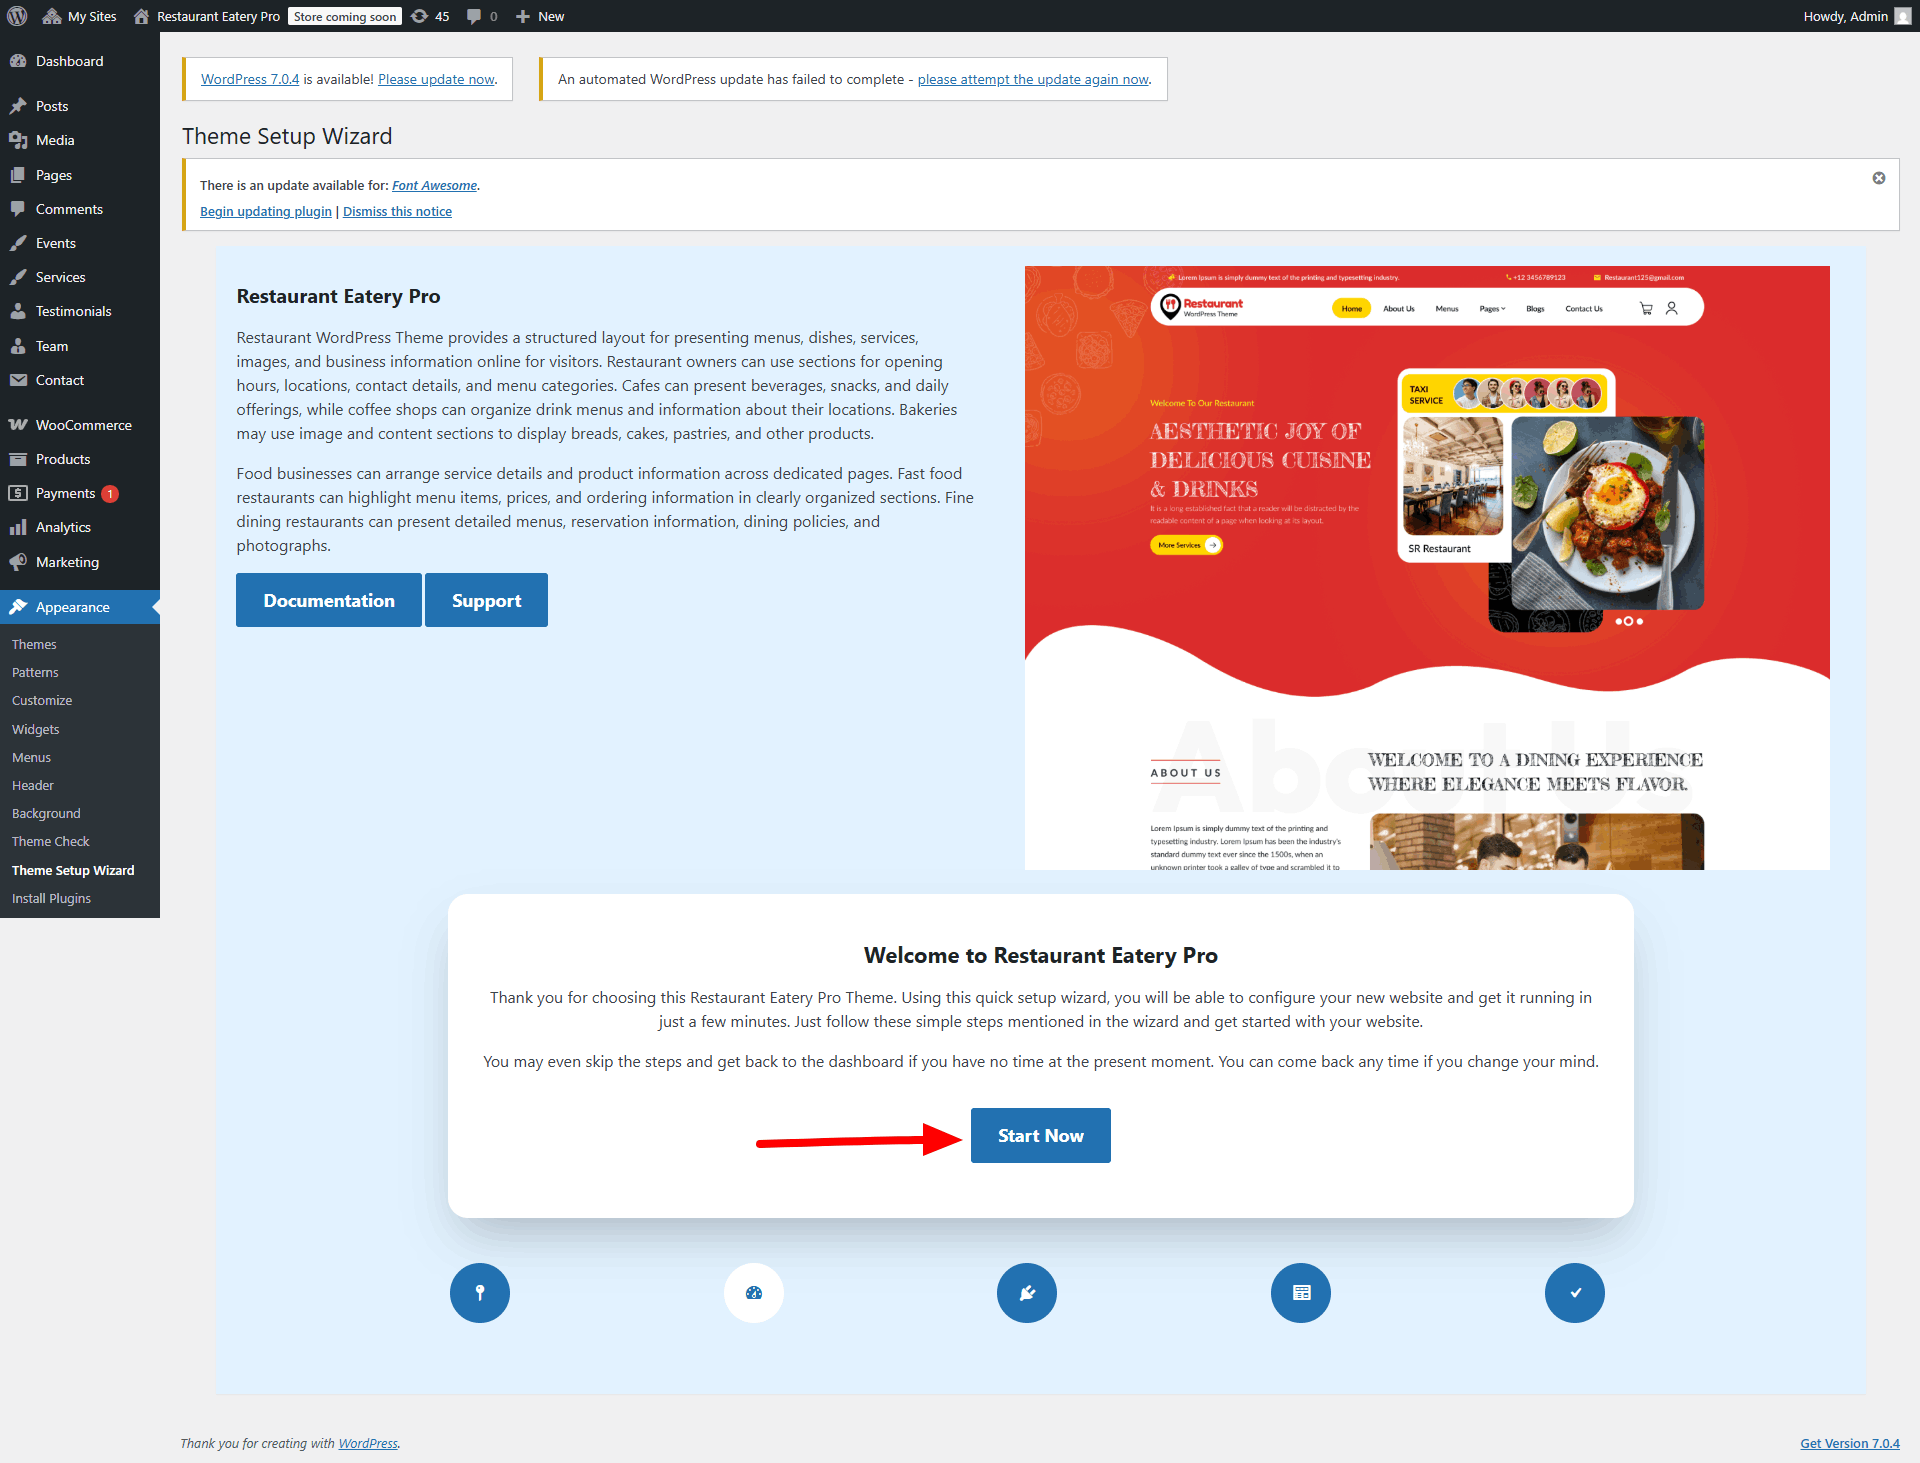
Click on the "Start Now". It will list all the plugins required for this plugin under "More Info". You can check it by clicking on more info.
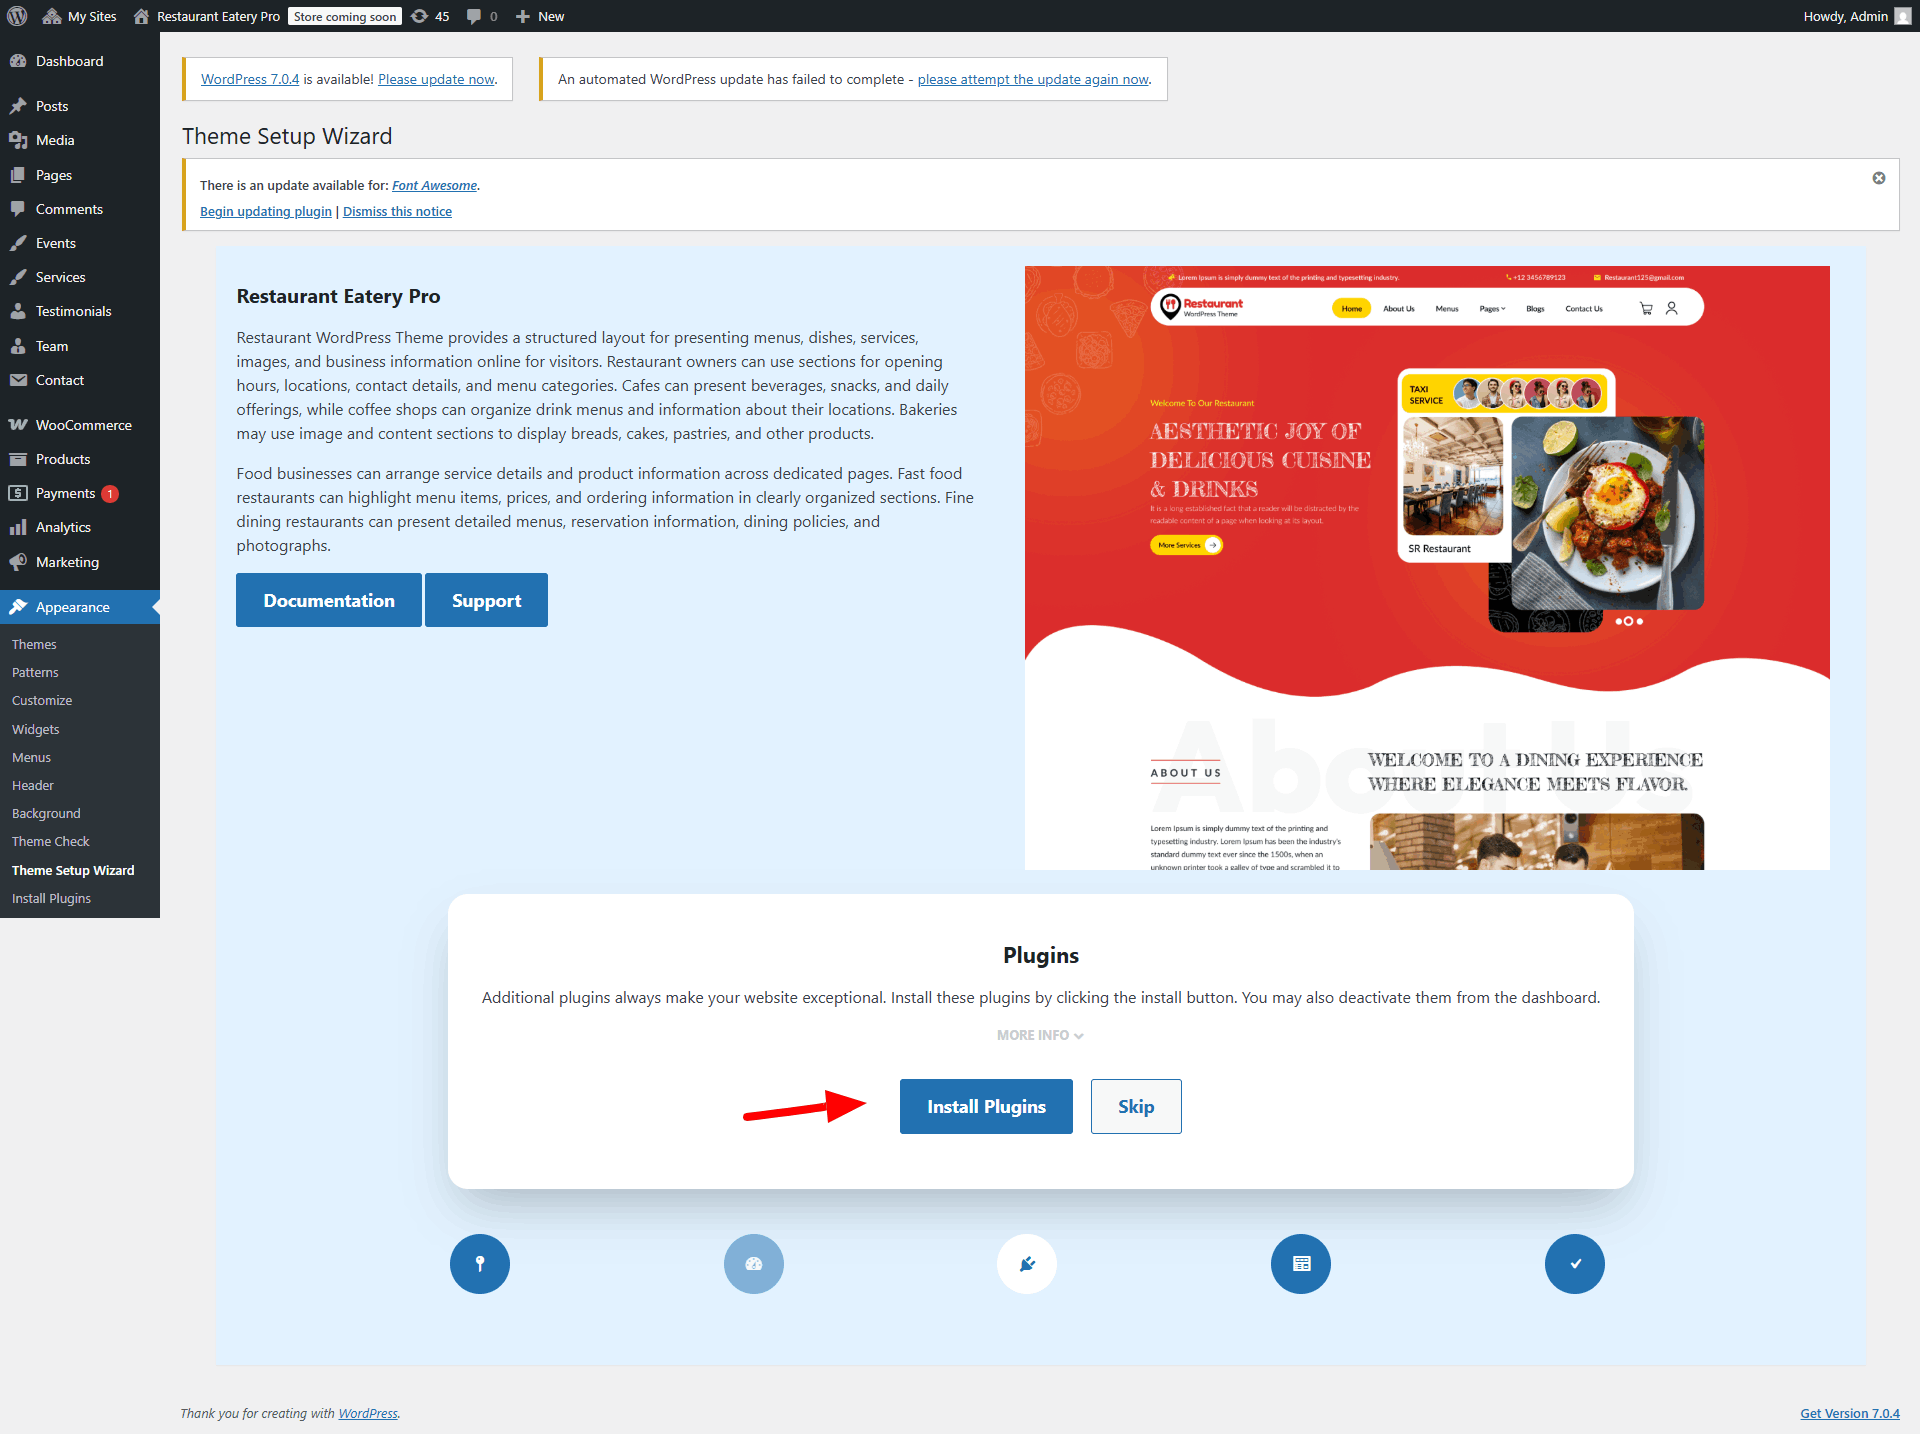
Click on the "Install Plugins". It will install all the required plugins
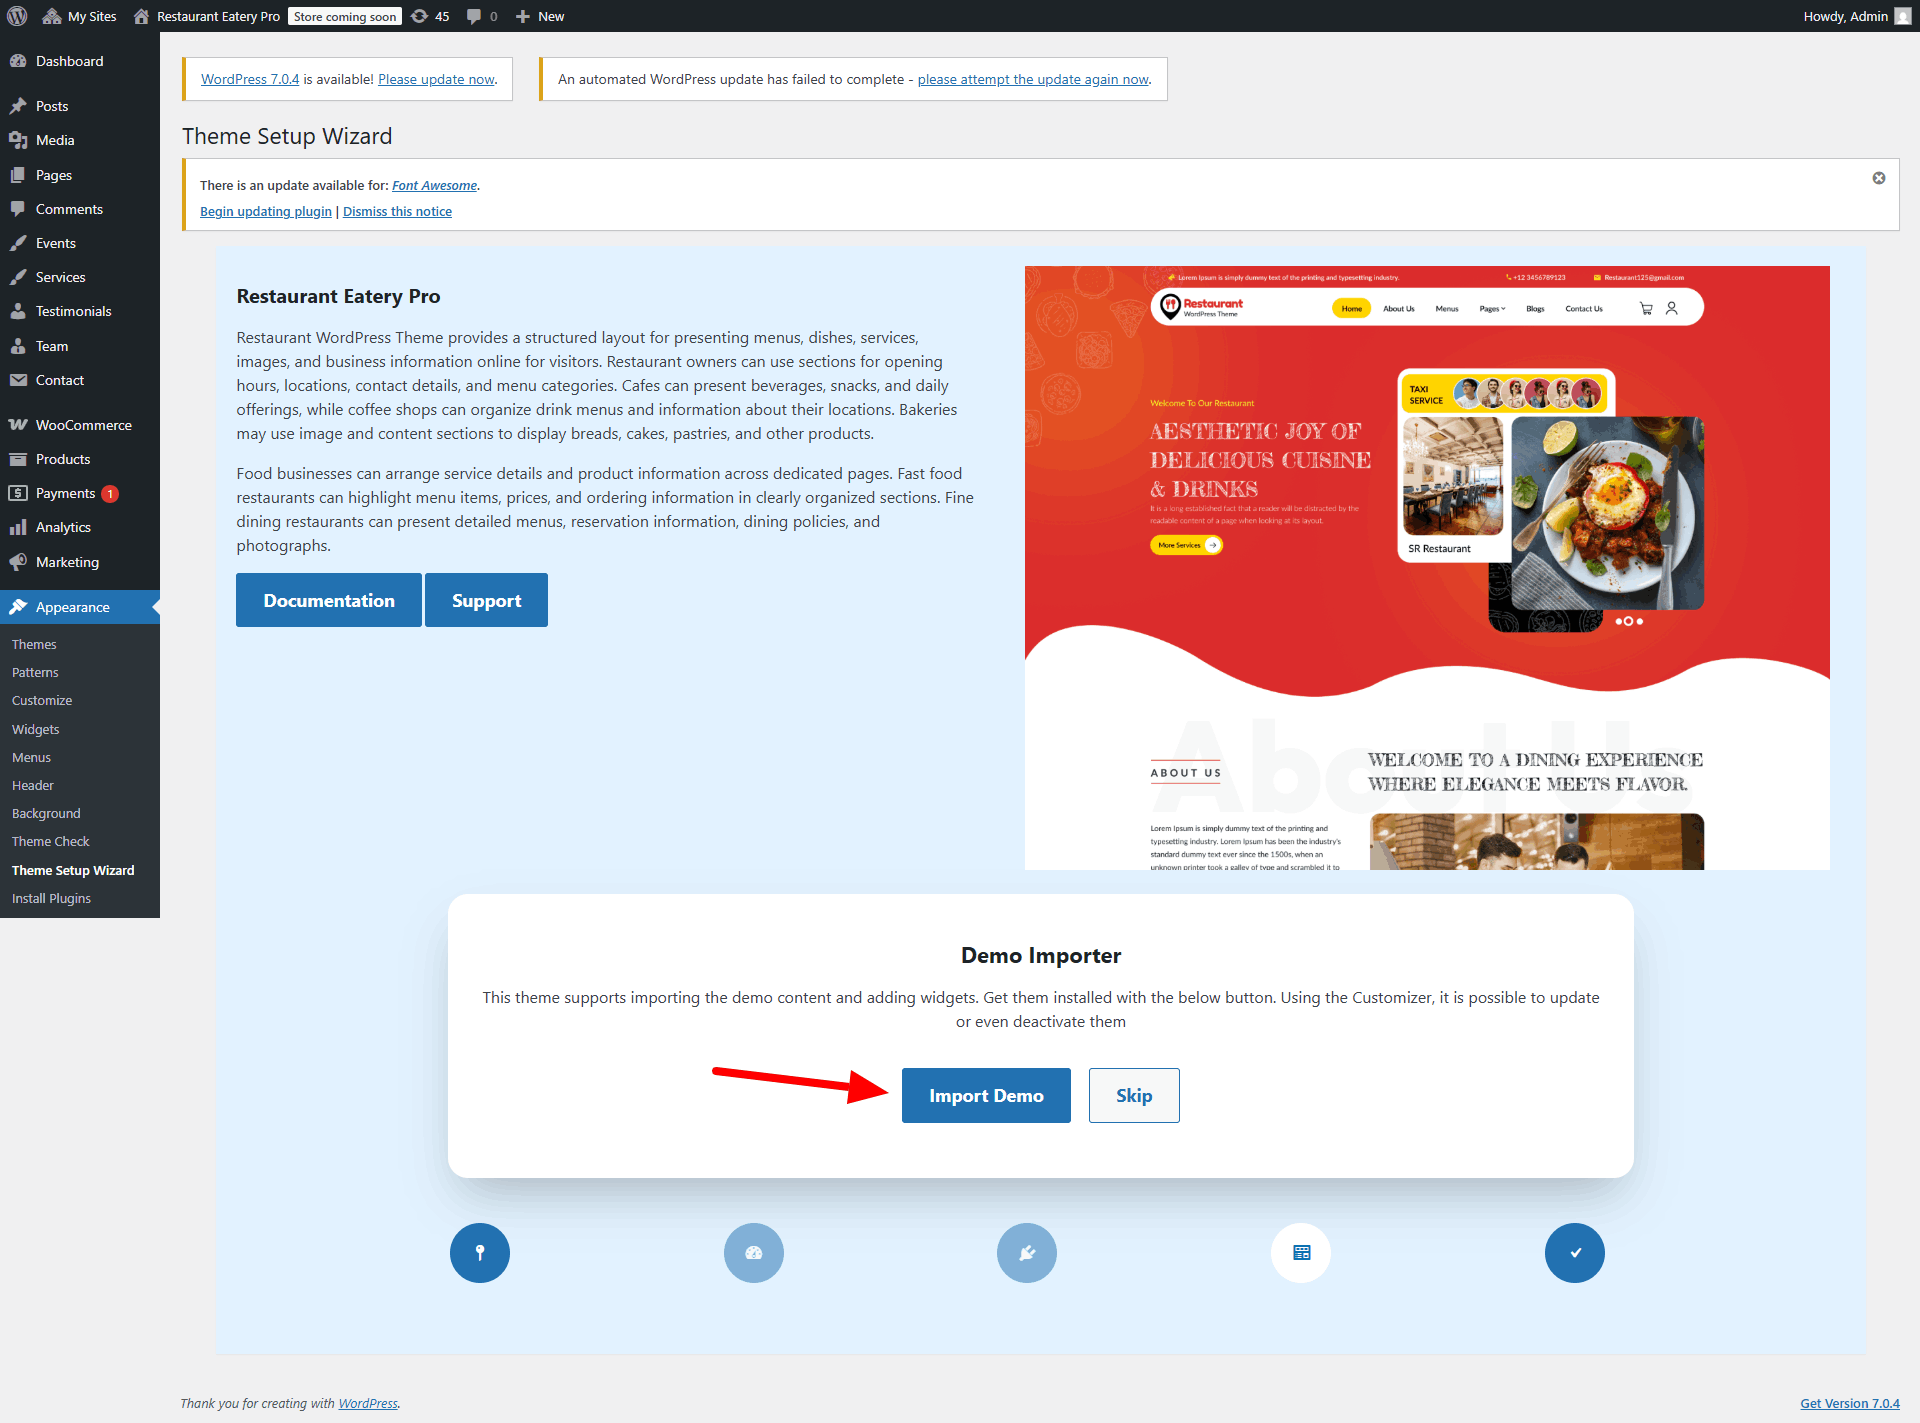
Then Click on the "Import Demo". It will import the demo exactly like we have shown on our live demo page.
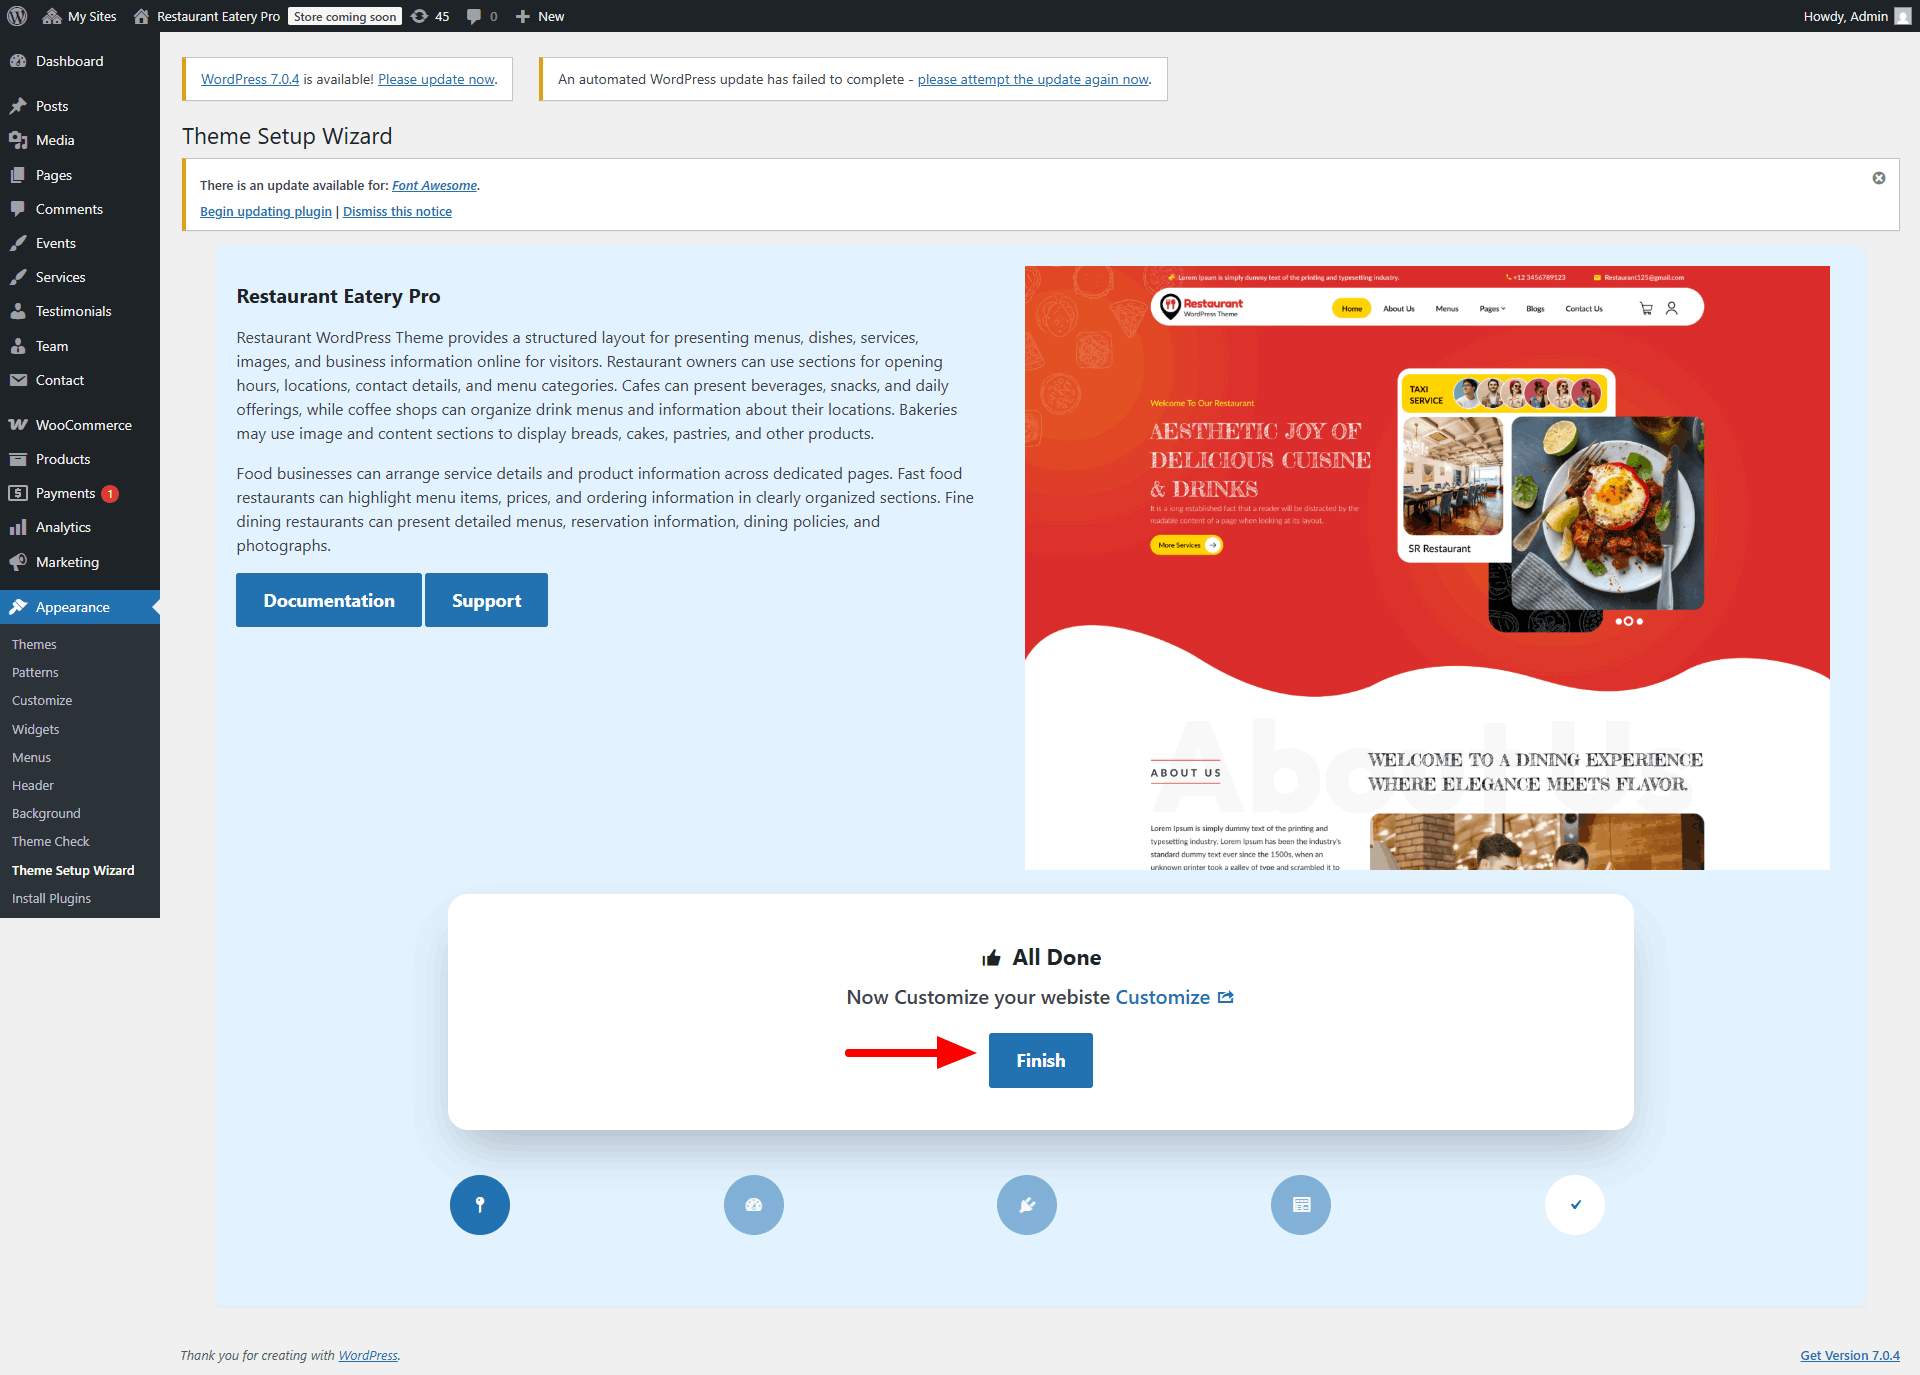
Once you have done with this you can see all the demo content on front page.

Customize Demo

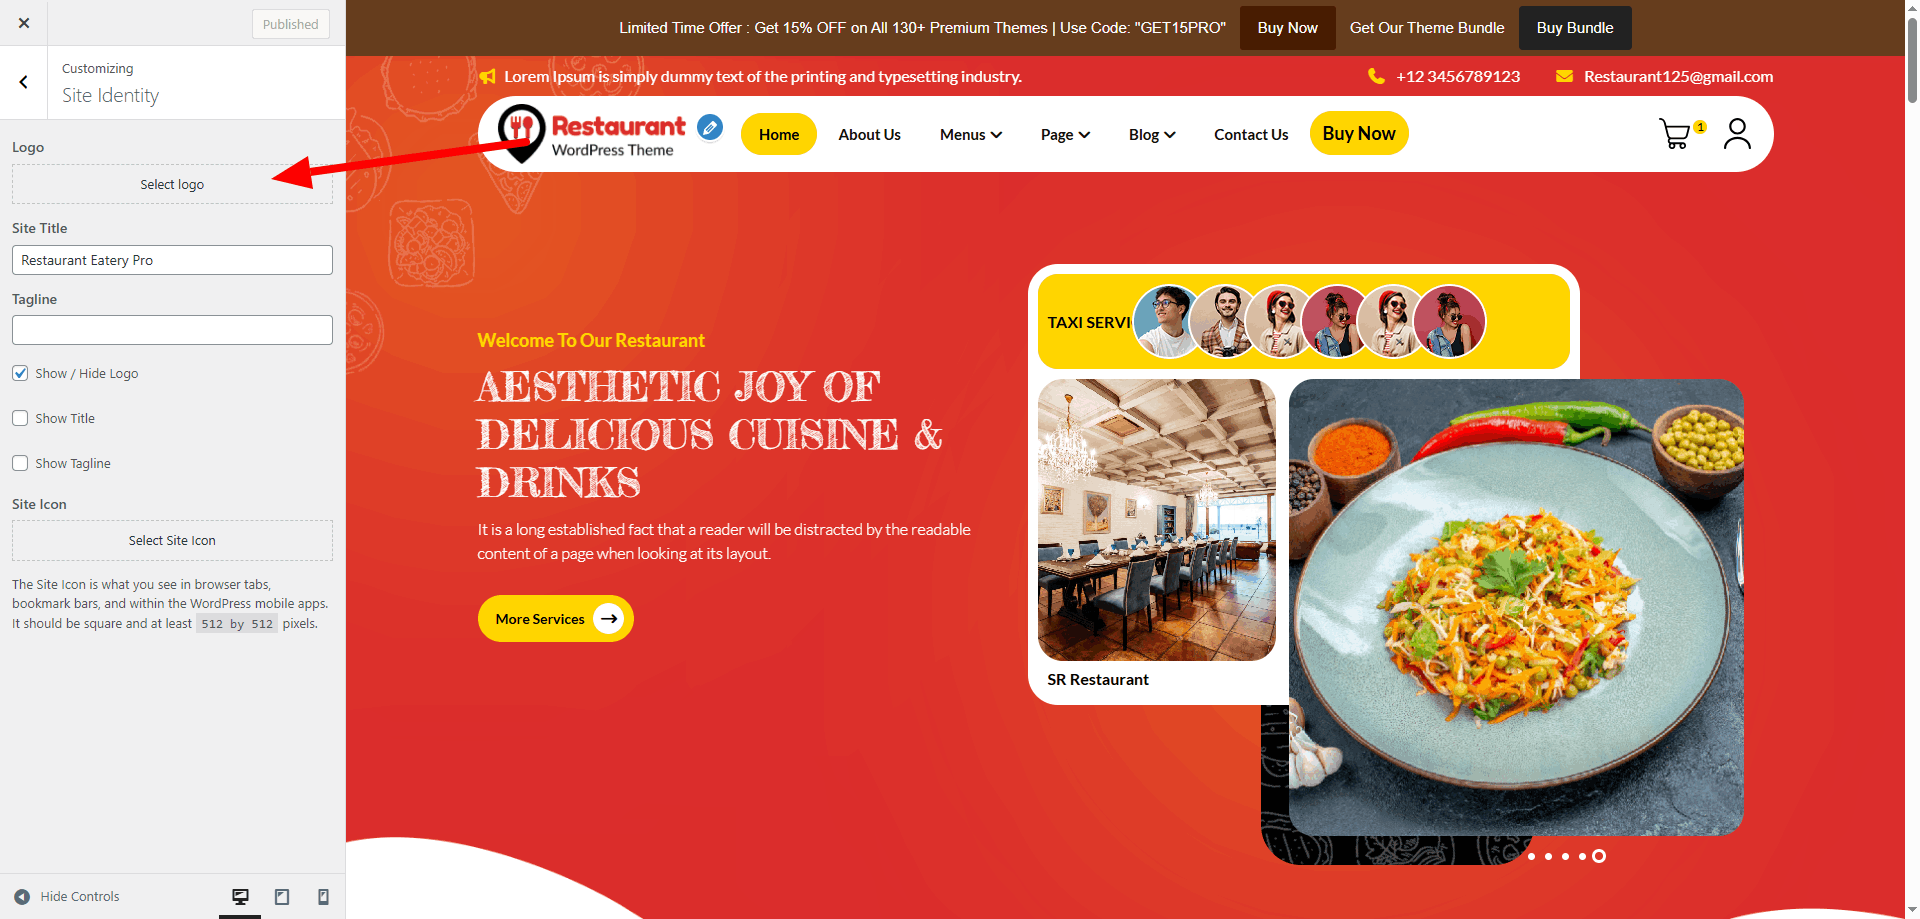
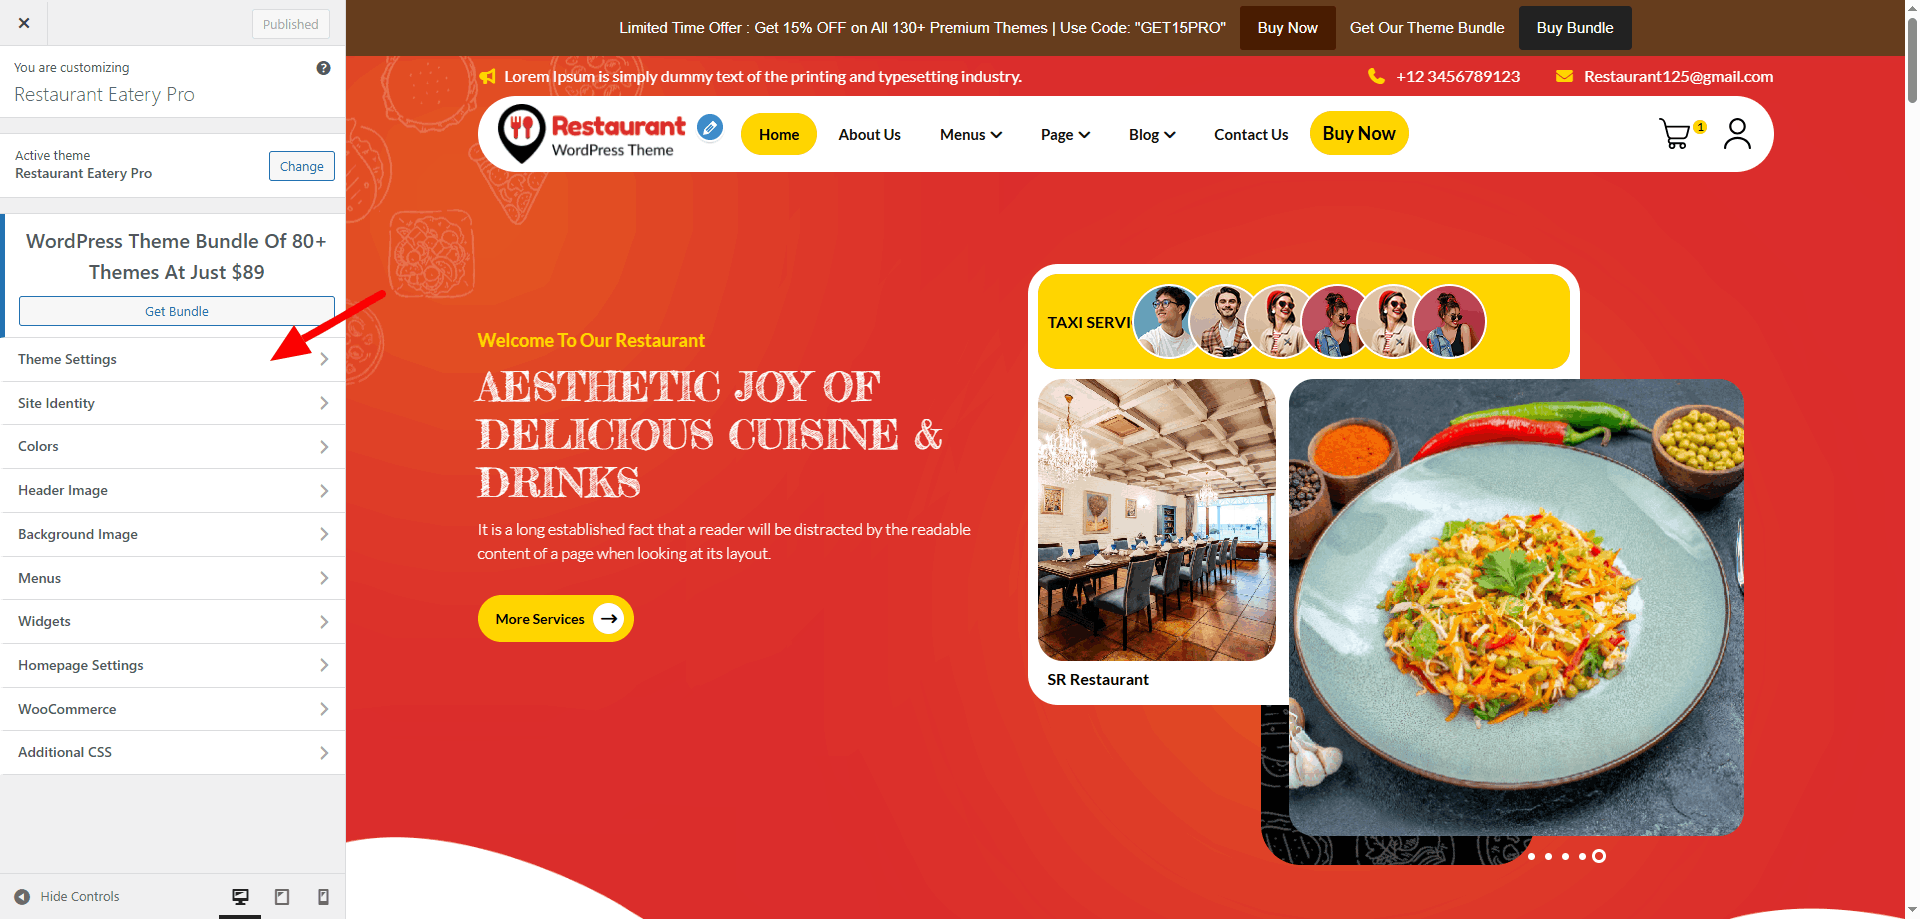
Now start customizing your site as per your requirement. open Appearance - Customize - Theme Settings
Customize Demo

Section Reordering and Typography

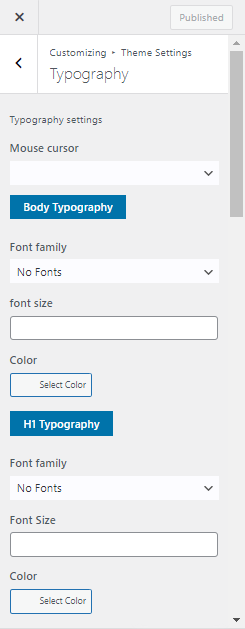
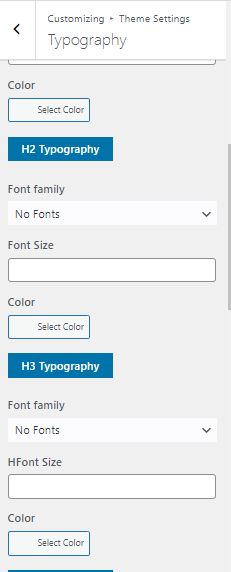
Global theme and color and typography will help you to to change the color and font in a single click.

Each section contains option to set the Content, Title/Text, Text, Buttons and Background Matte palettes to the linked section depending on the number of options available.
Global Color

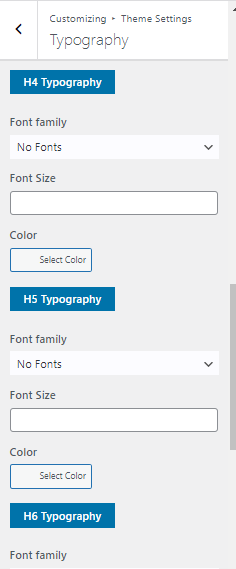
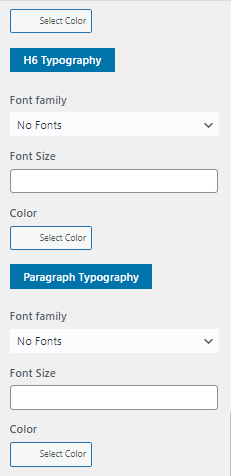
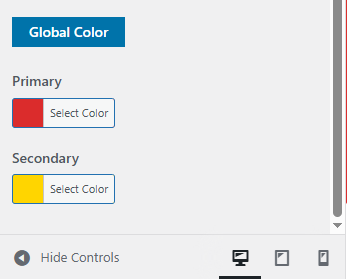
Global color will change colors for the entire theme. Open Appearance - Customize - Theme Settings - Typography. Scroll to bottom you will see two options for color, choose both options then only it will appear on frontend as it is gradient color.
Section Reordering

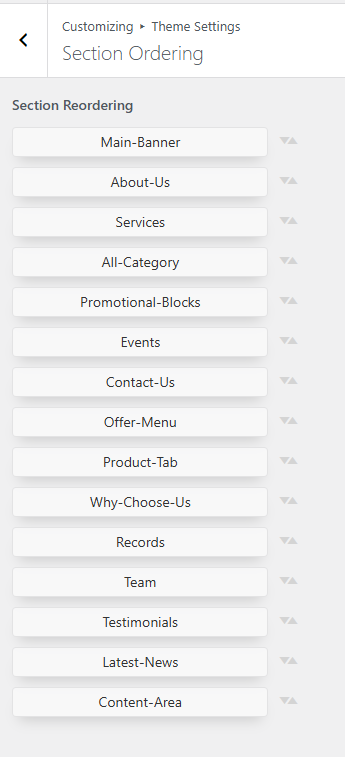
Move the section according to your requirement. Check screenshot below.
Configure "Main Banner" Section

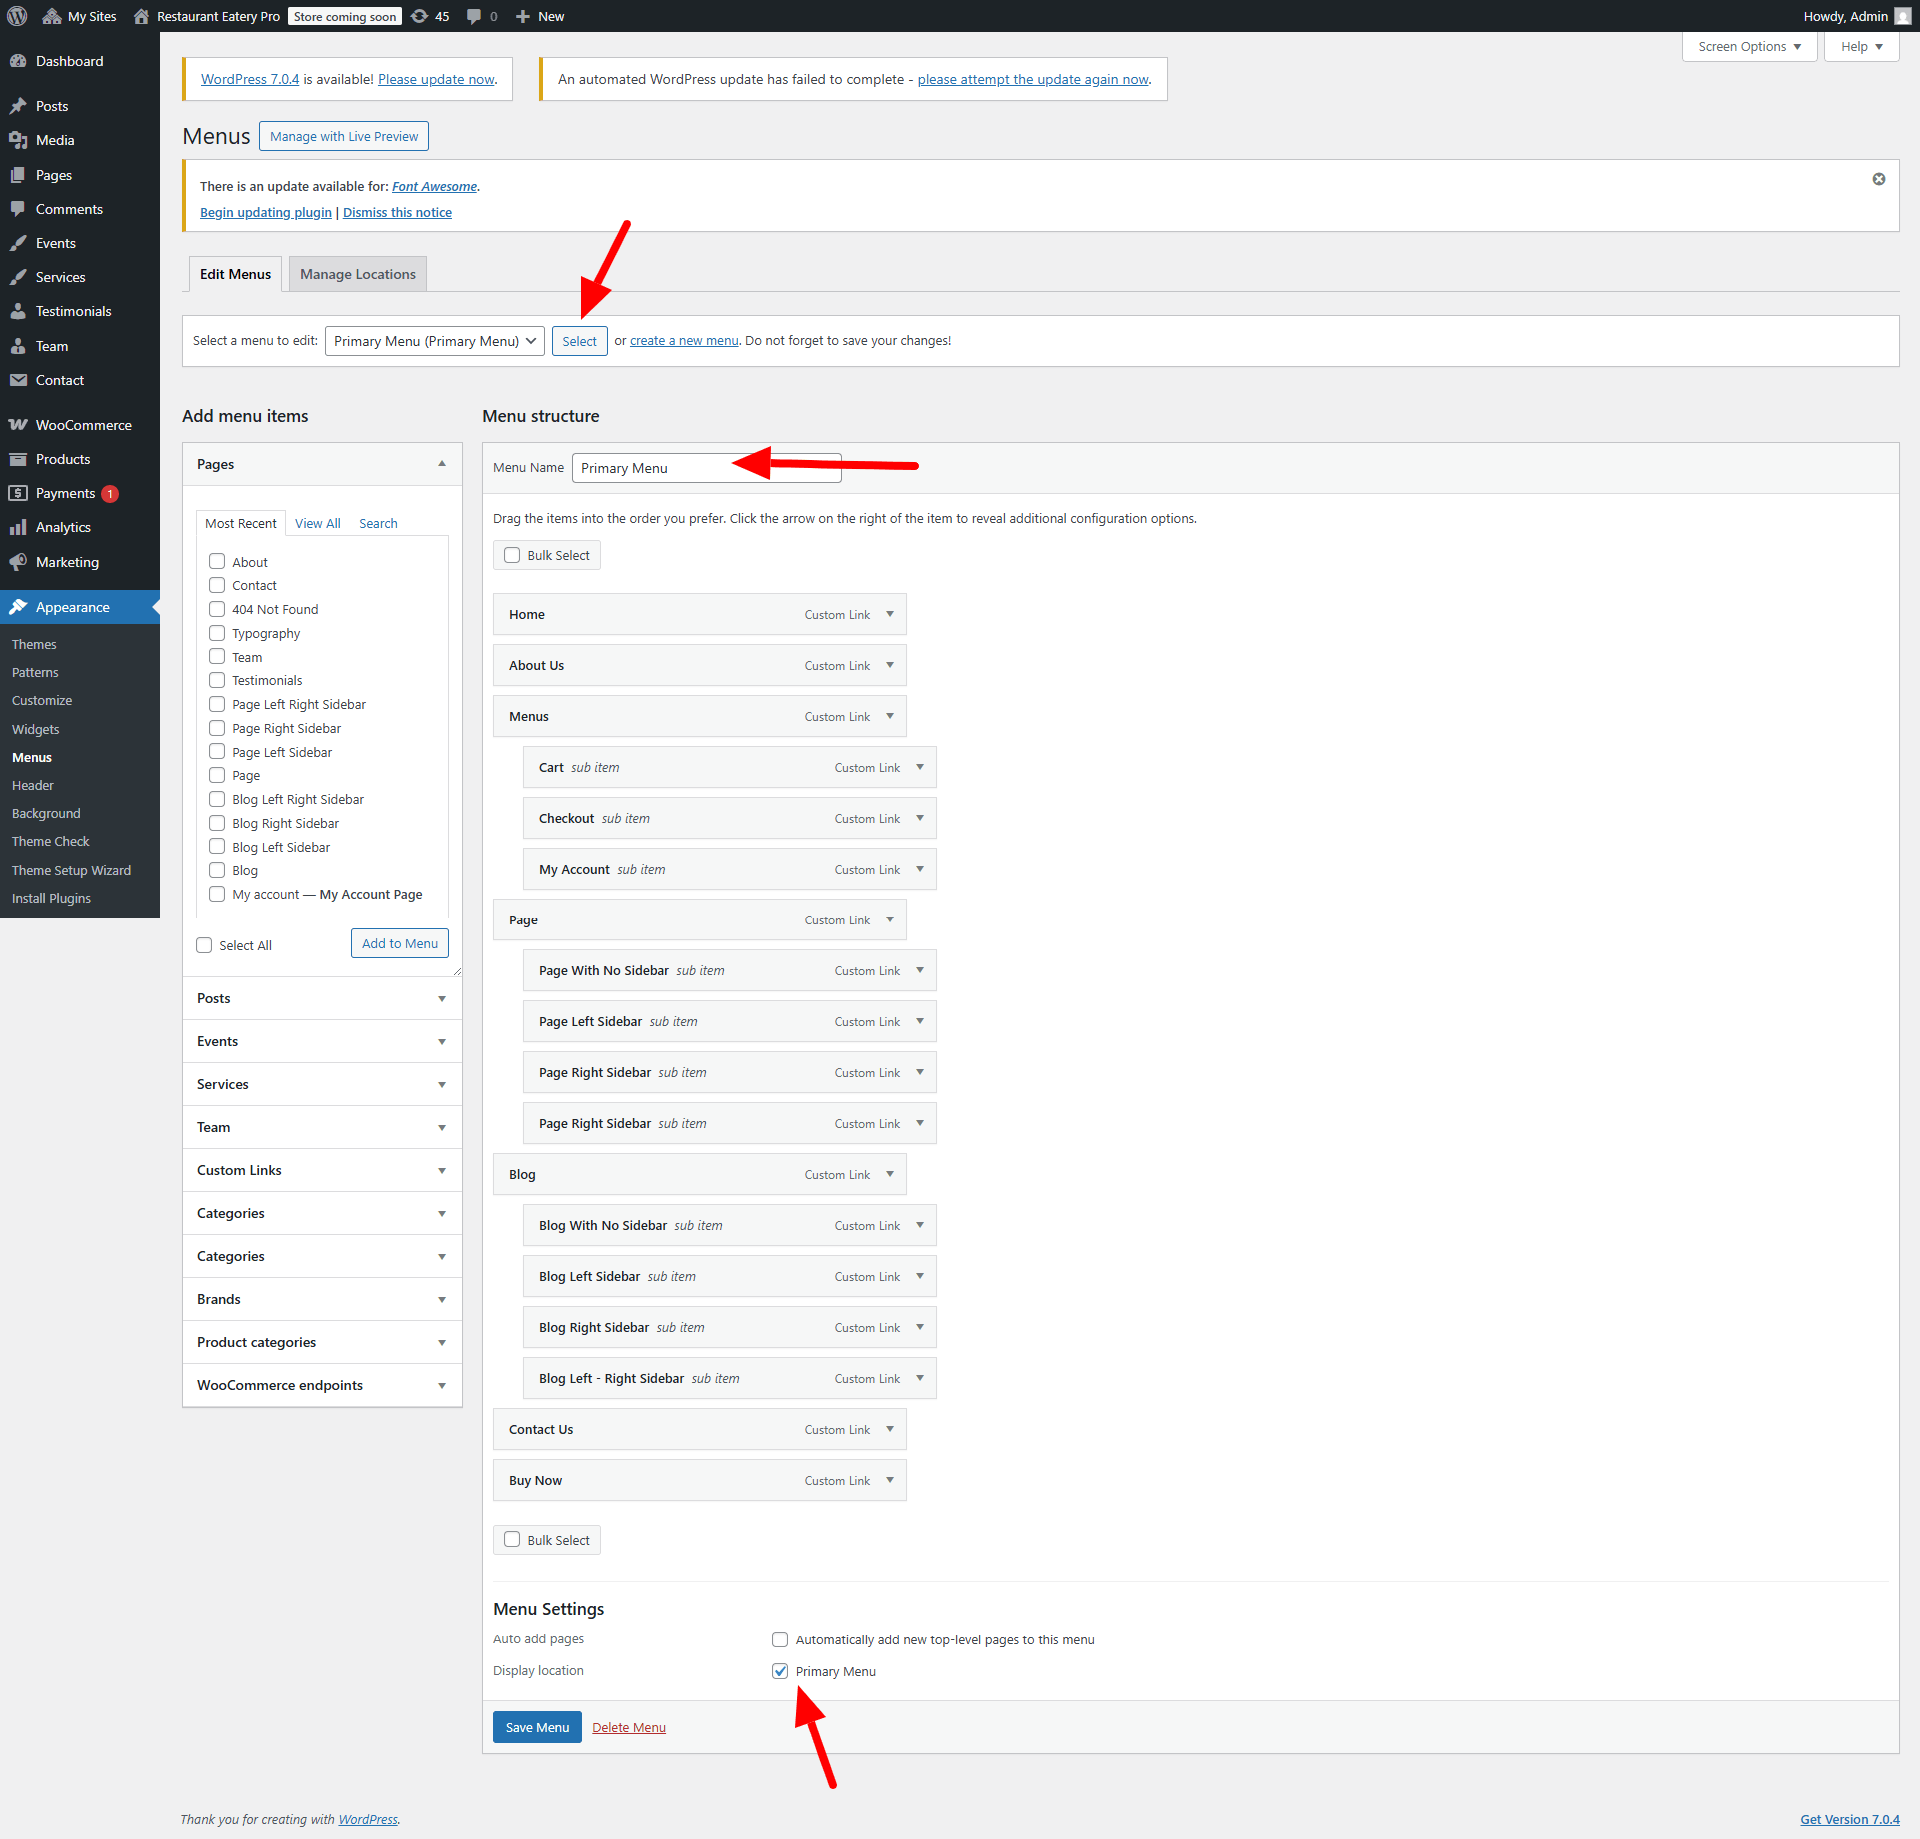
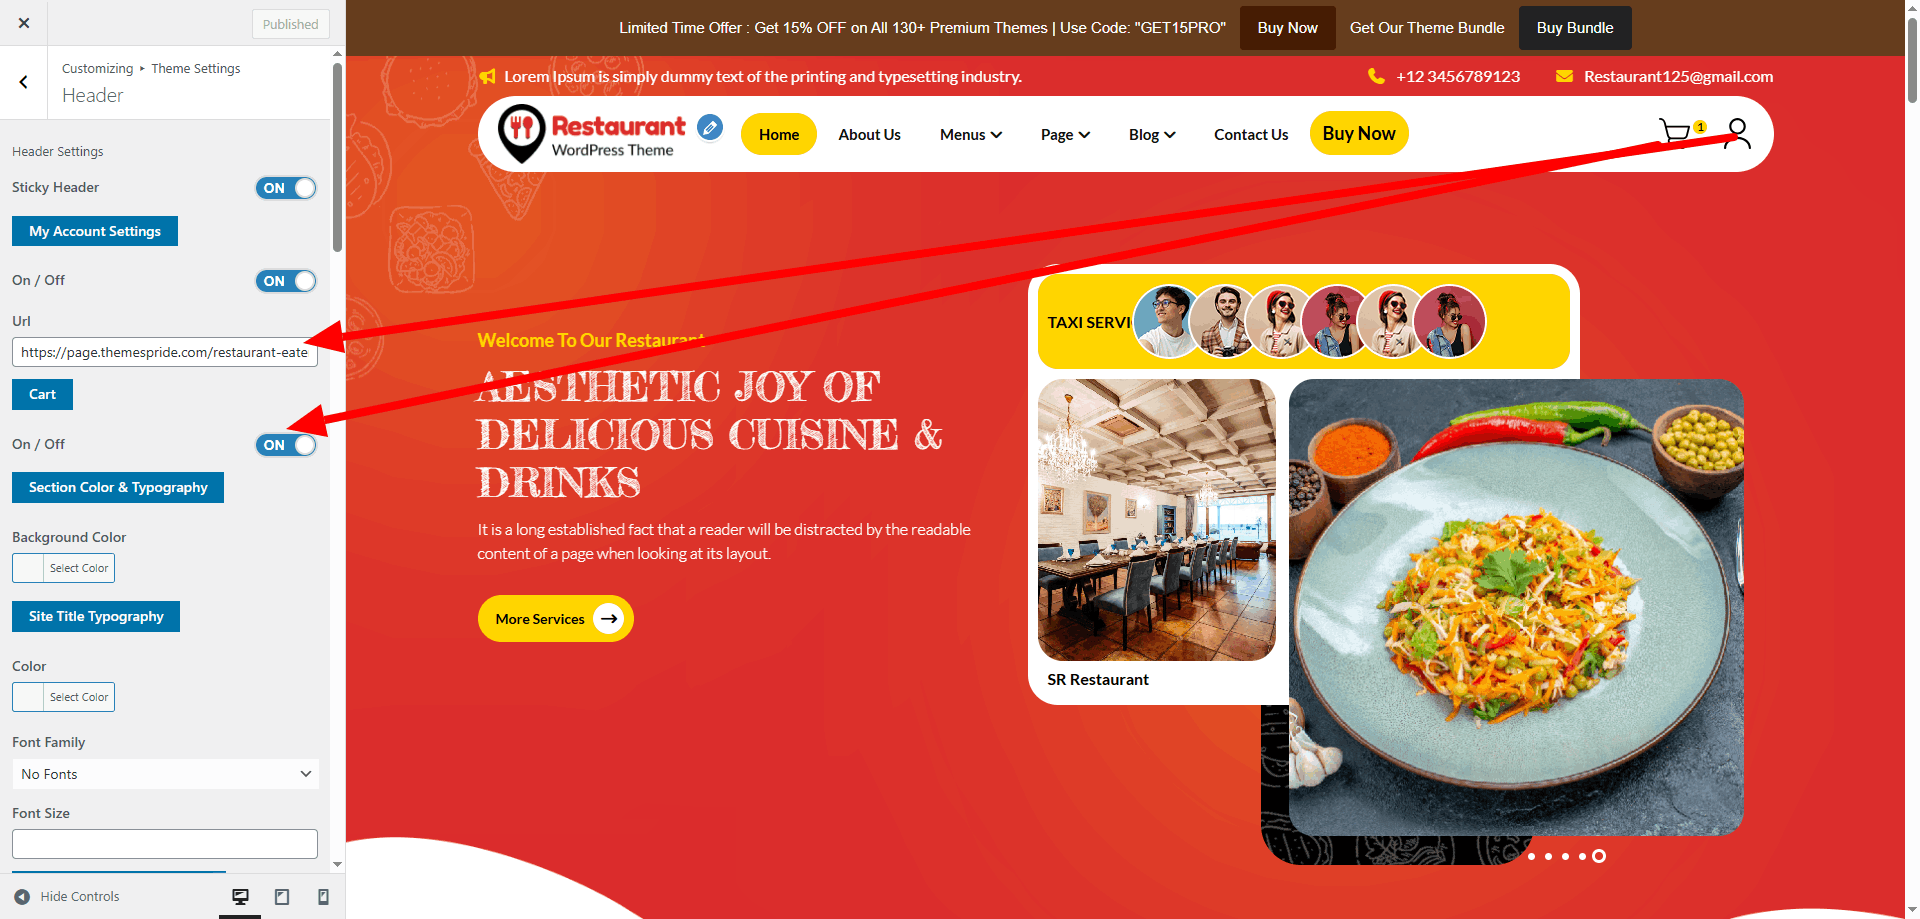
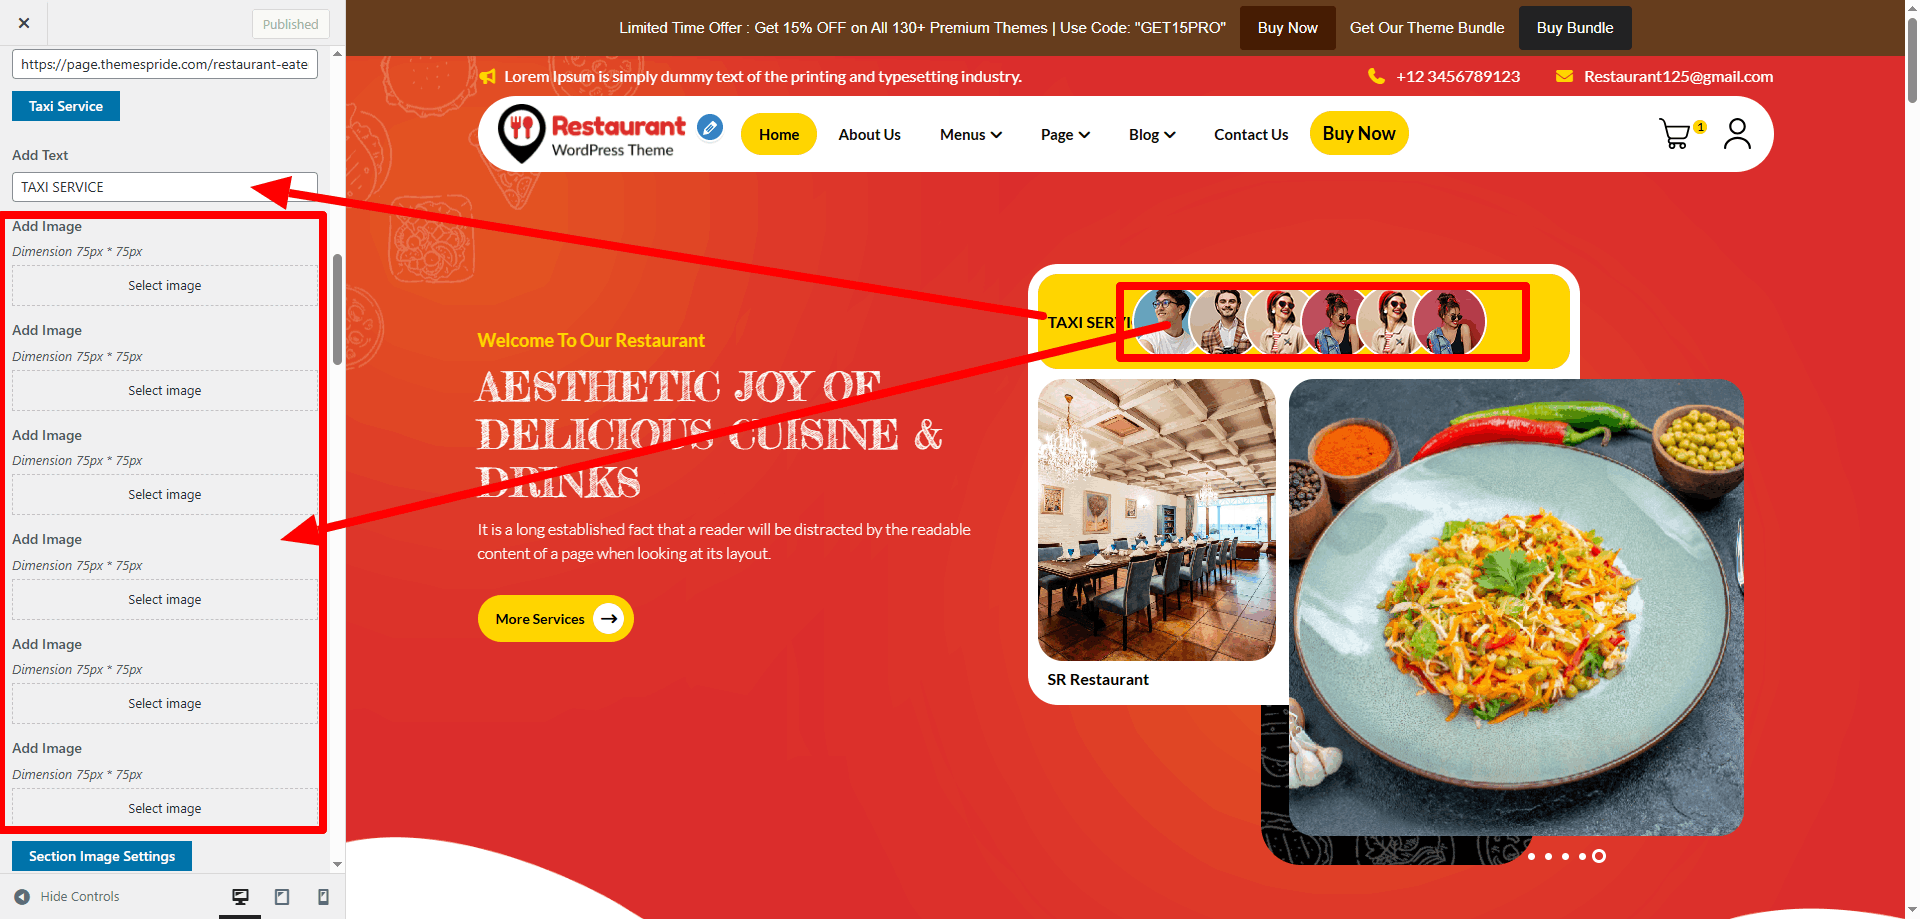
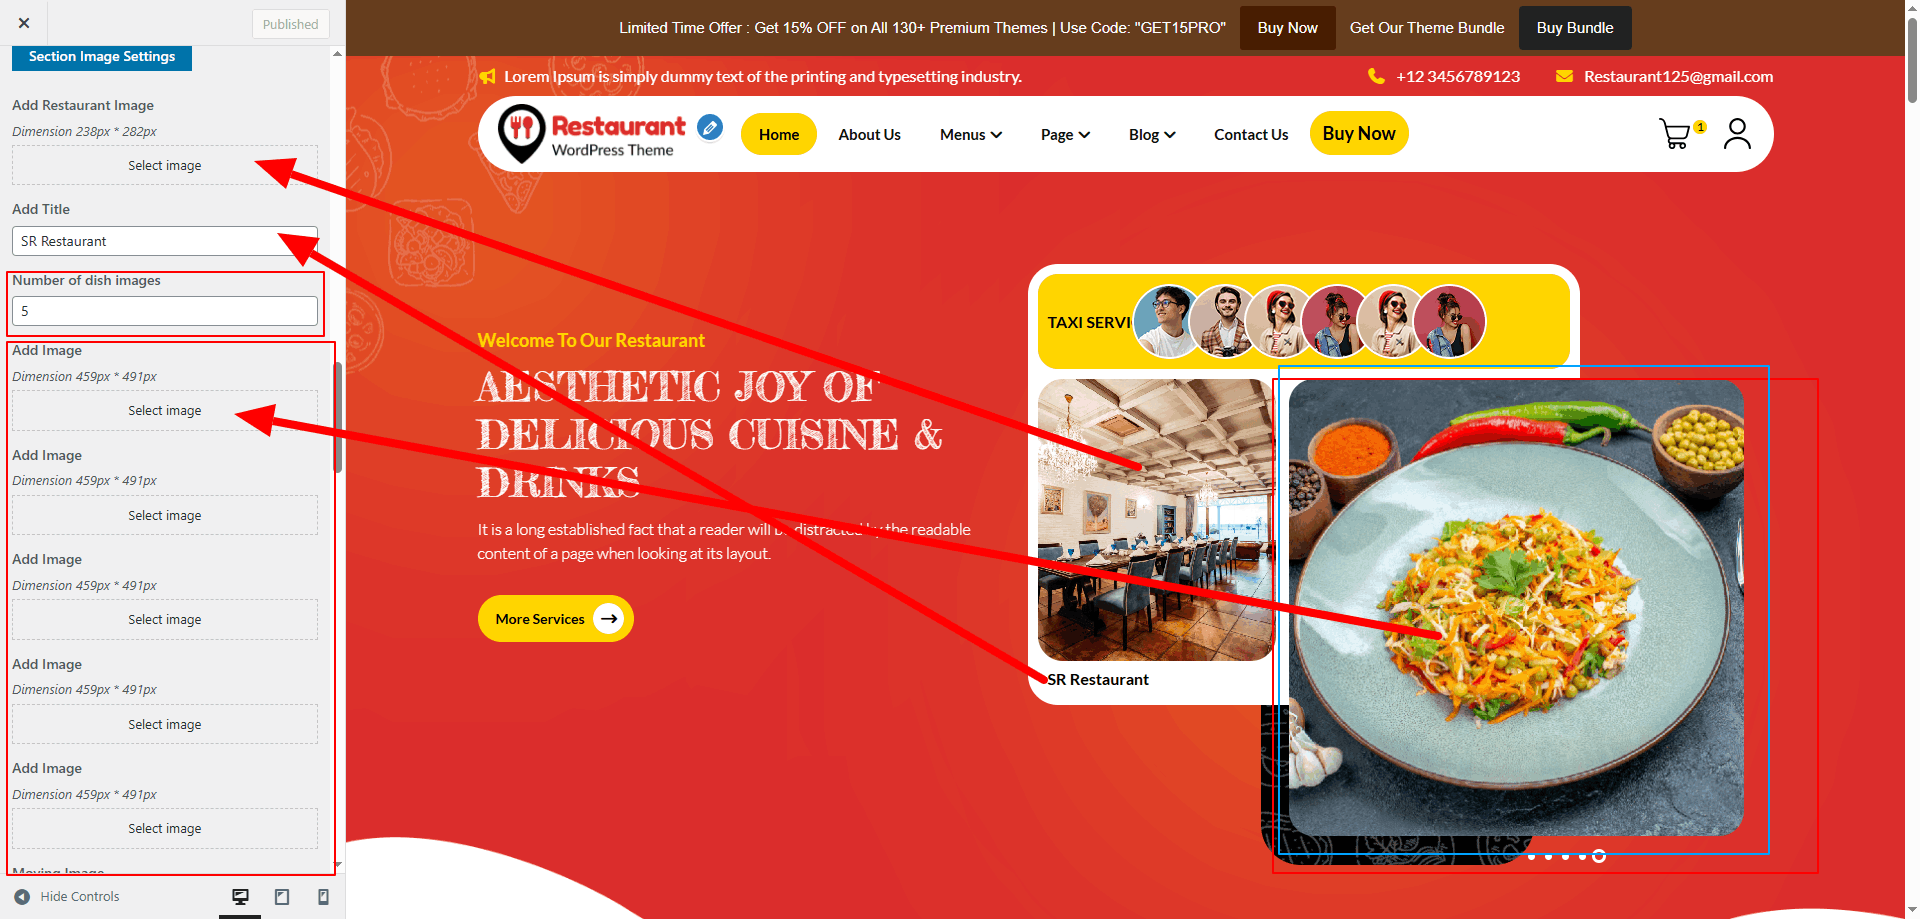
The Main Banner section is customizable through the Theme Settings panel. All headings, text, and placeholder content can be updated directly in the Customizer.

  1. Go to Appearance → Customize → Theme Settings → Main Banner.
  2. Update the Banner Heading, Tagline, and any supporting text.
  3. Replace placeholder images or background visuals with your own banner graphics.
  4. Adjust the number of slides or banners if supported by the theme.
  5. Scroll down to configure Color Options for background, text, and buttons.
  6. Save and publish changes. The banner will update instantly on the front end.

This section is ideal for highlighting promotions, campaigns, or your brand’s key message.
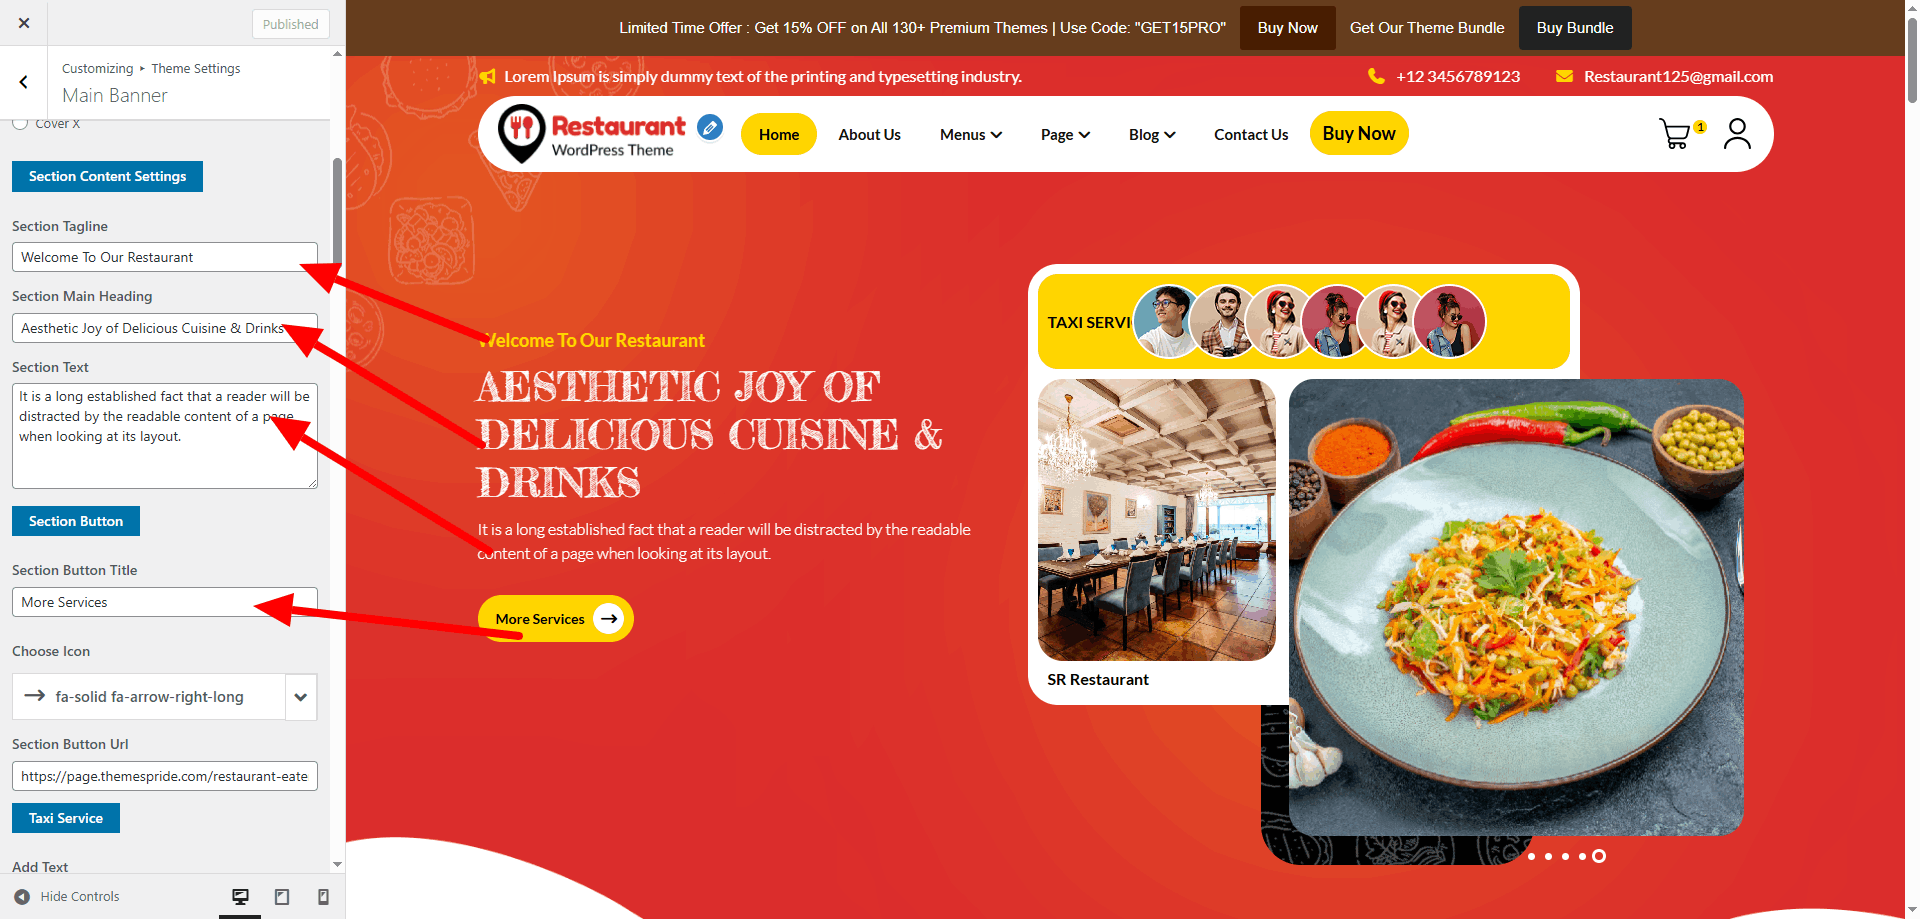
Main Banner Settings

Main Banner Editor

Main Banner Display

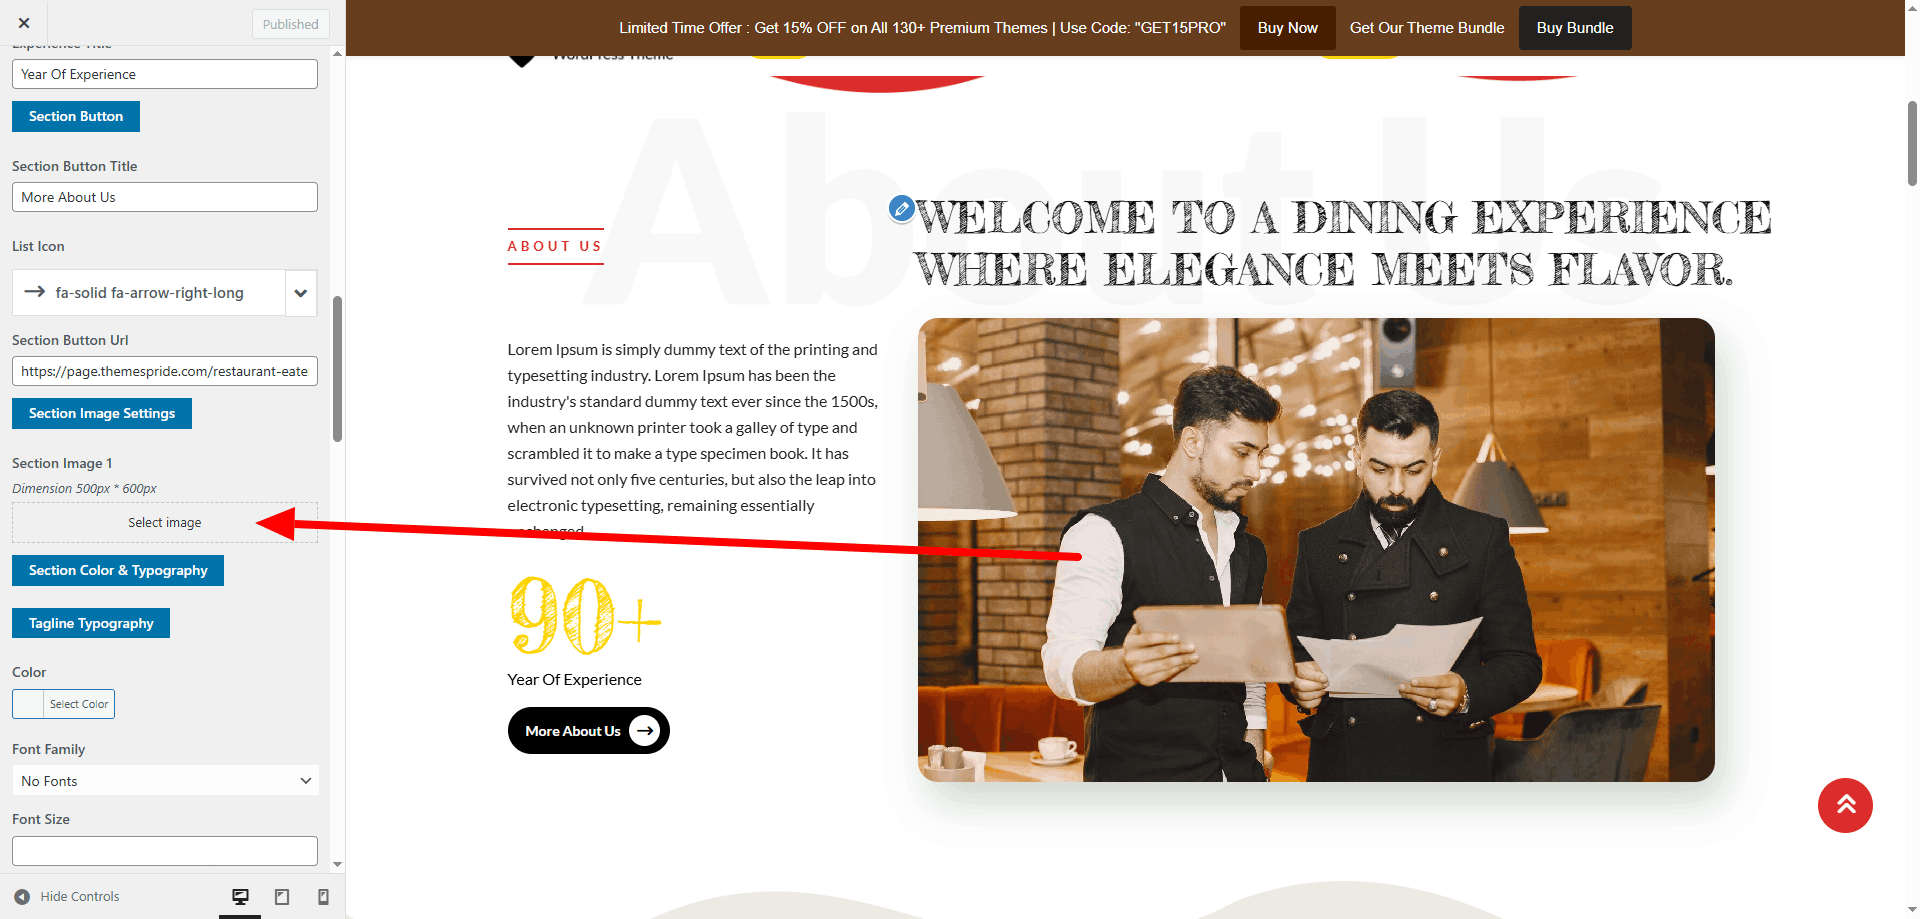
Configure "About Us" Section

The About Us section is fully managed through the Customizer. You can update headings, text, and placeholder content directly without editing code.

  1. Go to Appearance → Customize → Theme Settings → About Us.
  2. Update the Section Heading and Tagline to reflect your brand identity.
  3. Replace placeholder text with your own company background, mission, or values.
  4. Upload or replace images or videos to make the section more engaging.
  5. Scroll down to configure Color Options for background, text, and buttons.
  6. Save and publish changes. The section will update instantly on the front end.

This section is ideal for introducing your brand story and building trust with visitors.
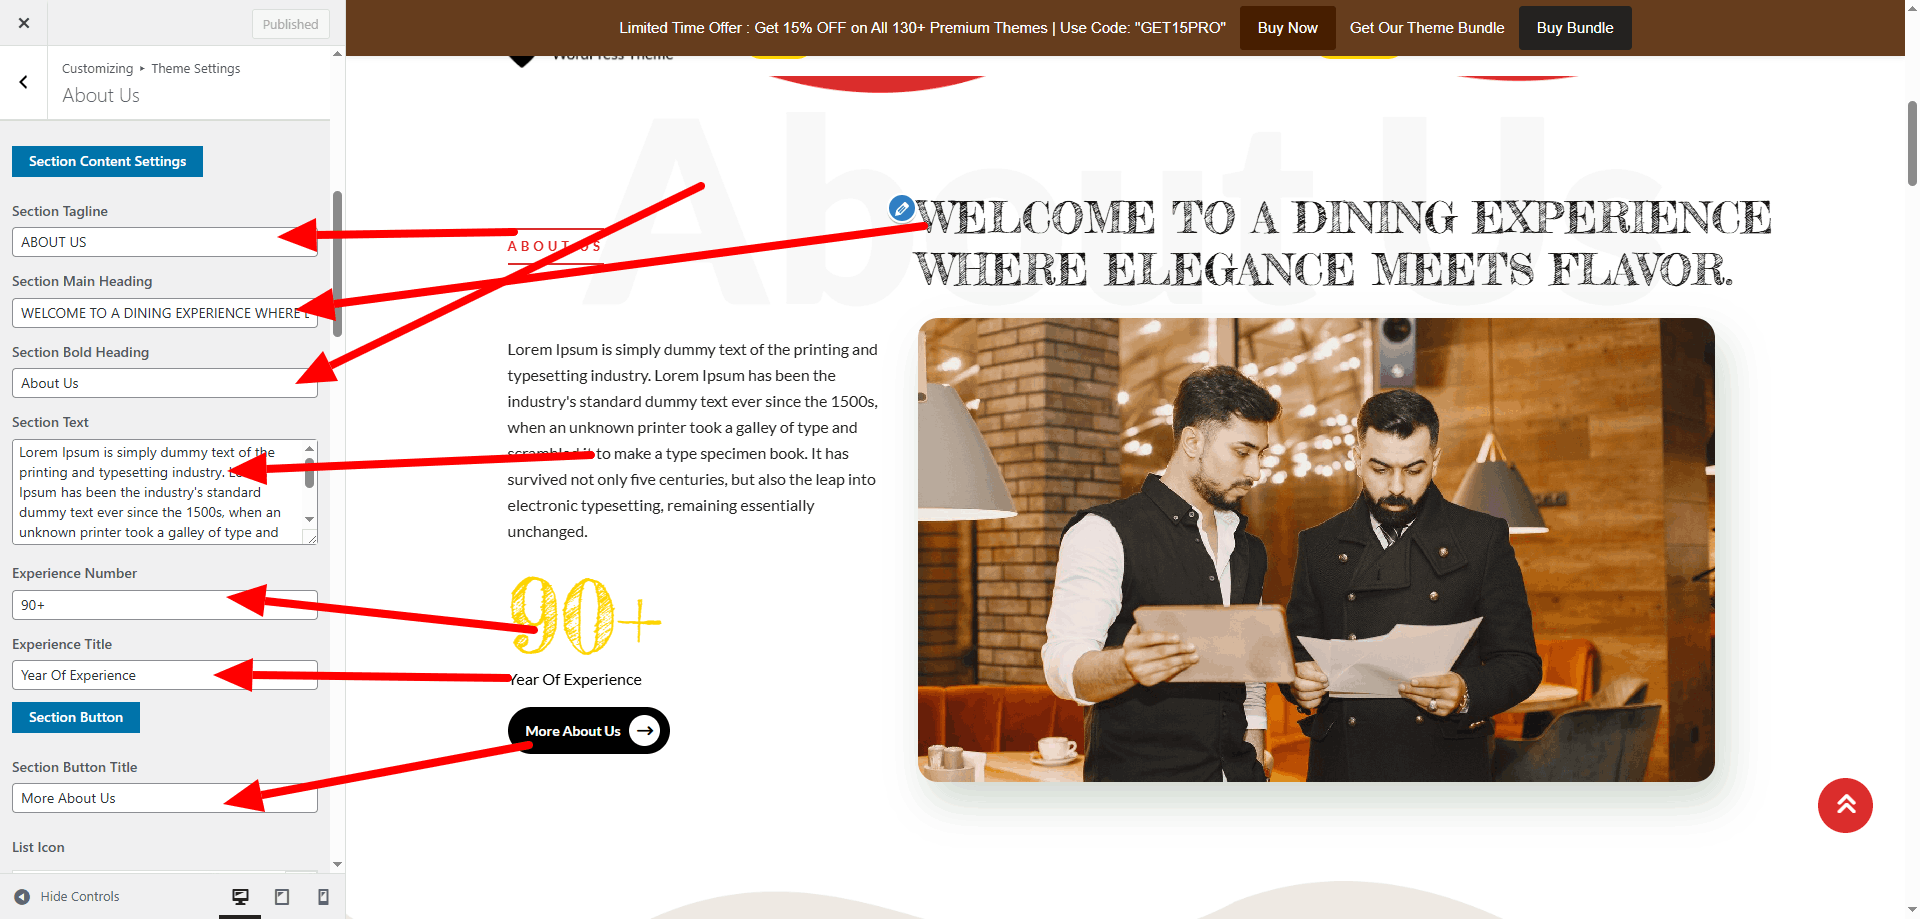
About Us Settings
About Us Display

Configure "Services" Section

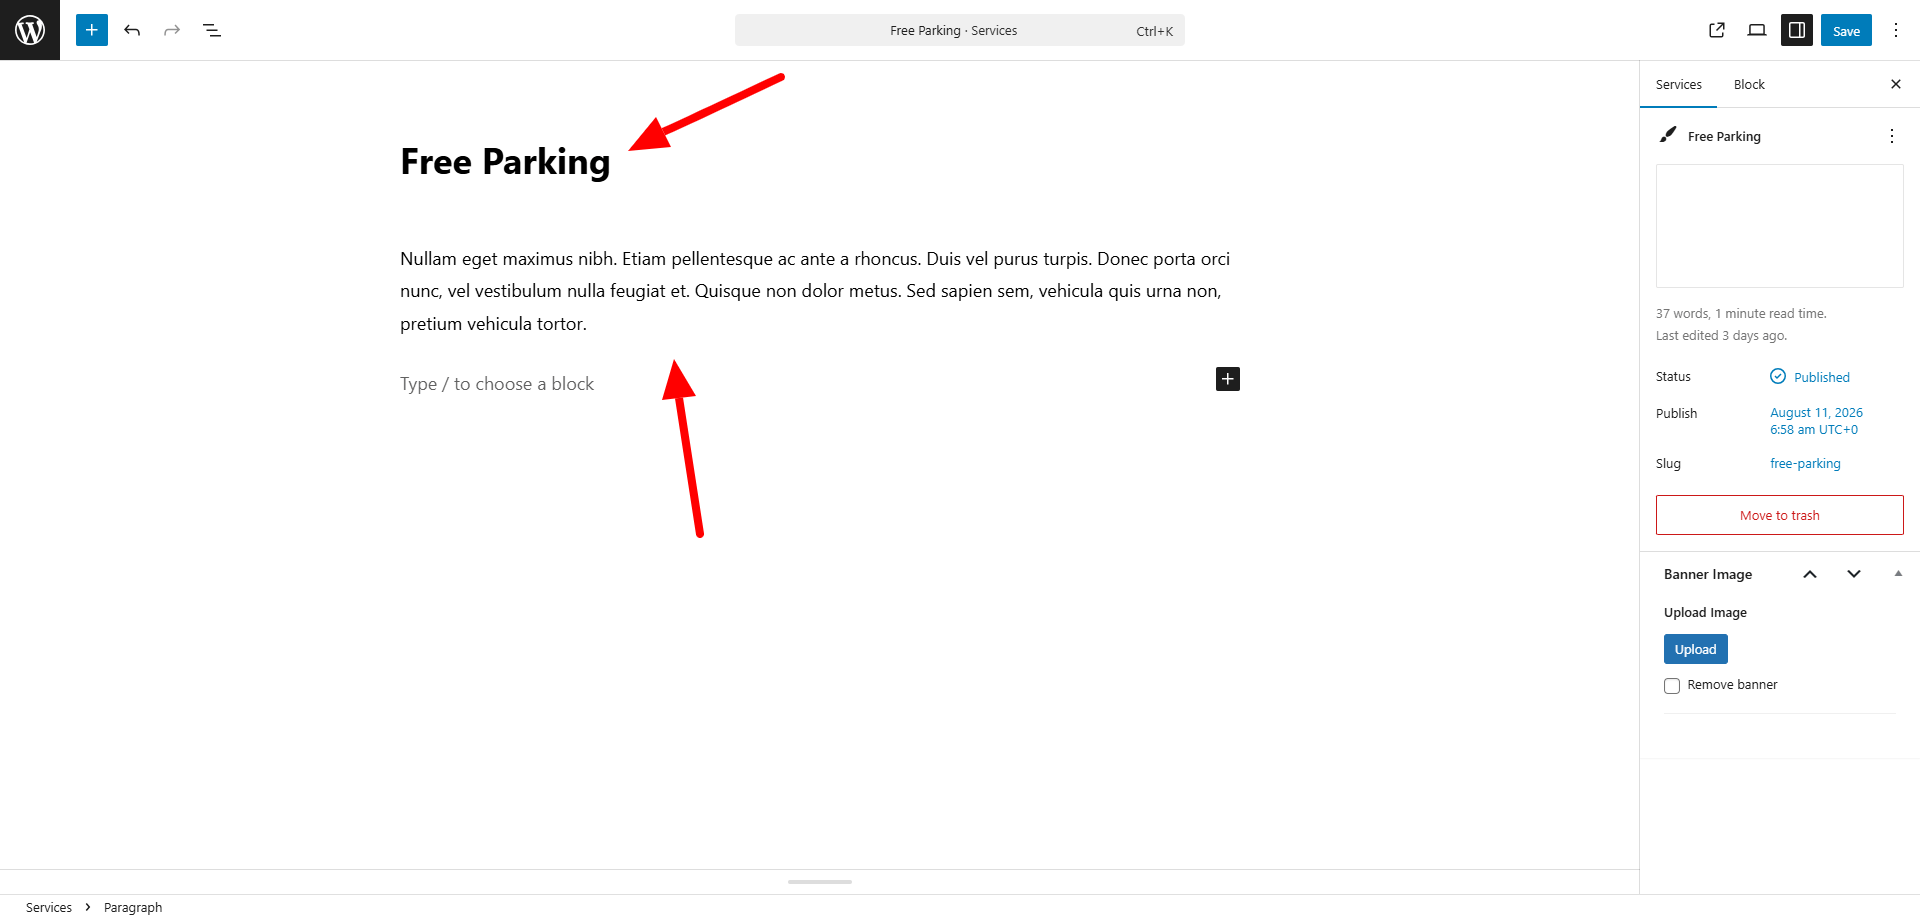
The Services area is driven by a custom post type. Each service entry can include a title, description, and an icon image, all managed through meta fields.

  • Go to Appearance → Customize → Theme Settings → Services.
  • Update the section tagline and heading to match your site’s branding.
  • Adjust the number of service boxes to display. You can increase or decrease them as needed.
  • Navigate to Dashboard → Services to manage individual service posts.
  • Edit the demo service posts provided, or click Add New to create your own.
  • Fill in the Service Title and Content area with details about the service.
  • Publish the service post. Repeat for each service you want to showcase.

Once saved, the Services section will automatically pull content from the custom post type. The icon image and short text are displayed from the meta fields, ensuring a consistent layout across all service boxes.
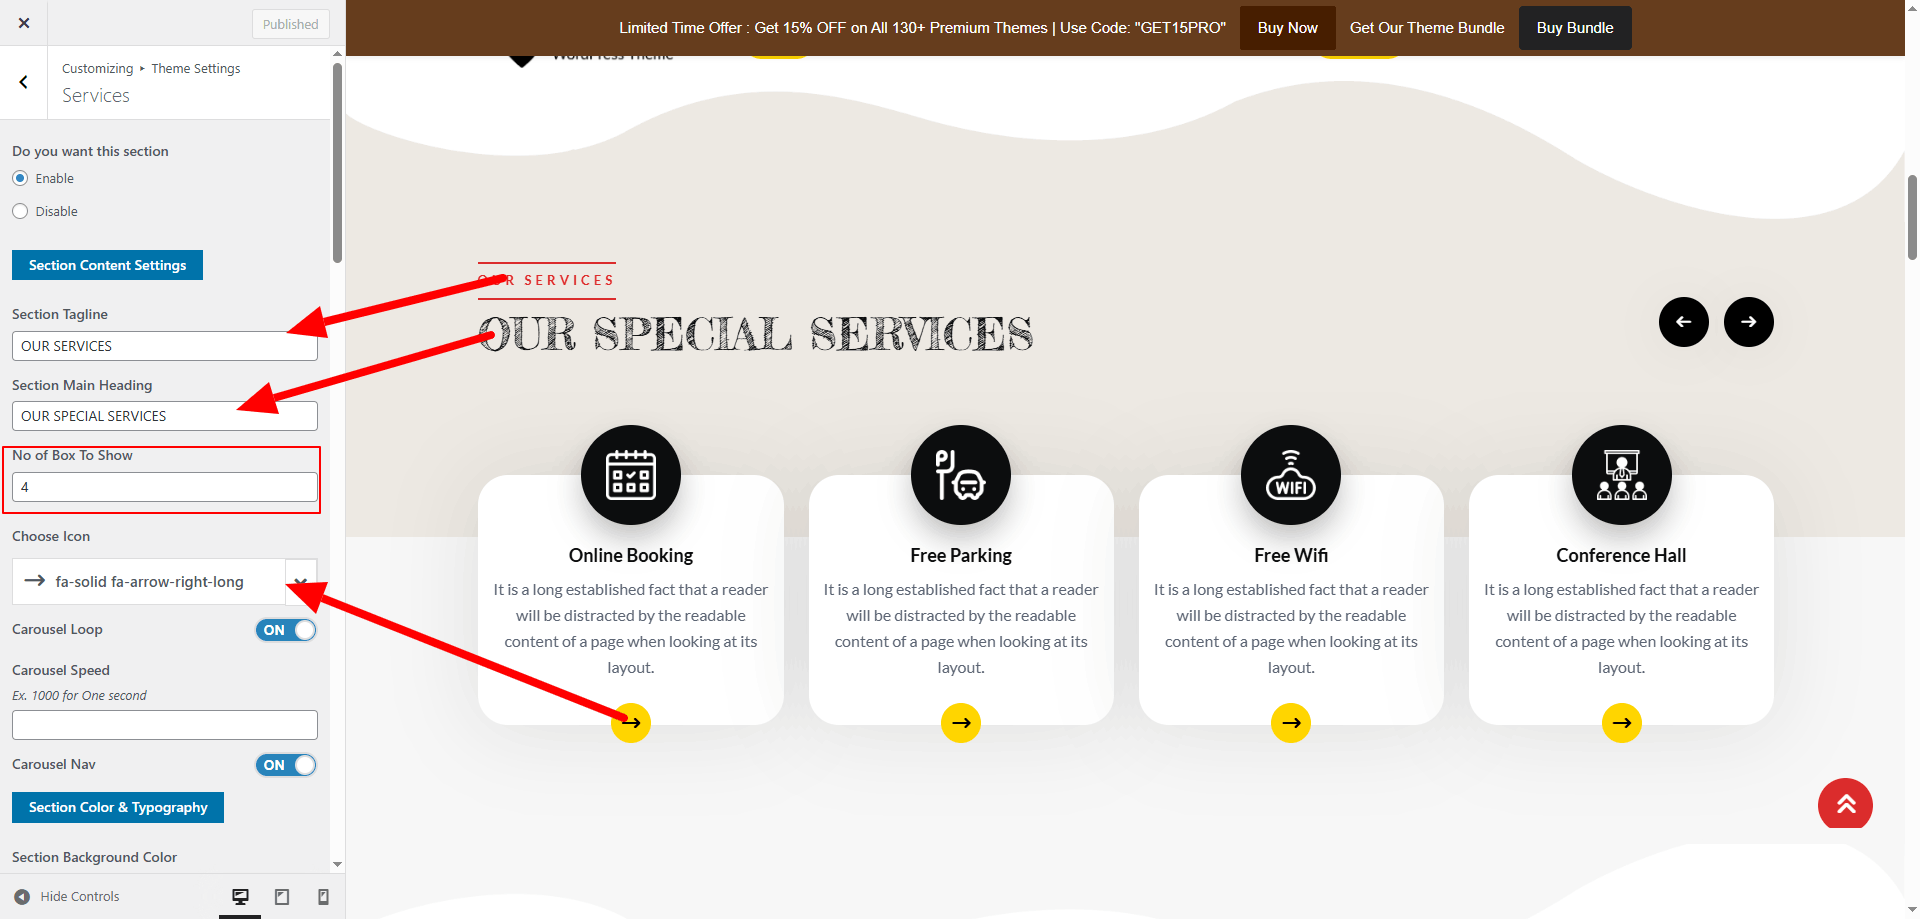
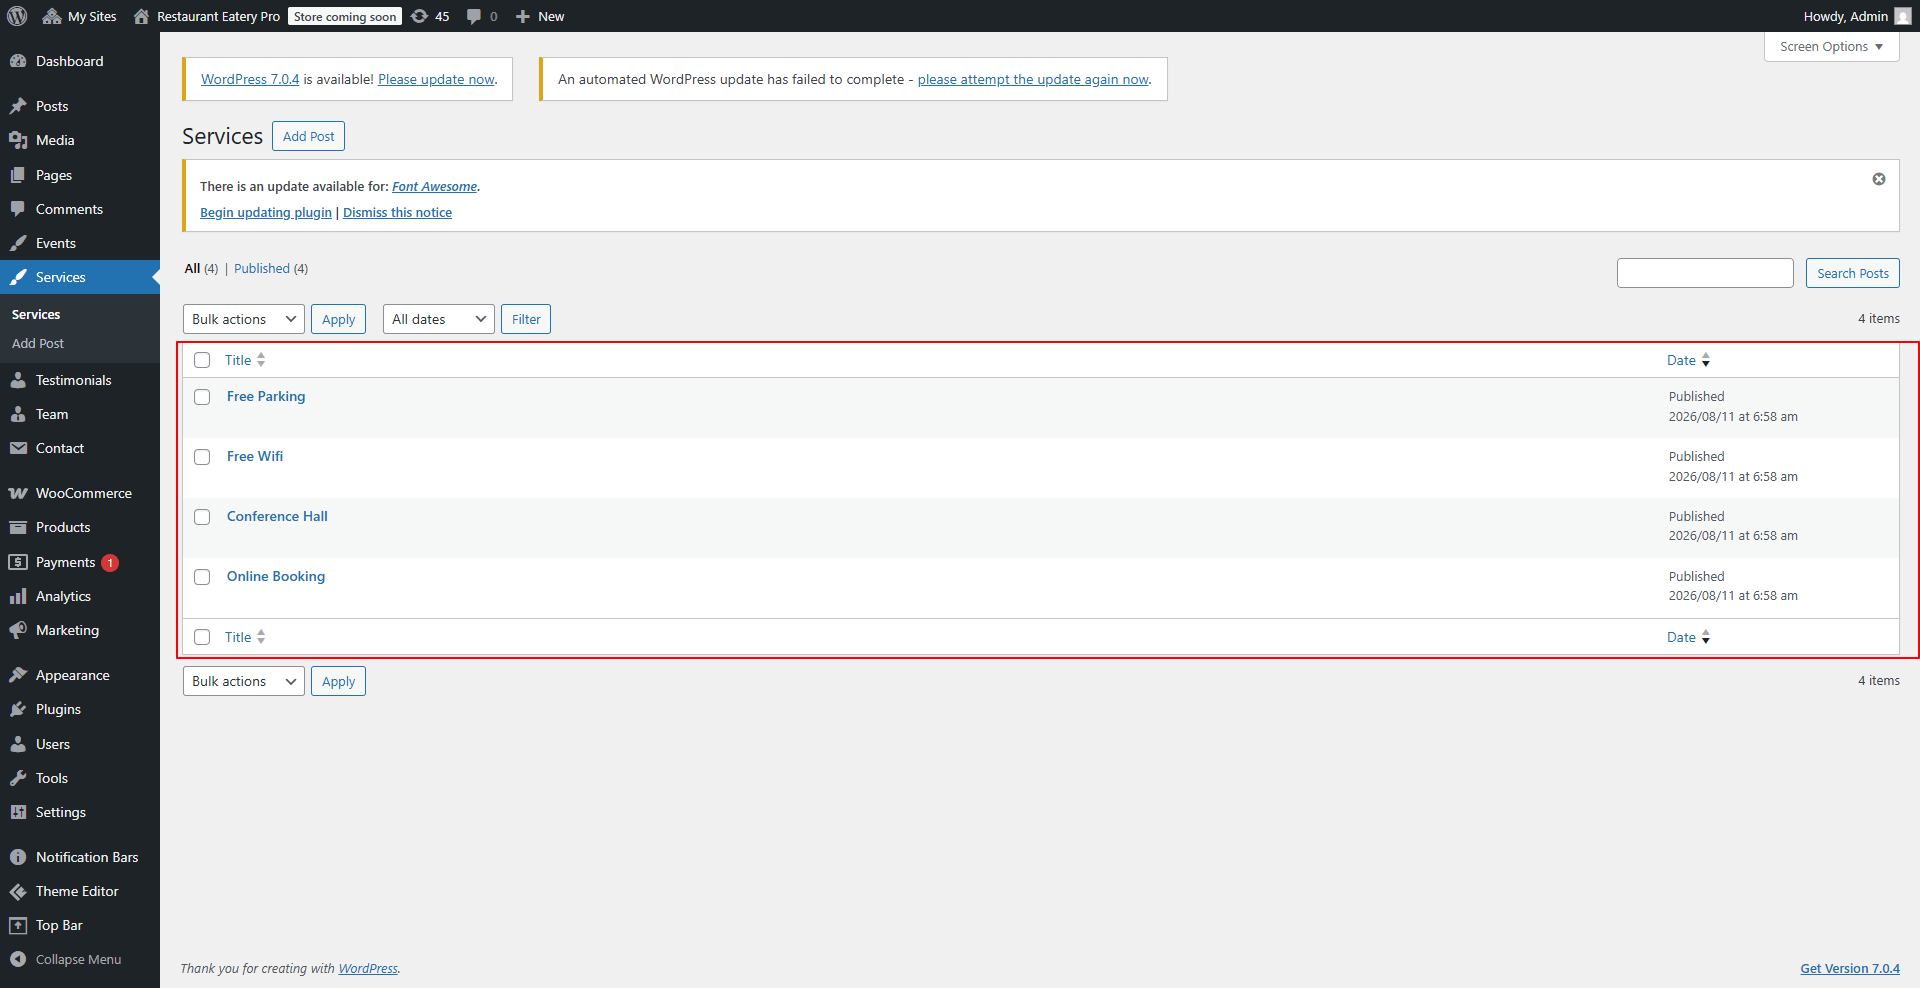
Services Settings

Services Post Editor

Services Display

Configure "Product Categories"

The Product Categories section allows you to organize items and display them in a structured layout. Follow these steps to set it up:

  • Go to Appearance → Customize → Theme Settings → Product Categories.
  • Update the section heading and tagline to match your store’s branding.
  • Replace placeholder text and images with your own category details.
  • Adjust the number of category boxes shown on the front end. You can increase or decrease them as needed.
  • For backend setup, navigate to WooCommerce → Products → Categories.
  • Click Add New Category to create categories. Enter the Name, optional Slug, and choose a Parent Category if required.
  • Upload a Thumbnail Image for each category to display in the shop layout.
  • Assign products to categories under Products → All Products by editing each product and selecting the relevant category.

Once configured, the Product Categories section will automatically pull data from WooCommerce. You can further customize the layout, order, and colors in the Customizer.
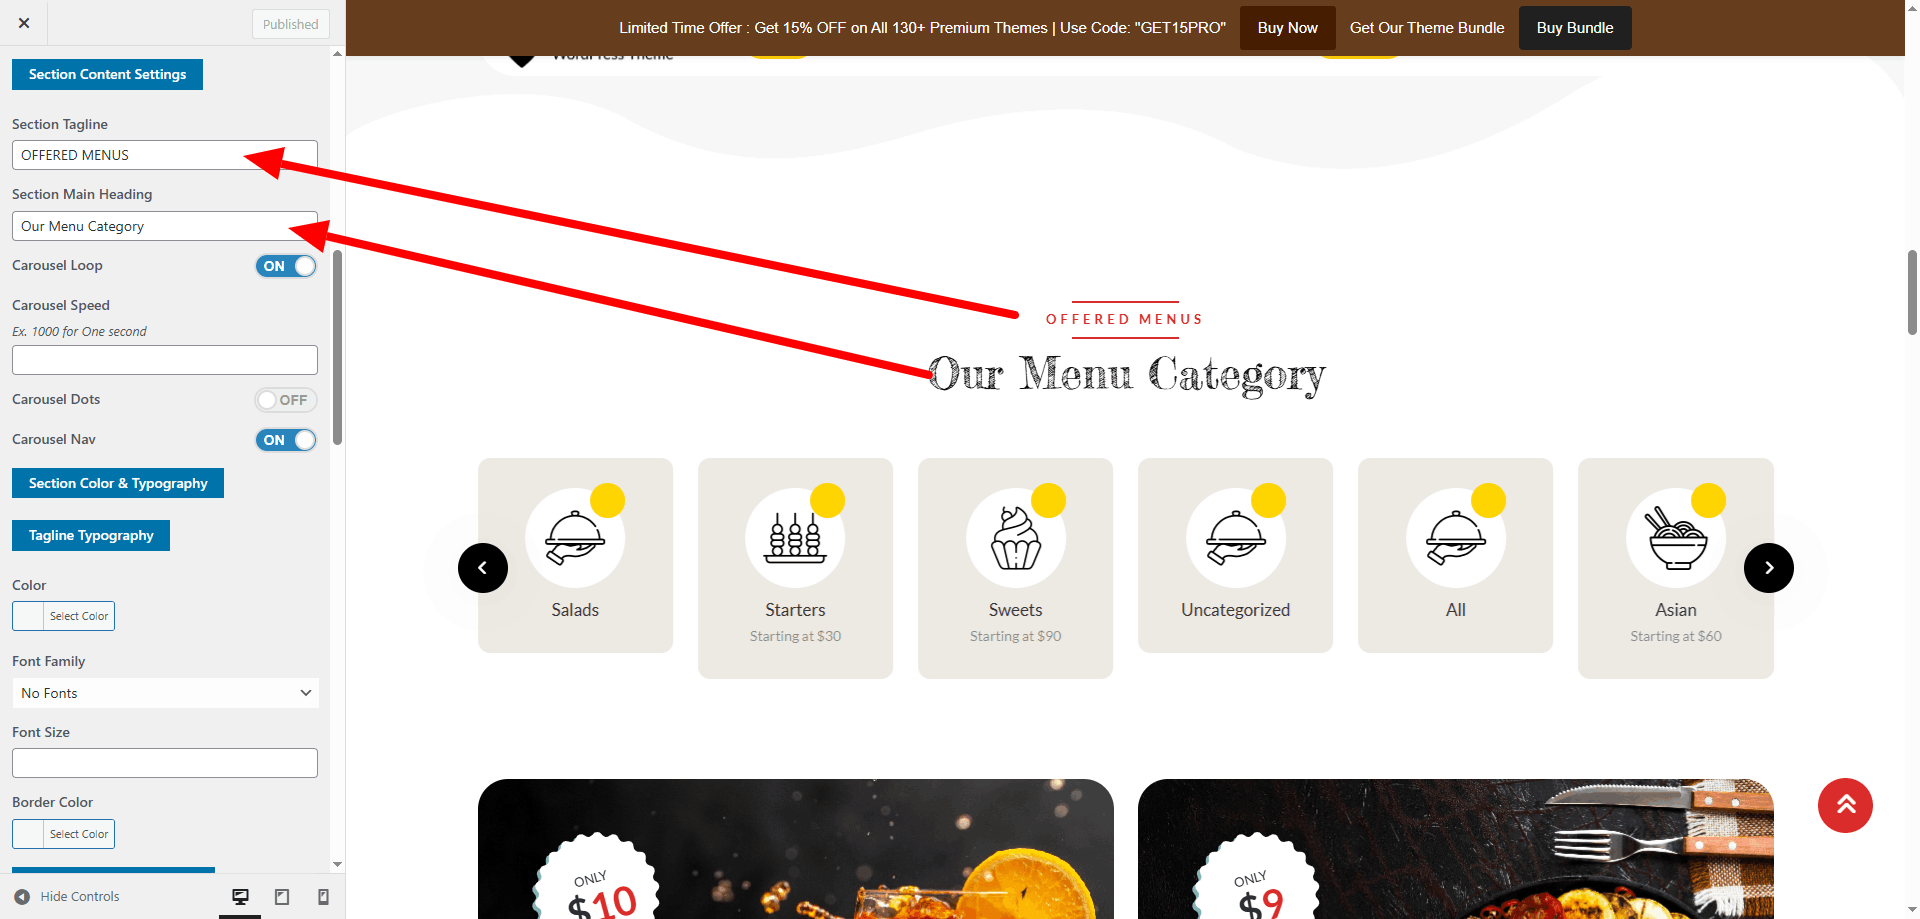
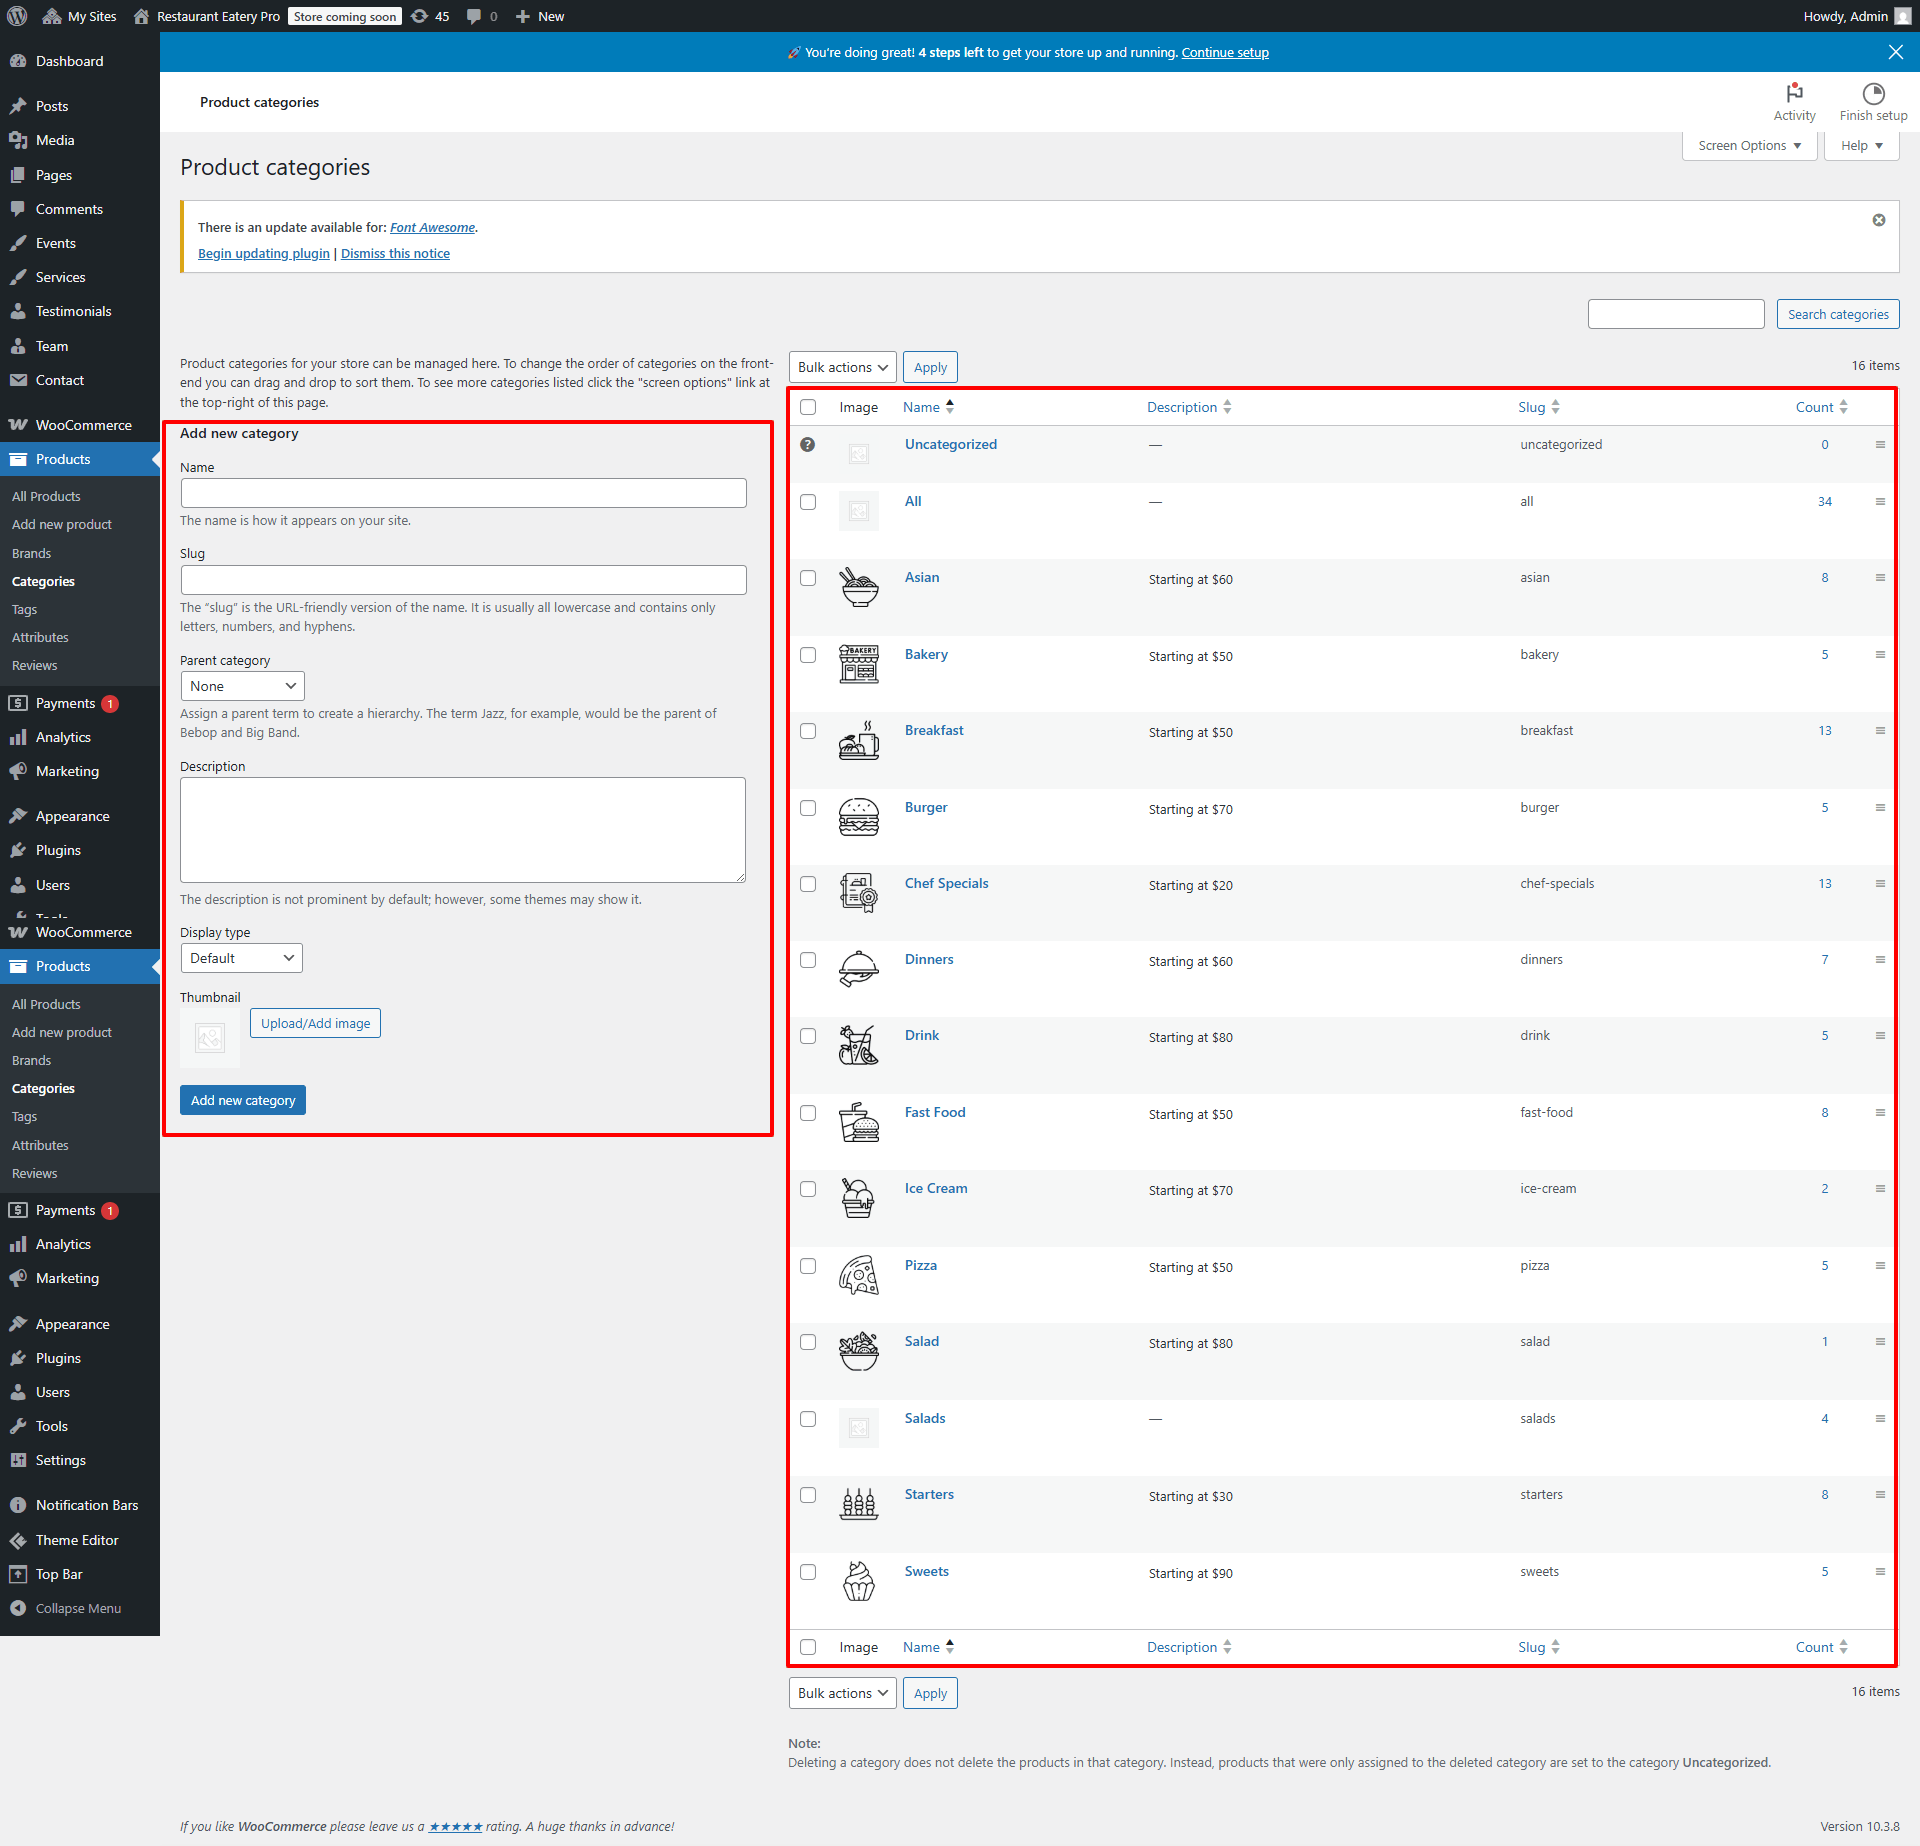
Product Categories Settings
Product Categories Display

Scroll to the bottom of the Customizer panel to access all color and style options for this section.

Configure "Promotional Banner"

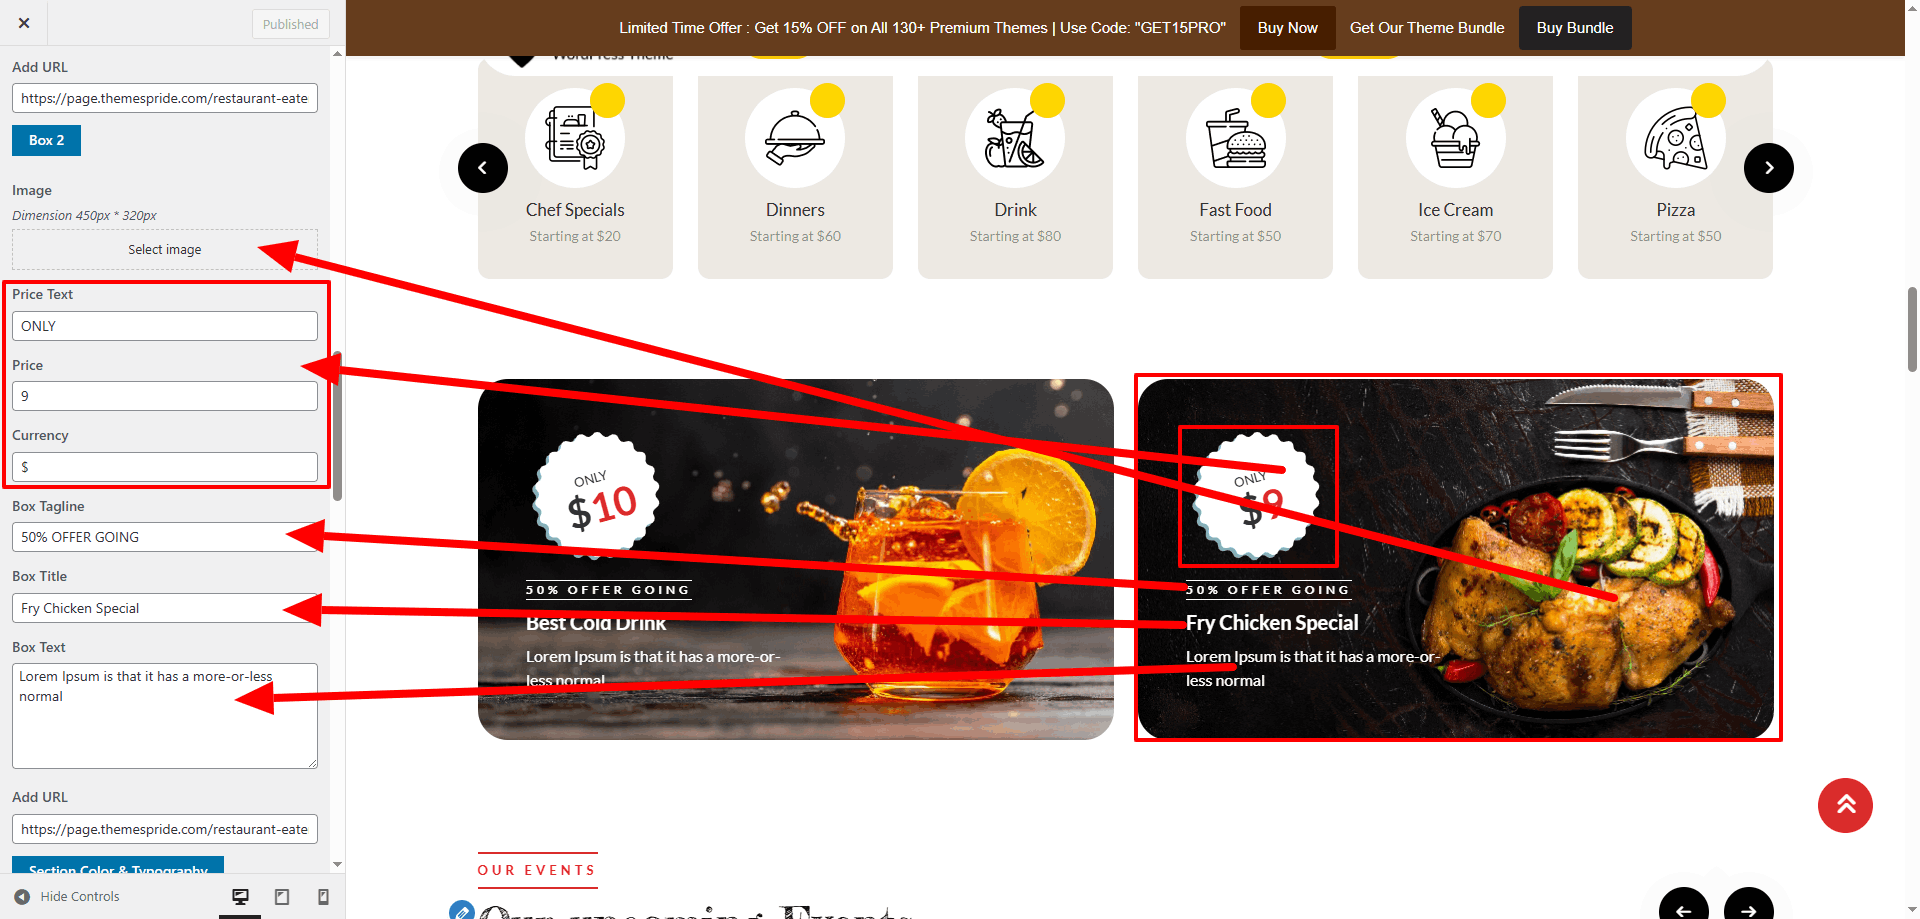
The Promotional Banner section is fully managed through the Customizer. All headings, text, and placeholder content can be updated directly without editing code.

  • Go to Appearance → Customize → Theme Settings → Promotional Banner.
  • Update the Banner Heading and Tagline fields to match your campaign or store promotion.
  • Replace placeholder images or background visuals with your own banner graphics.
  • Adjust the number of promotional slides or boxes if the theme supports multiple banners.
  • Scroll down to configure Color Options, including background, text, and button colors.
  • Save and publish changes. The banner will update instantly on the front end.

All content in this section is customizable through the Theme Settings panel, ensuring flexibility for seasonal promotions, sales, or announcements.
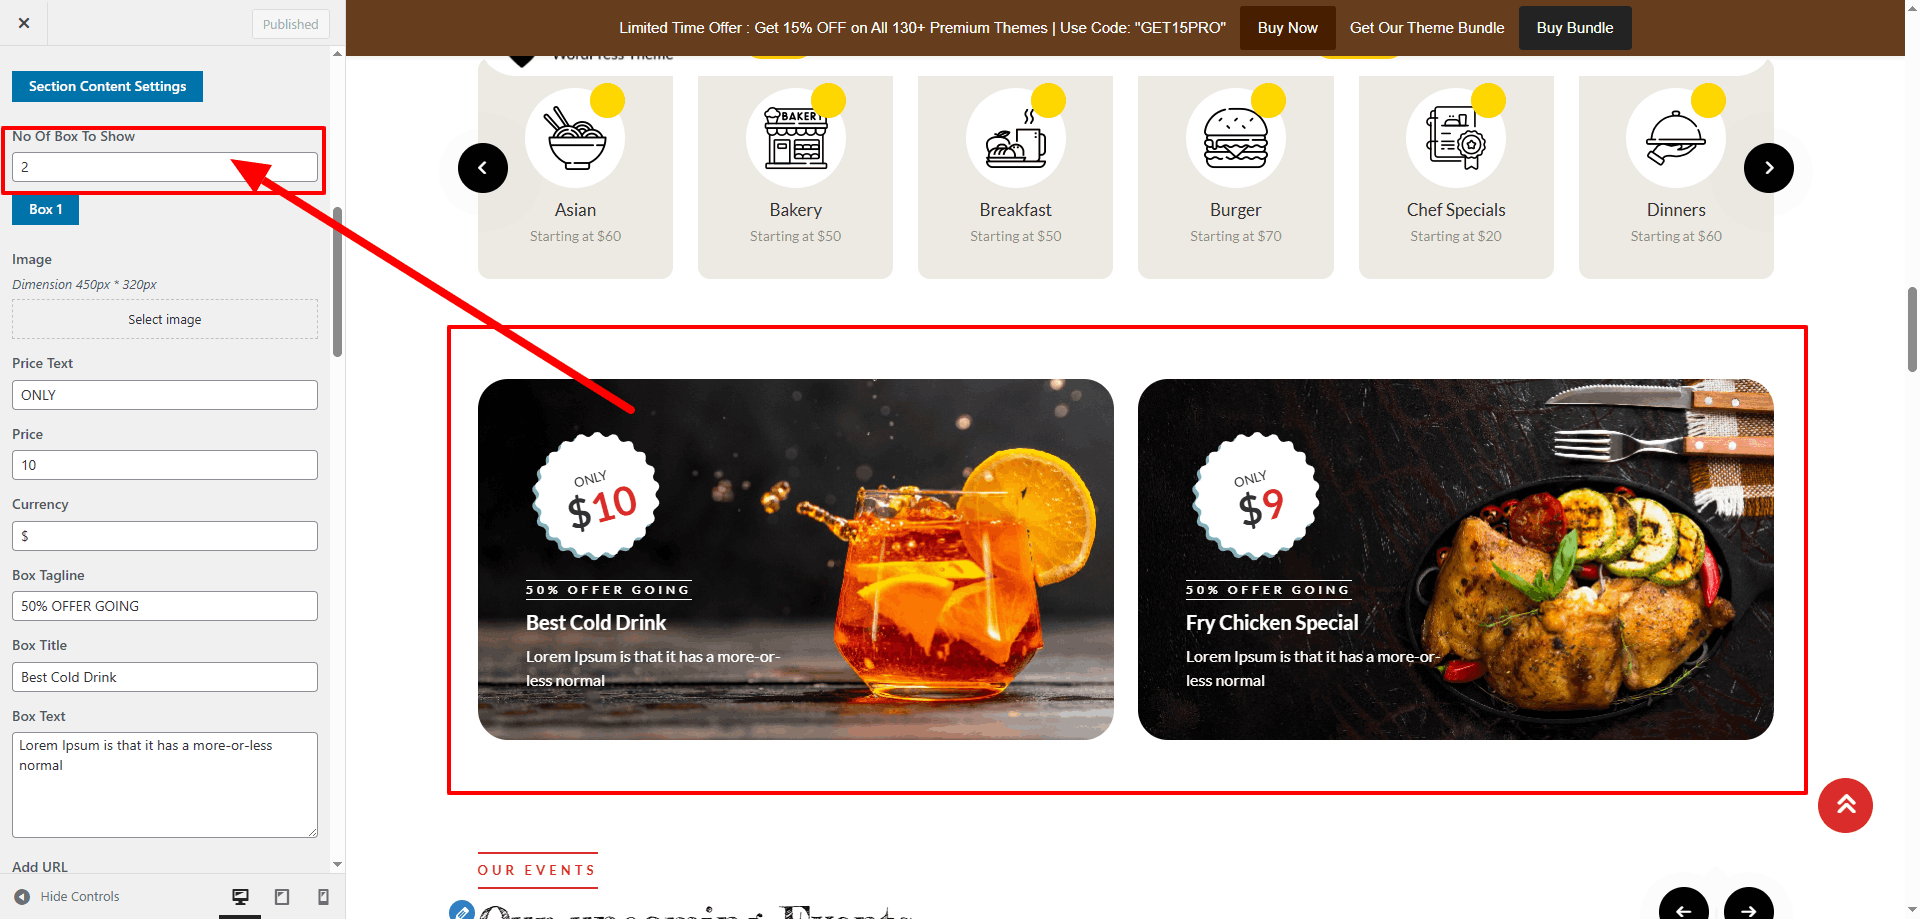
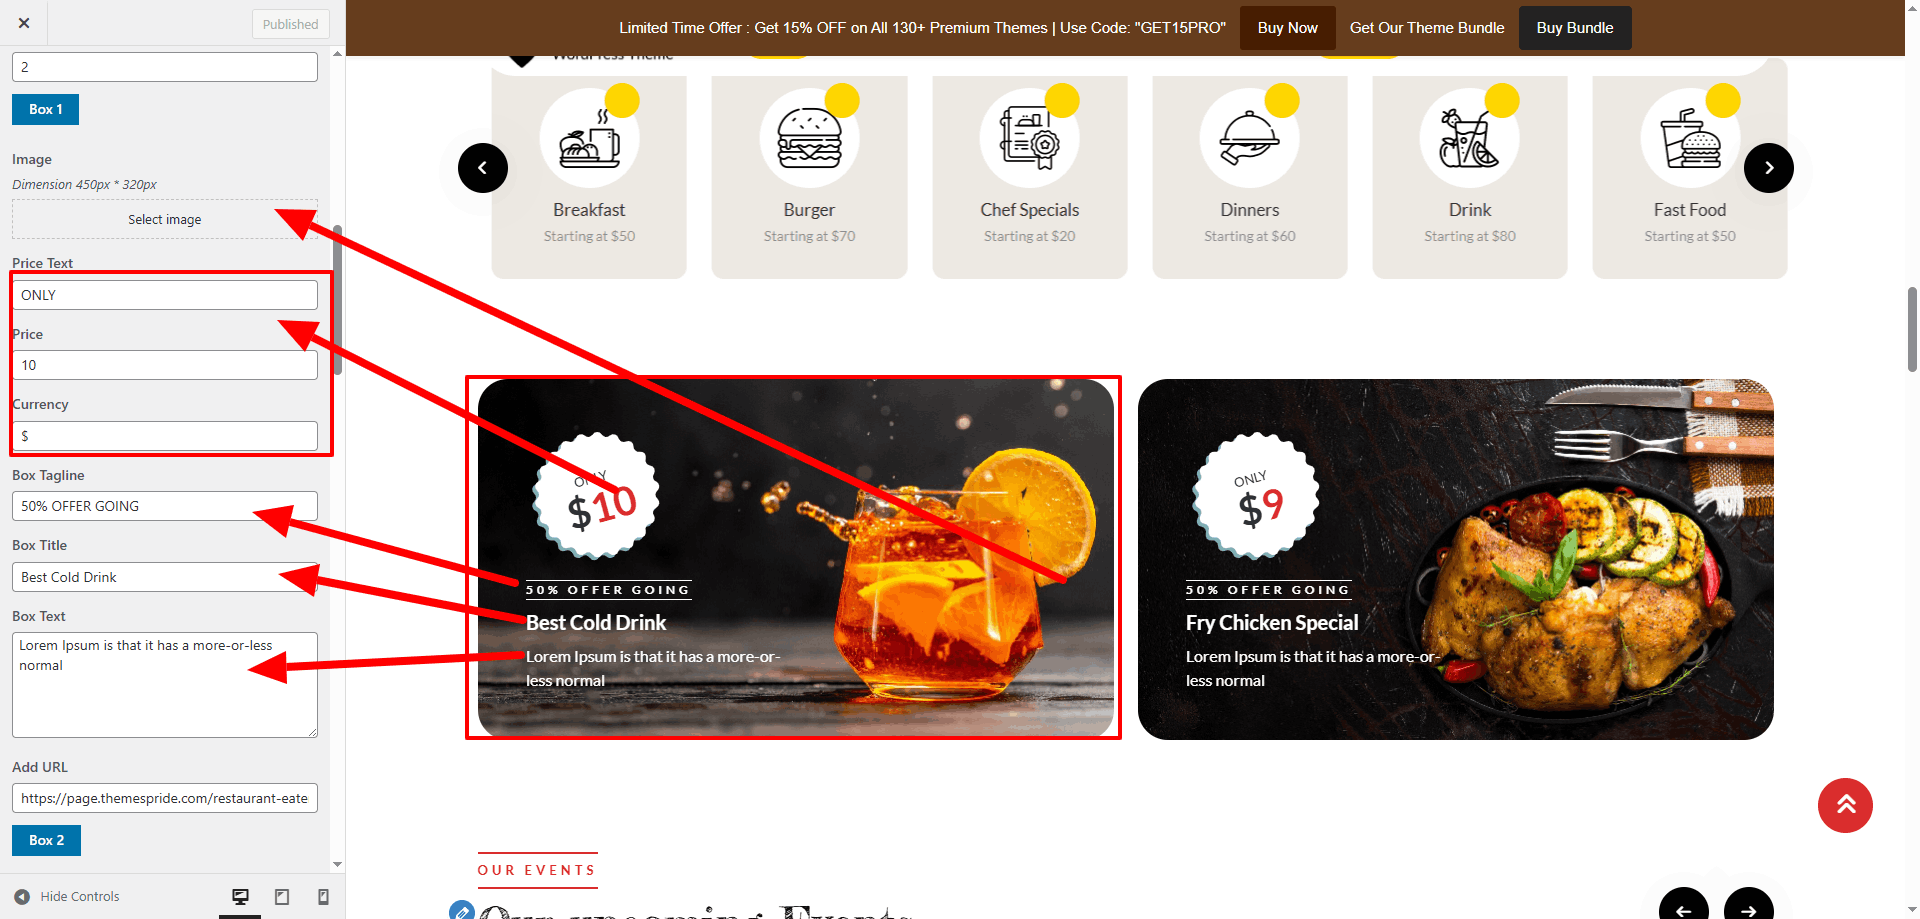
Promotional Banner Settings
Promotional Banner Editor
Promotional Banner Display

Configure "Events" Section

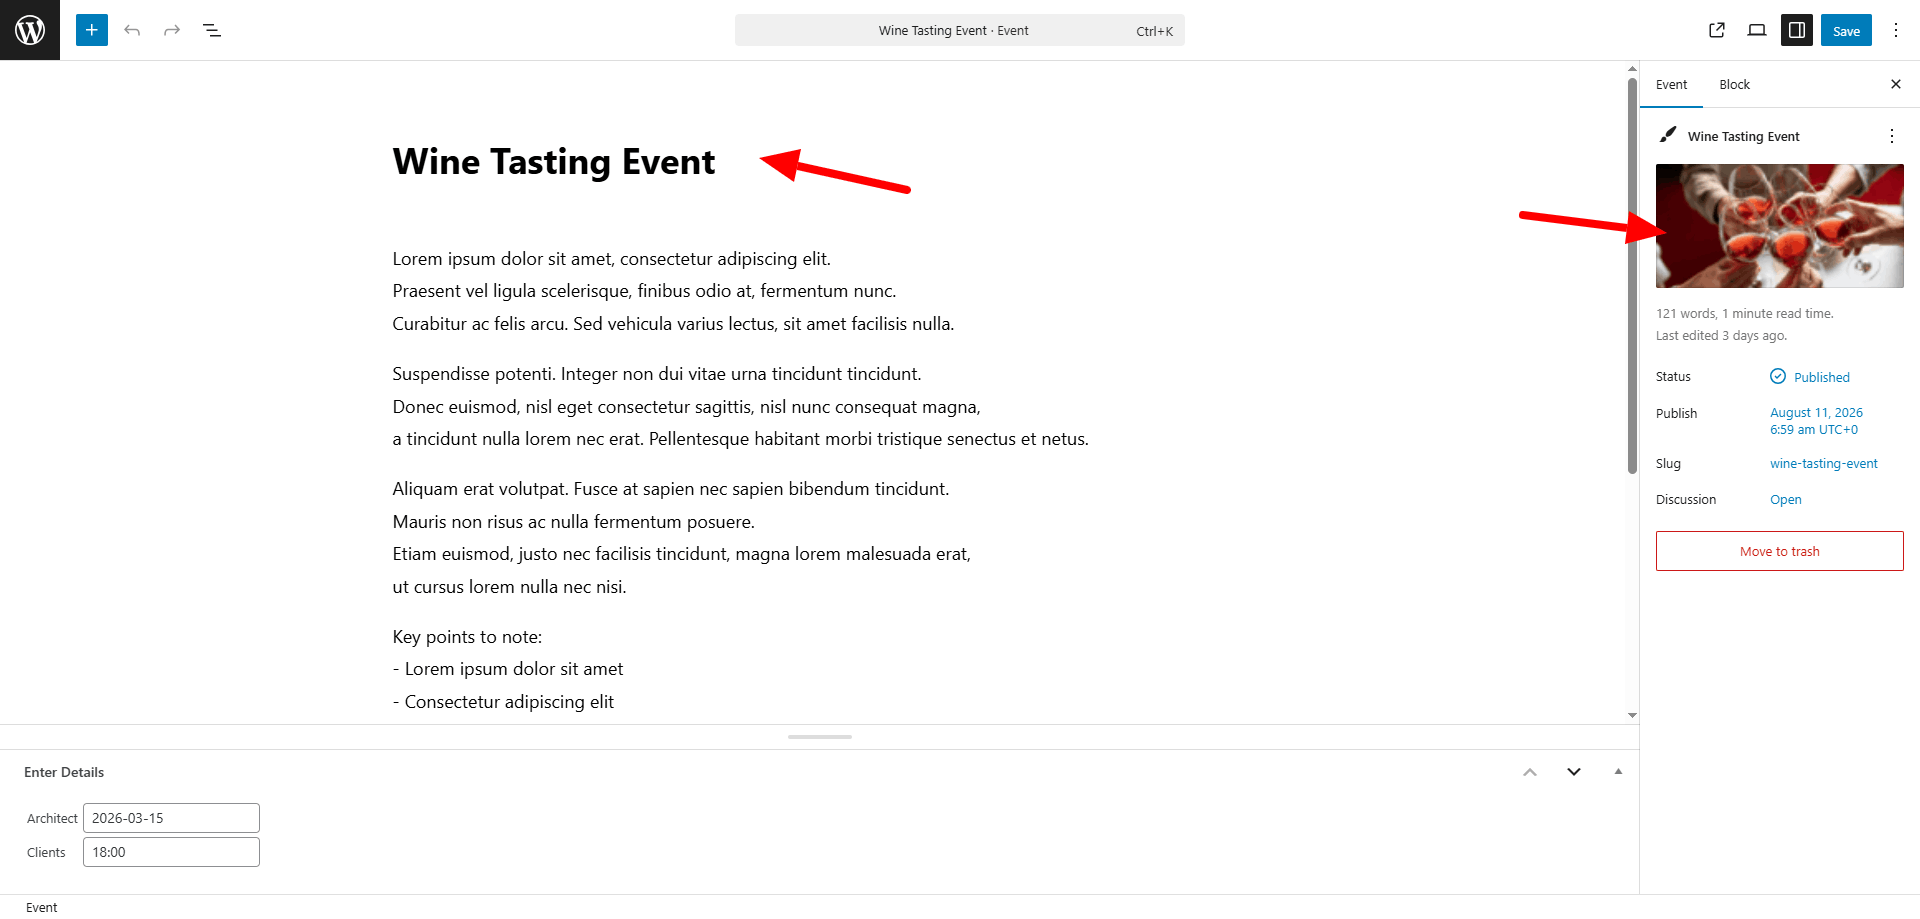
The Events section is driven by a custom post type. Each event entry can include a title, description, date, and featured image, all managed through the WordPress dashboard.

  1. Go to Appearance → Customize → Theme Settings → Events.
  2. Update the section heading and tagline to match your site’s branding.
  3. Adjust placeholder content and layout options directly in the Customizer.
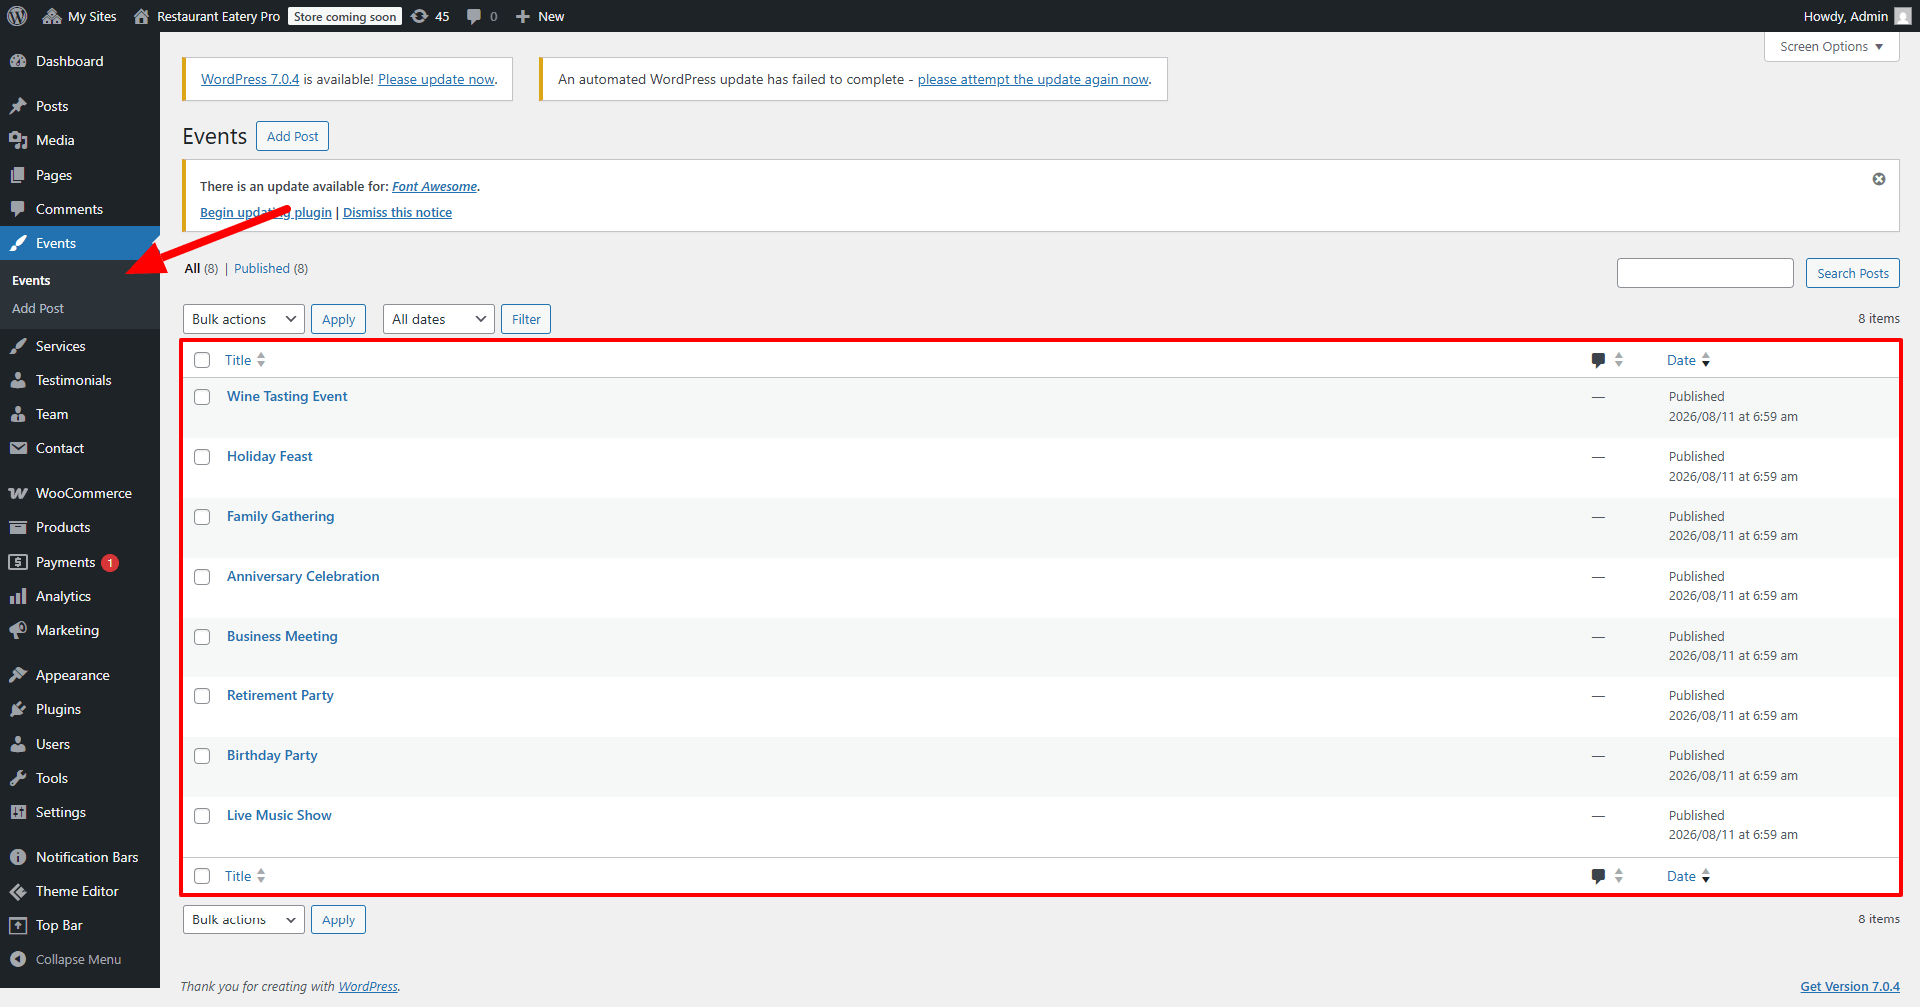
  4. Navigate to Dashboard → Events to manage individual event posts.
  5. Edit the demo event posts provided, or click Add New to create your own.
  6. Fill in the Event Title, Description, and Date/Time fields.
  7. Upload a Featured Image to visually represent the event.
  8. Publish the event post. Repeat for each event you want to showcase.

Once saved, the Events section will automatically pull content from the custom post type. Layout, colors, and styling can be customized further in the Theme Settings panel.
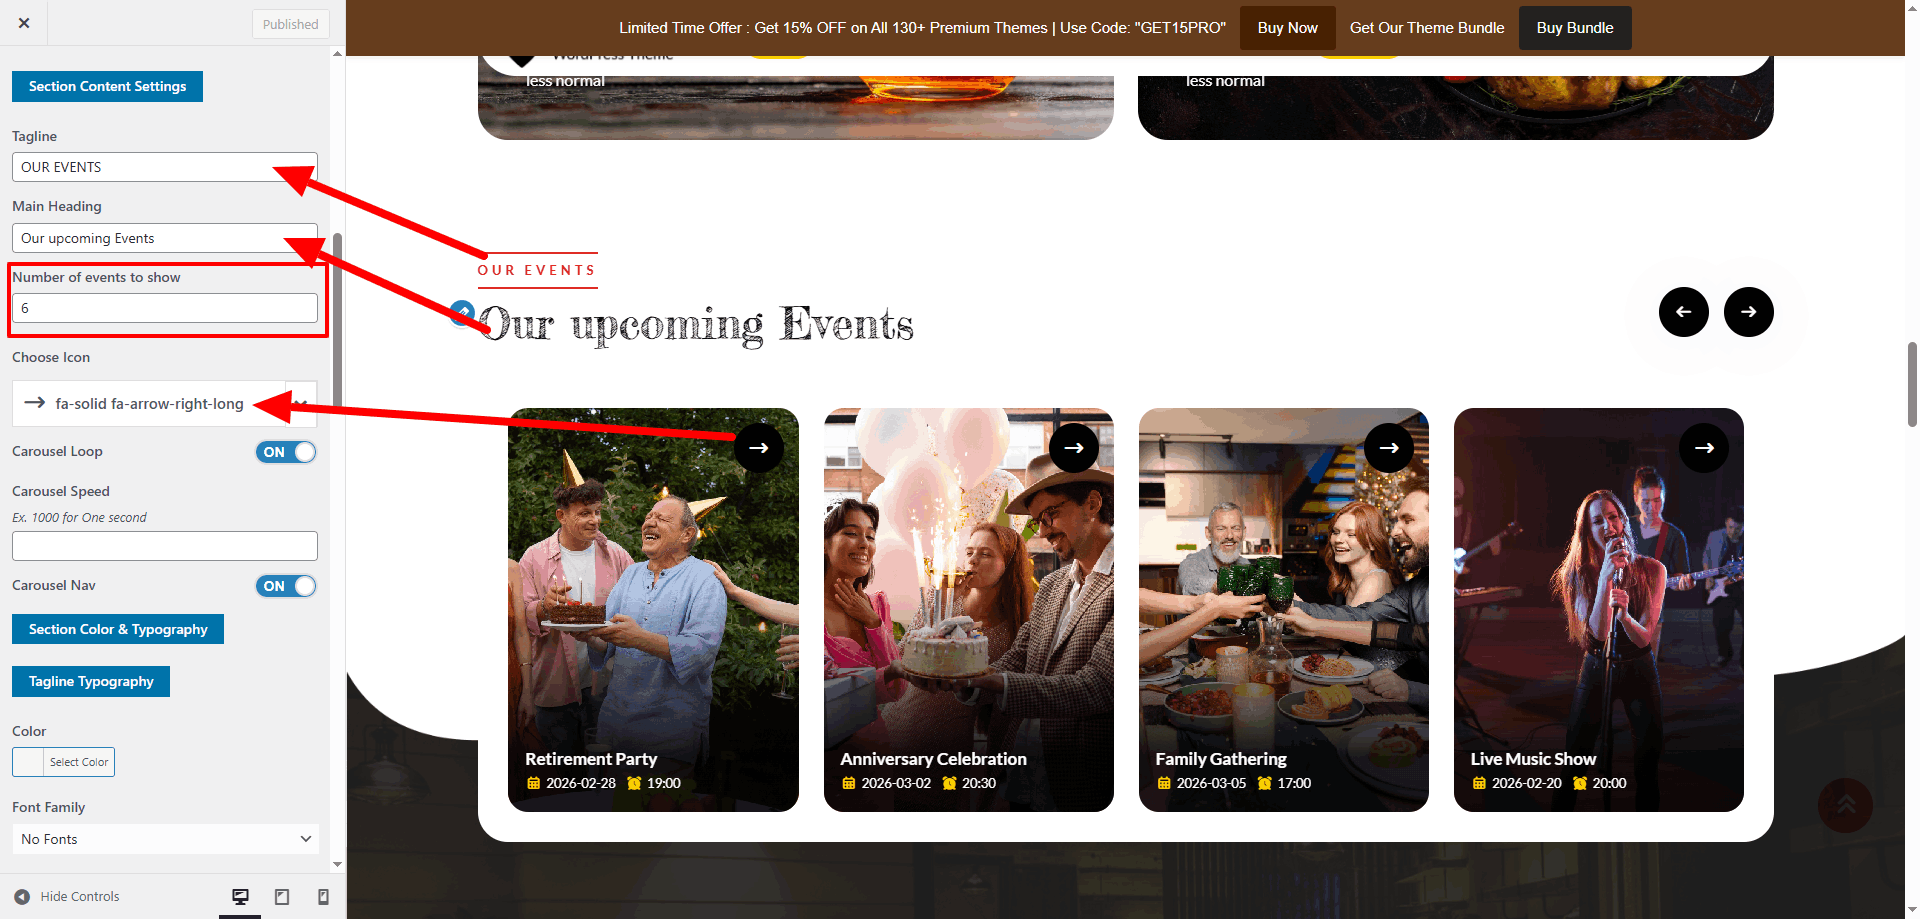
Events Settings
Events Post Editor
Events Display

Scroll to the bottom of the Customizer panel to access all color and style options for this section.

Configure "Reservations" Section

The Reservations section is powered by a Contact Form 7 form. All headings, placeholders, and styling are managed through the Customizer, while the form fields themselves are editable in the Contact Form 7 plugin.

  1. Go to Appearance → Customize → Theme Settings → Reservations.
  2. Update the section heading and tagline to match your site’s branding.
  3. Replace placeholder text with your own reservation instructions.
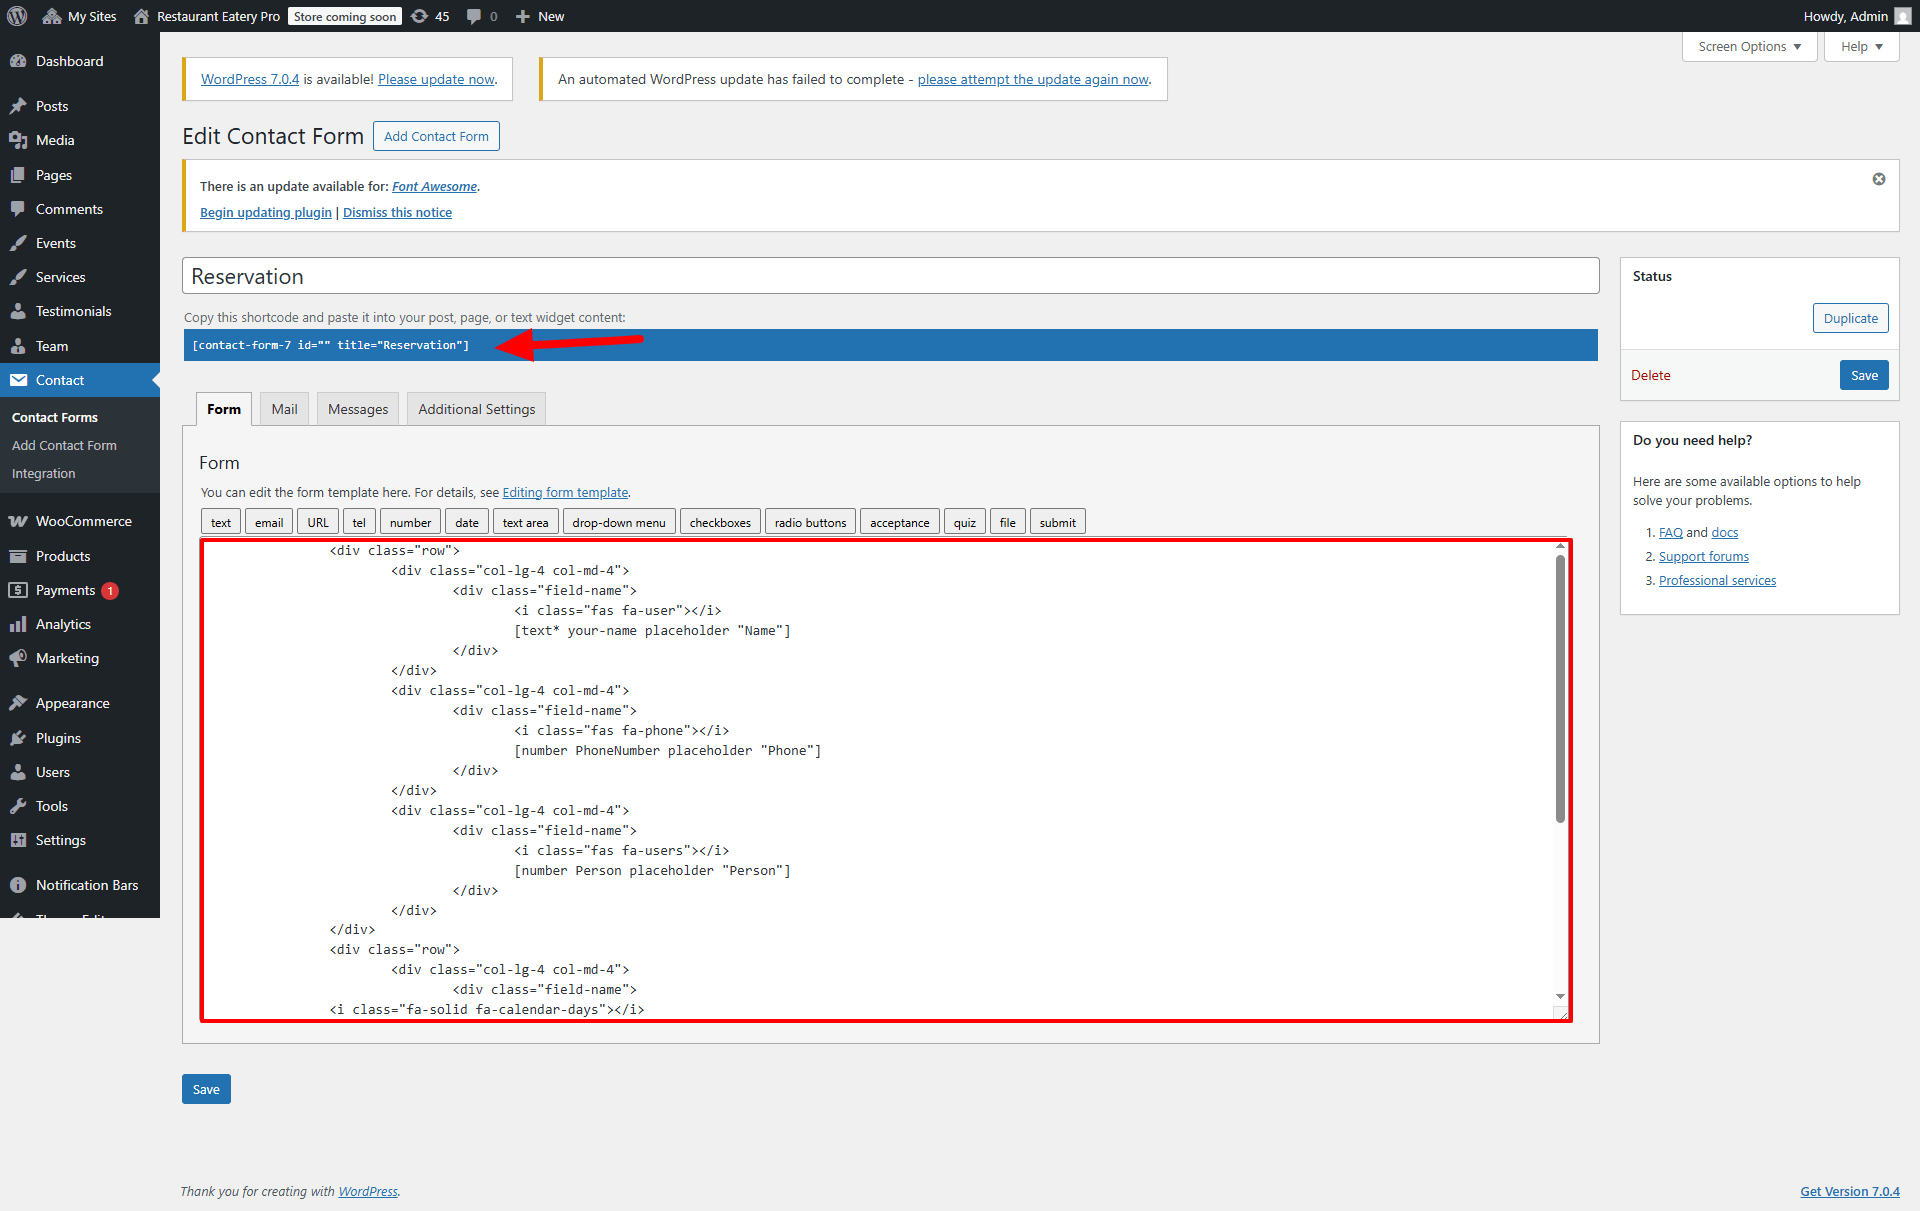
  4. Navigate to Dashboard → Contact → Contact Forms to manage the reservation form.
  5. Edit the demo reservation form provided, or click Add New to create your own.
  6. Use the Contact Form 7 editor to configure fields such as Name, Email, Phone, Date, and Time.
  7. Copy the form’s shortcode and ensure it is linked in the Reservations section via the Customizer.
  8. Scroll down in the Customizer to configure Color Options for background, text, and buttons.
  9. Save and publish changes. The reservation form will update instantly on the front end.

This setup ensures that the Reservations section is fully customizable, while the form logic and fields remain flexible through Contact Form 7.
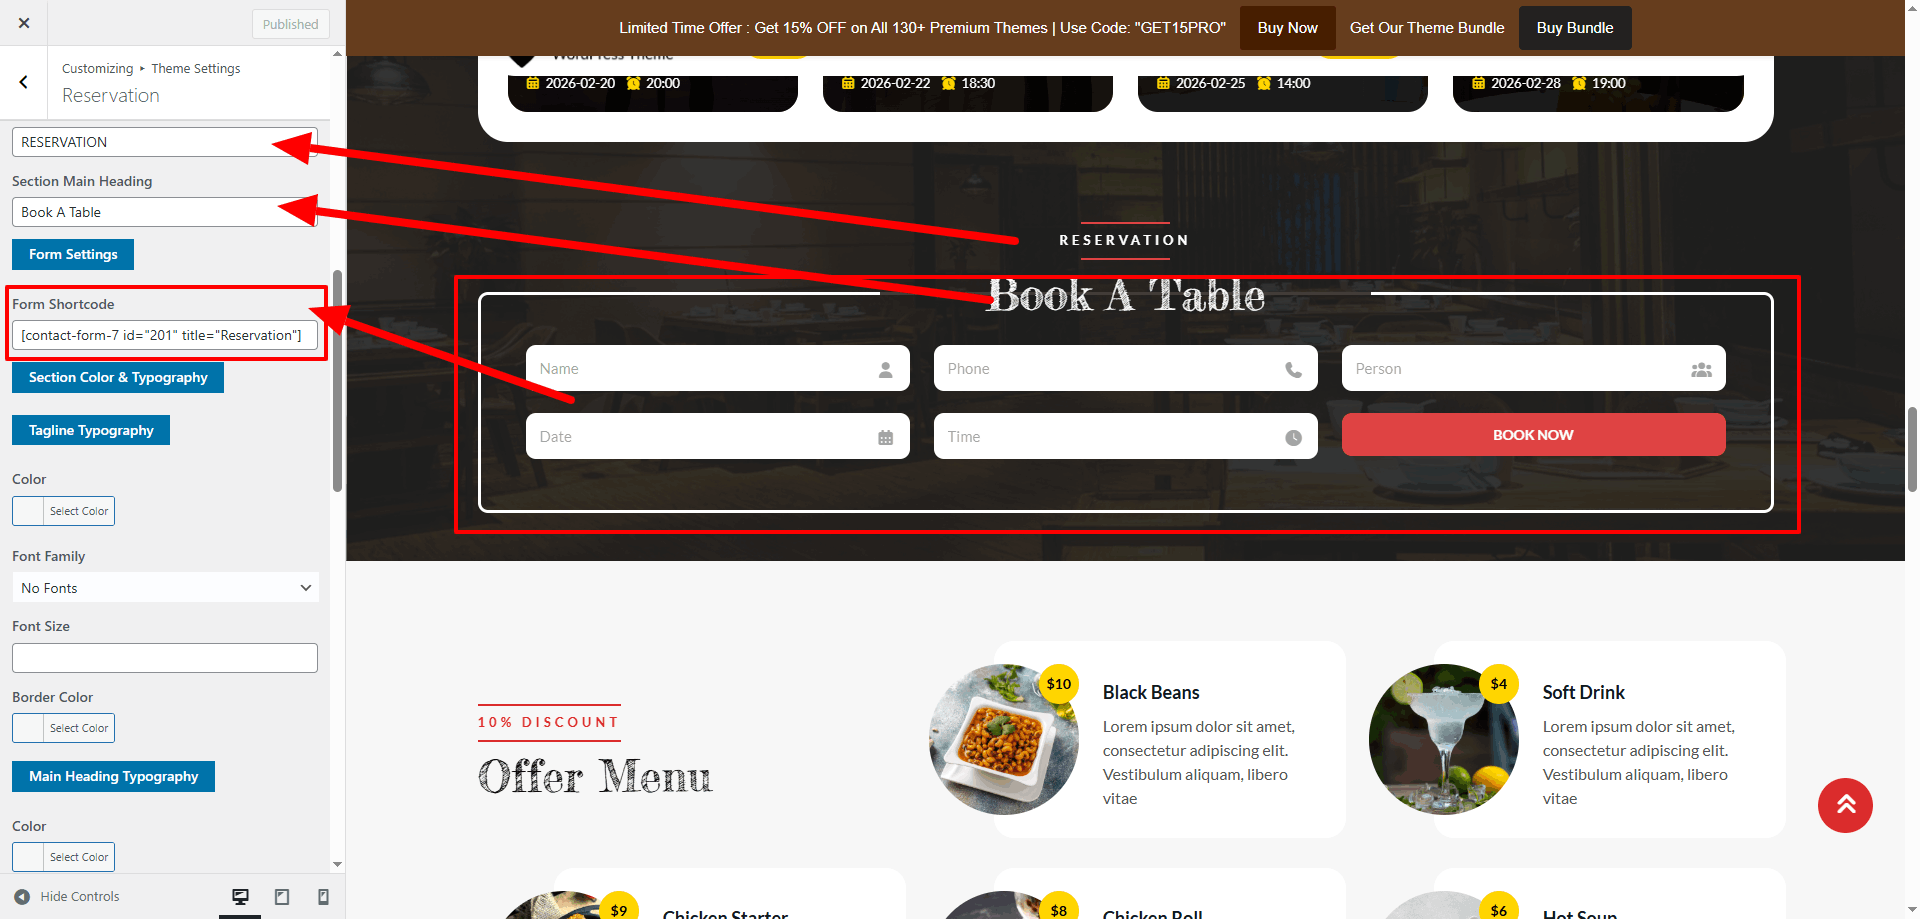
Reservations Settings
Reservation Form Editor

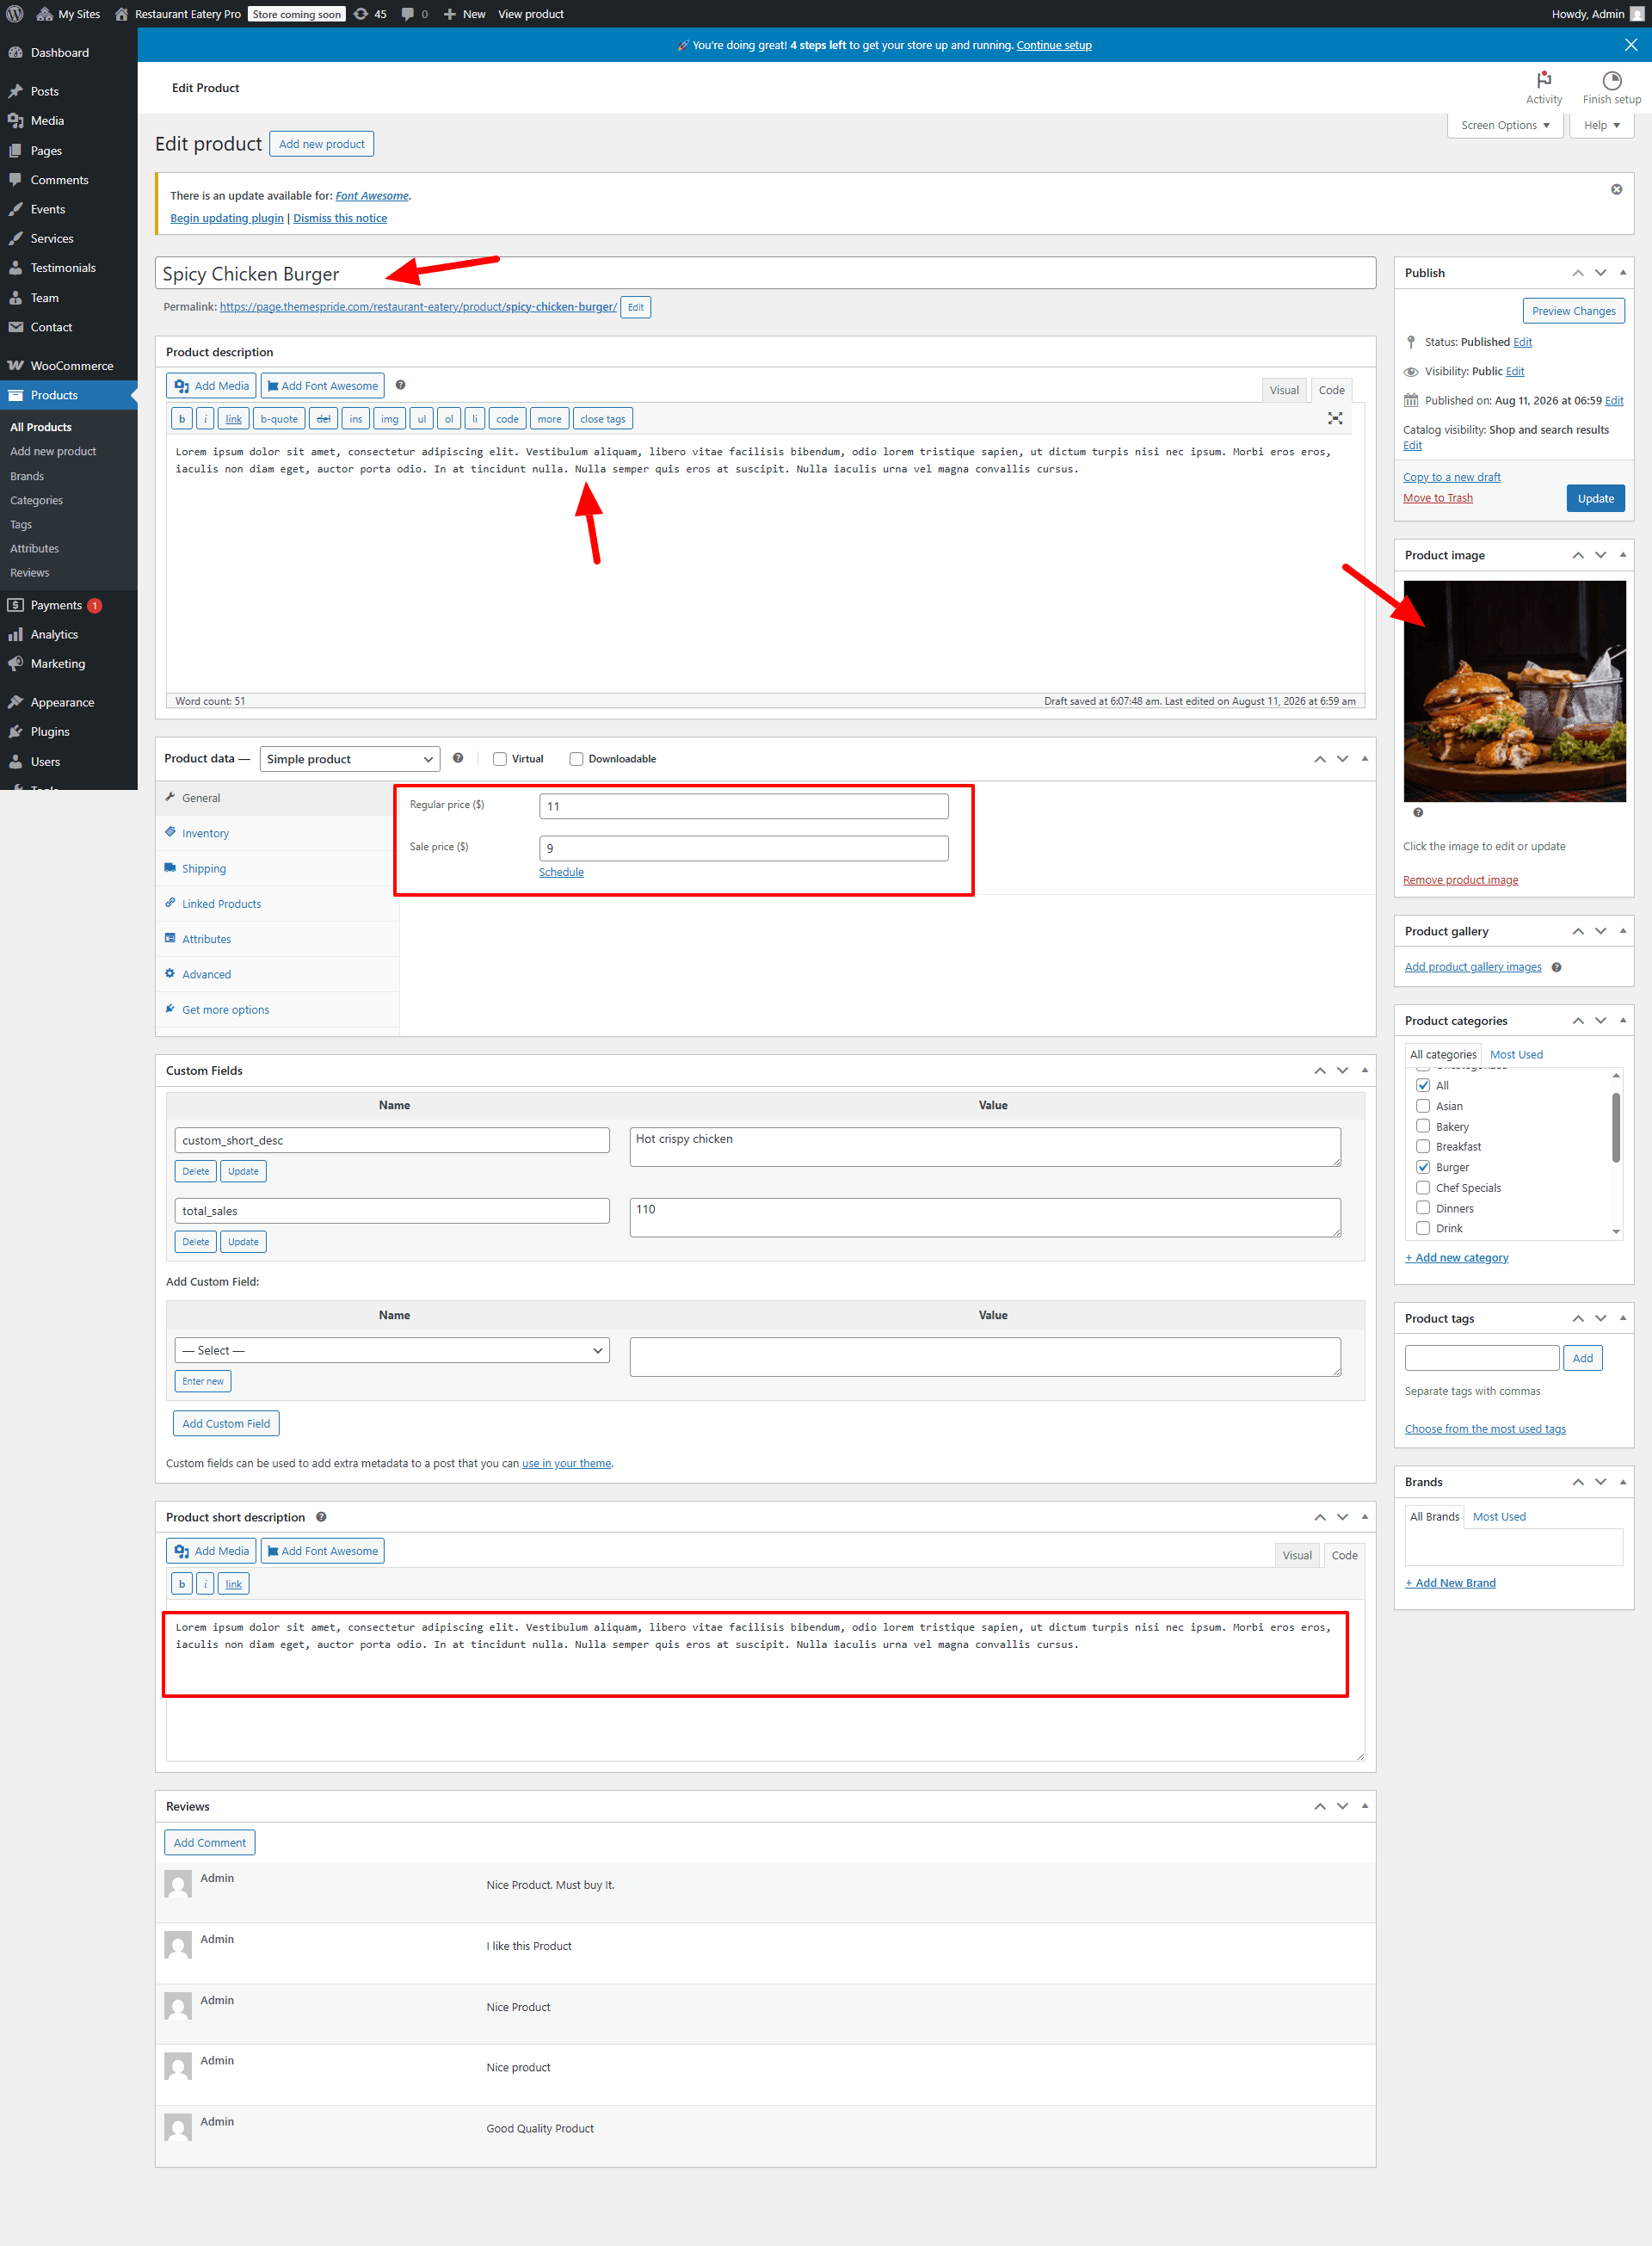
Configure "Offer Menus" Section

The Offer Menus section is driven by WooCommerce products. Each menu item is created as a product in WooCommerce and then displayed in this section. Headings, placeholders, and styling are managed through the Customizer.

  1. Go to Appearance → Customize → Theme Settings → Offer Menus.
  2. Update the section heading and tagline to match your restaurant’s branding.
  3. Replace placeholder text and images with your own menu details.
  4. Navigate to Dashboard → Products → Add New to create menu items.
  5. Enter the Product Name (e.g., “Grilled Chicken Special”) and add a description.
  6. Set the Regular Price and optionally a Sale Price to highlight offers.
  7. Upload a Product Image to visually represent the dish.
  8. Assign products to categories (e.g., “Starters”, “Main Course”, “Desserts”) for better organization.
  9. Publish the product. Repeat for each menu item you want to showcase.
  10. Scroll down in the Customizer to configure Color Options for background, text, and buttons.

Once saved, the Offer Menus section will automatically pull products from WooCommerce, displaying them with prices and images. This makes it easy to highlight special offers or seasonal dishes.
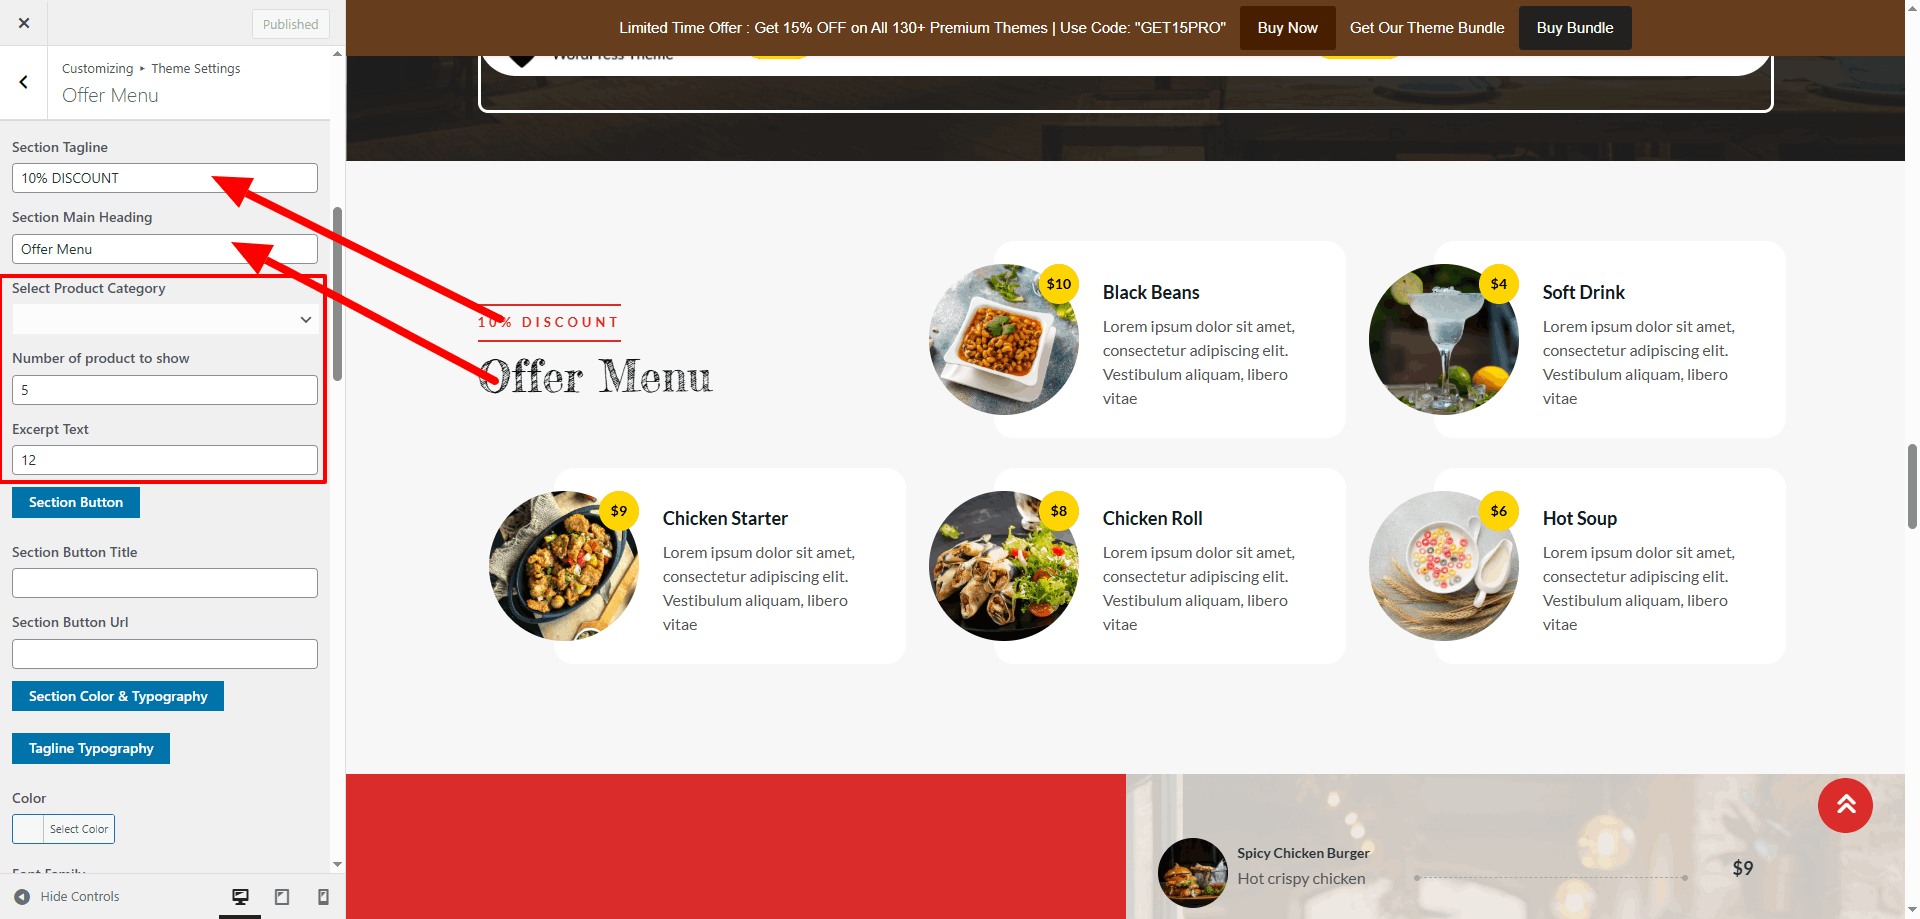
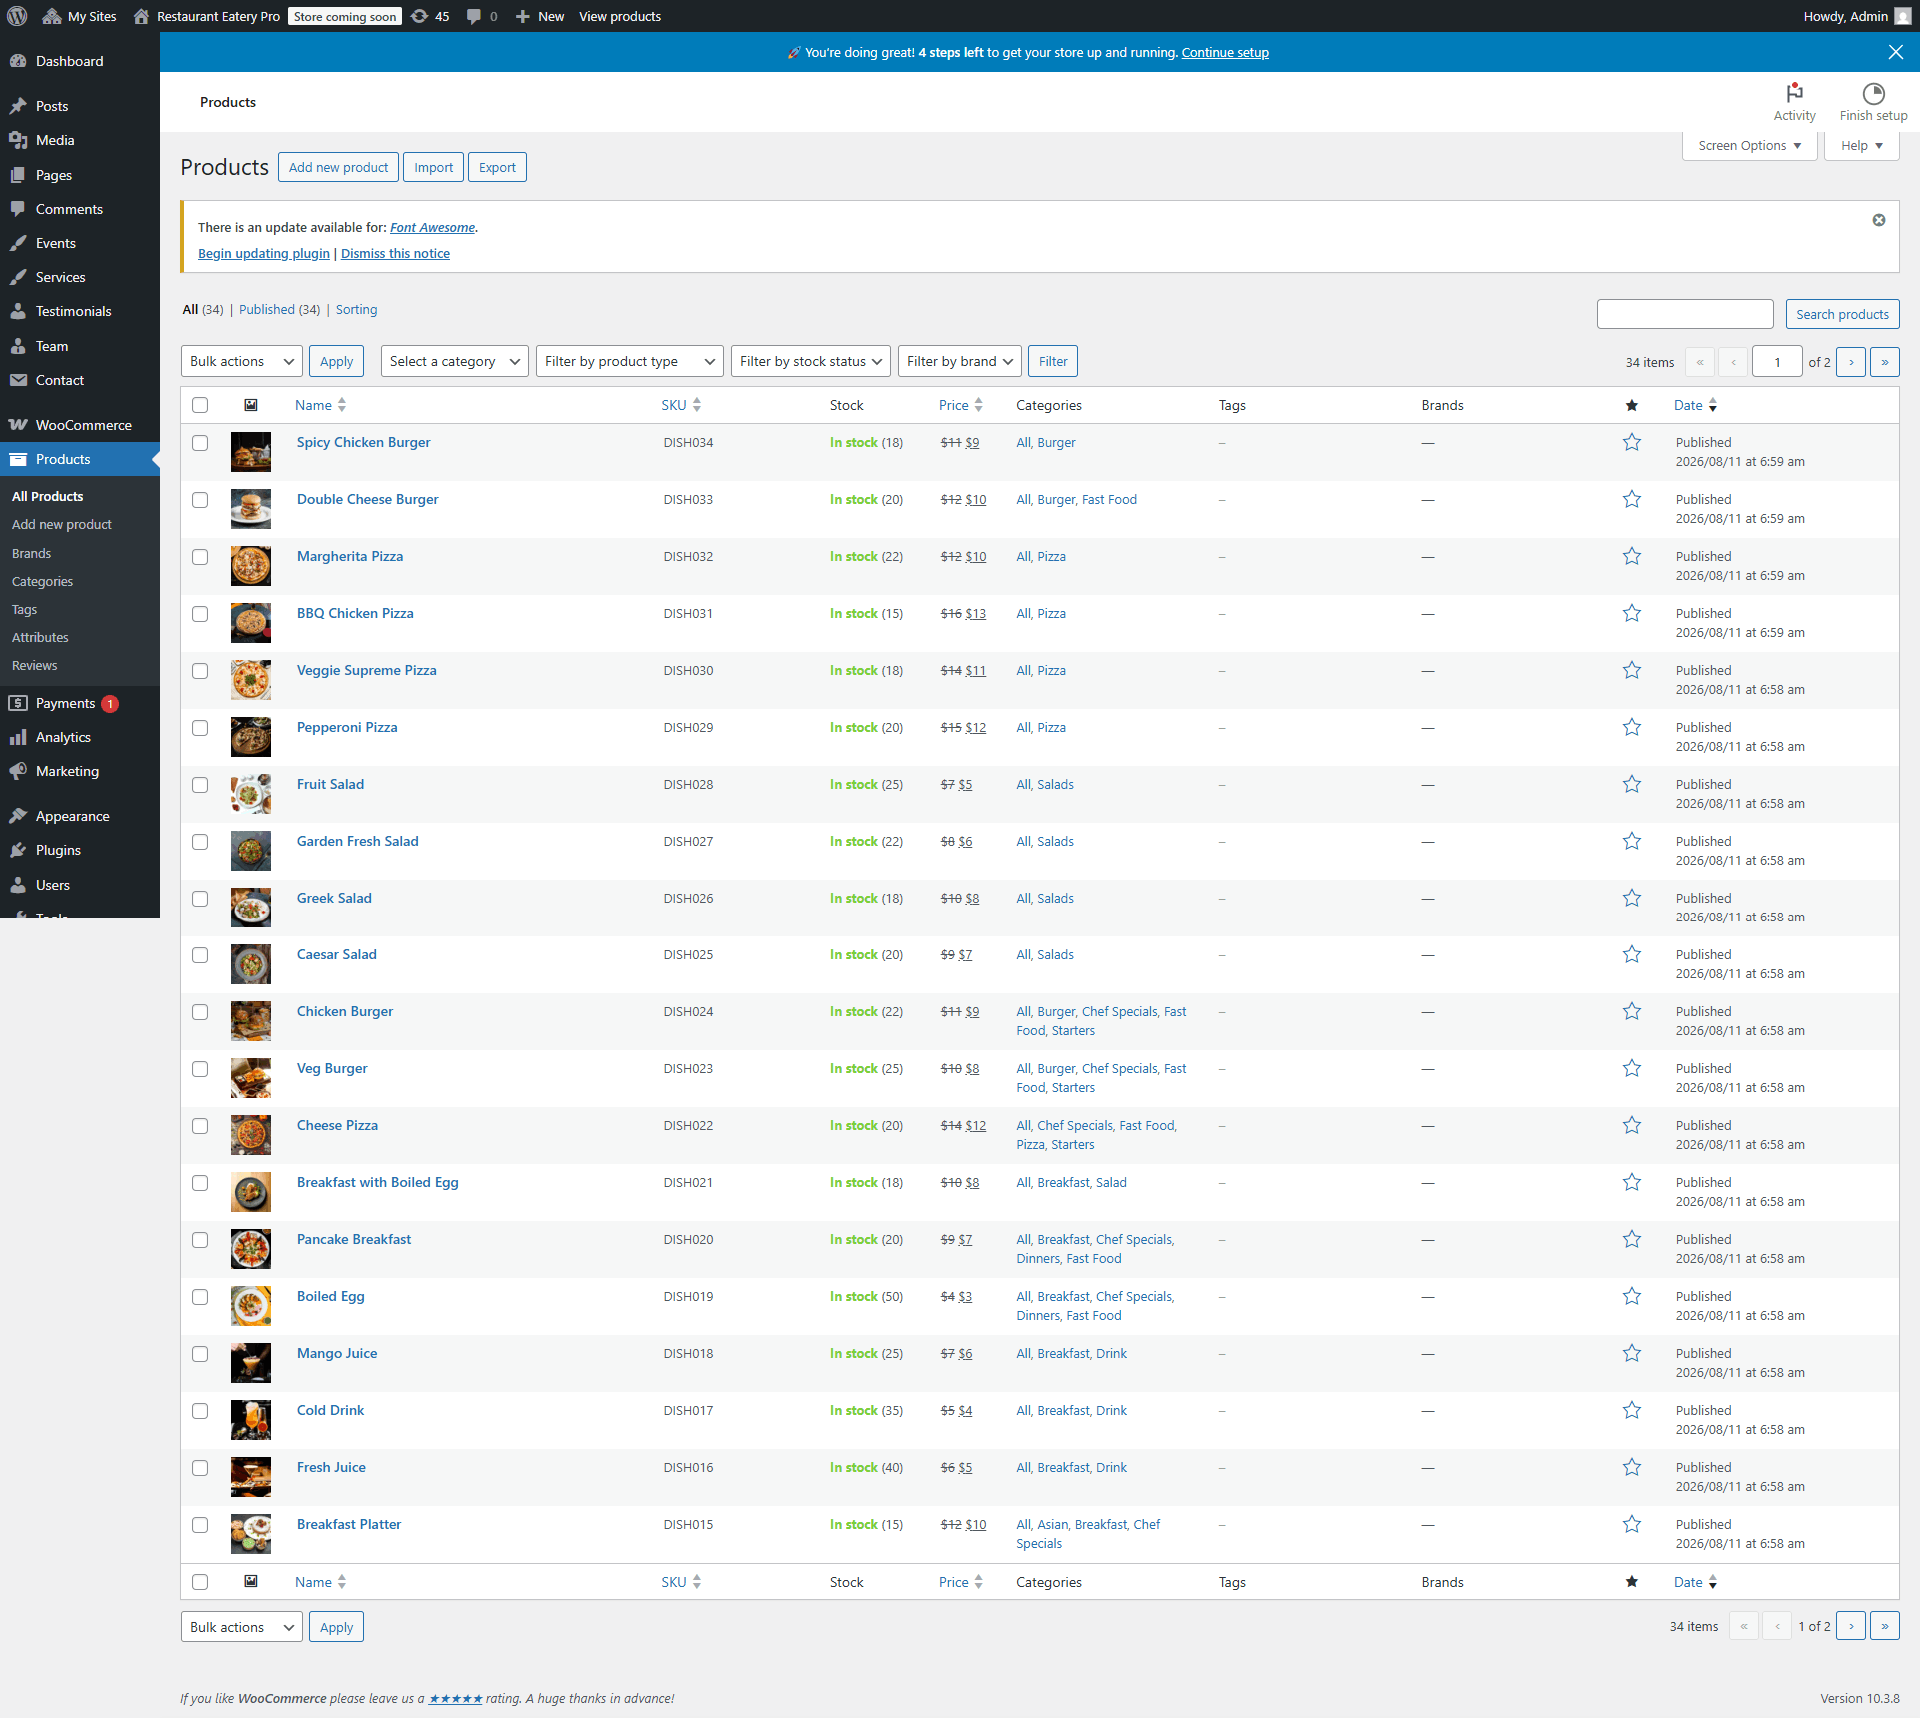
Offer Menus Settings
Offer Menu Product Editor
Offer Menus Display

Configure "Product Tab" Section

The Product Tab section allows you to showcase products grouped by category in a tabbed layout. Headings, placeholders, and styling are managed through the Customizer, while product data comes from WooCommerce.

  1. Go to Appearance → Customize → Theme Settings → Product Tab.
  2. Update the section heading and tagline to match your store’s branding.
  3. Replace placeholder text and images with your own product details.
  4. Navigate to Dashboard → Products → Categories to create or edit categories.
  5. Assign products to categories under Products → All Products by editing each product and selecting the relevant category.
  6. In the Customizer, choose which categories should appear as tabs in the section.
  7. Adjust the number of tabs displayed and reorder them to match your preferred layout.
  8. Scroll down in the Customizer to configure Color Options for background, text, and buttons.

Once configured, the Product Tab section will automatically pull products from WooCommerce categories, displaying them neatly under each tab for easy browsing.
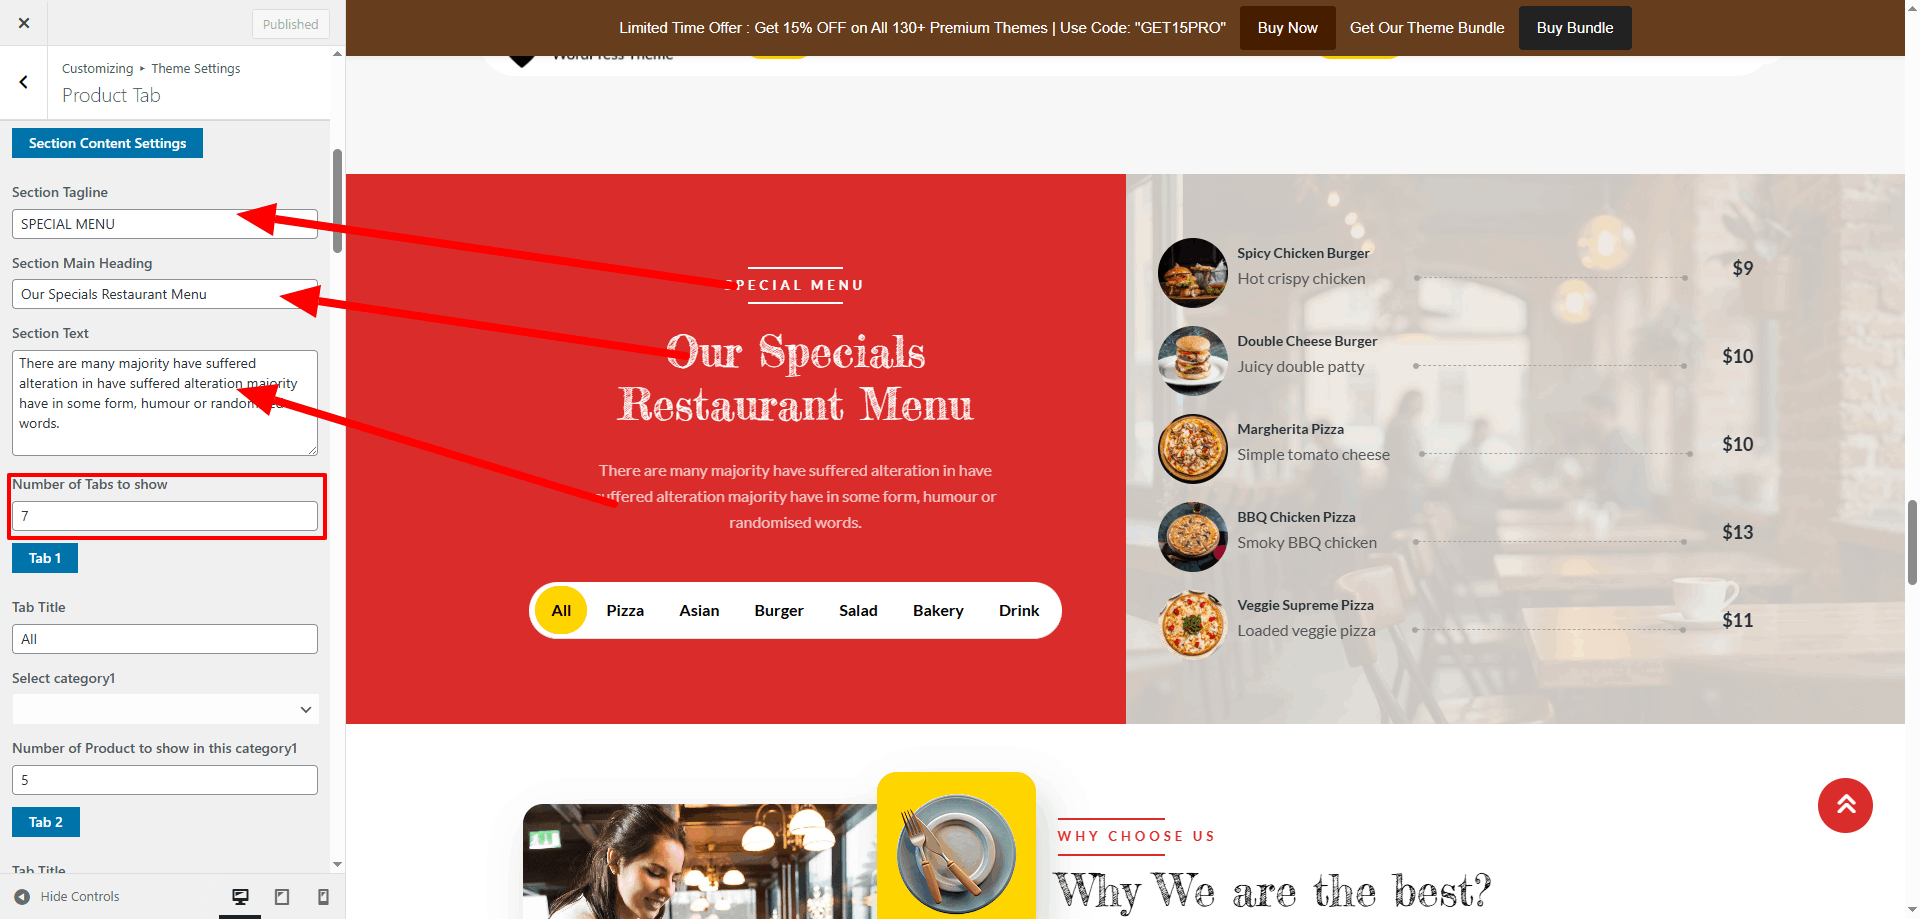
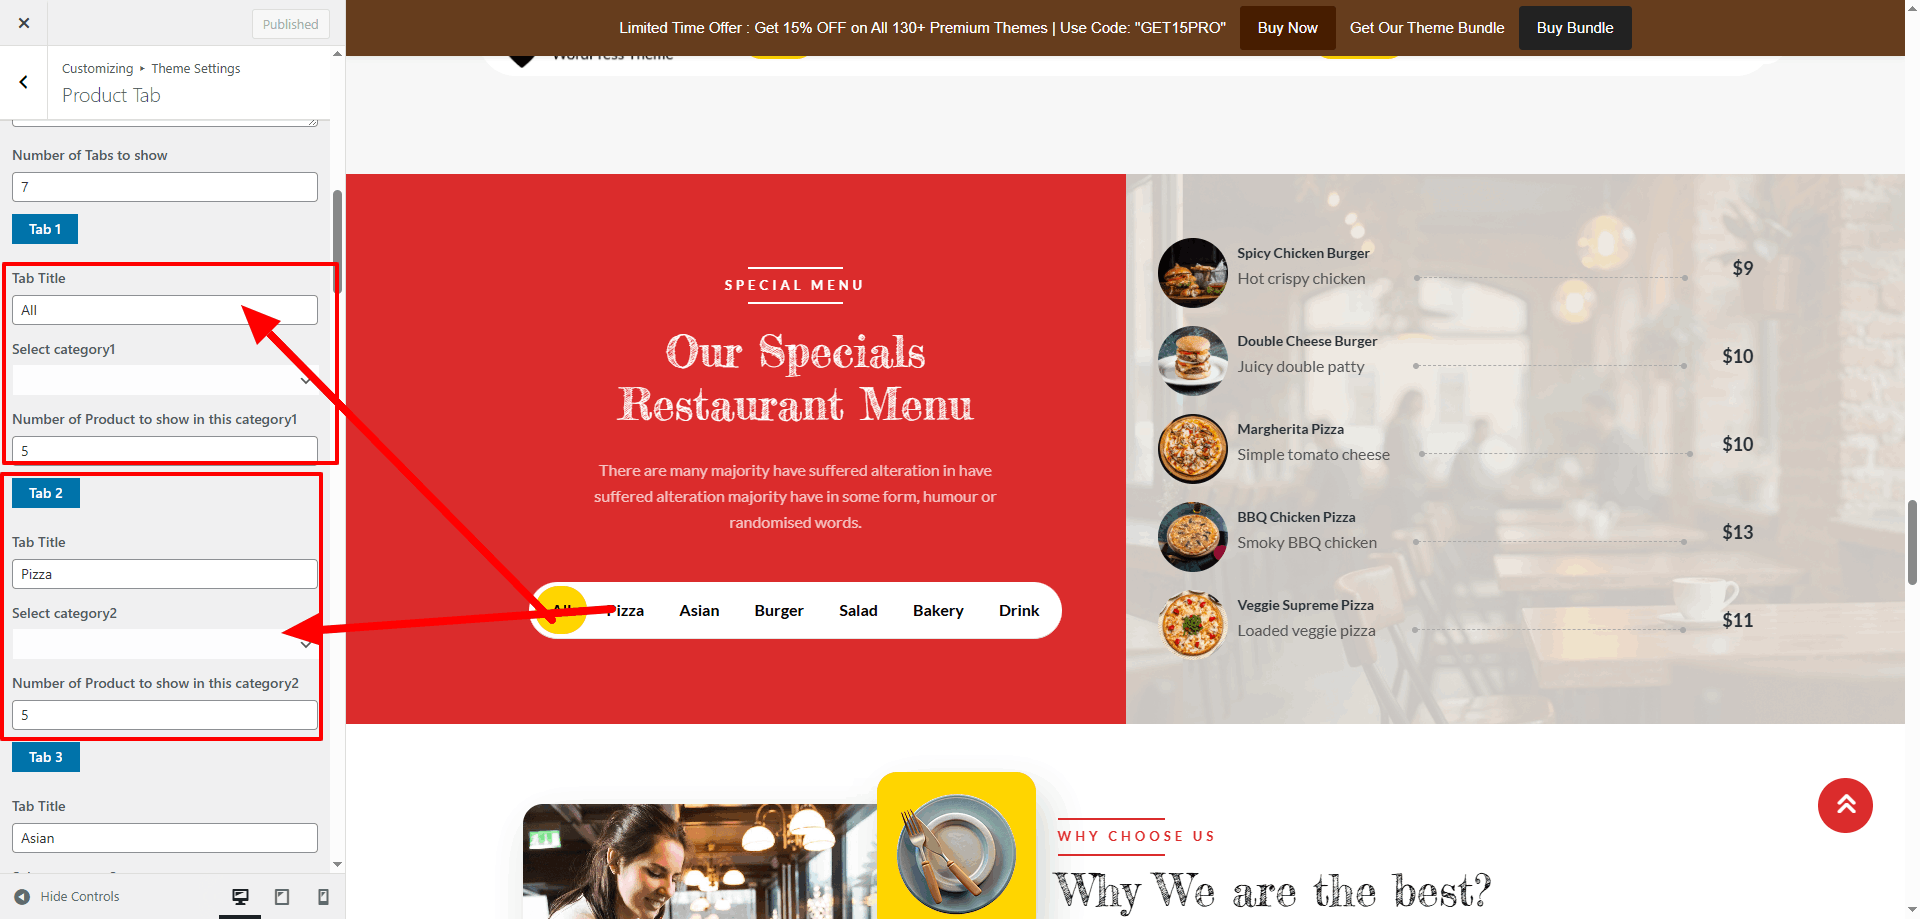
Product Tab Settings
Product Tab Category Selection

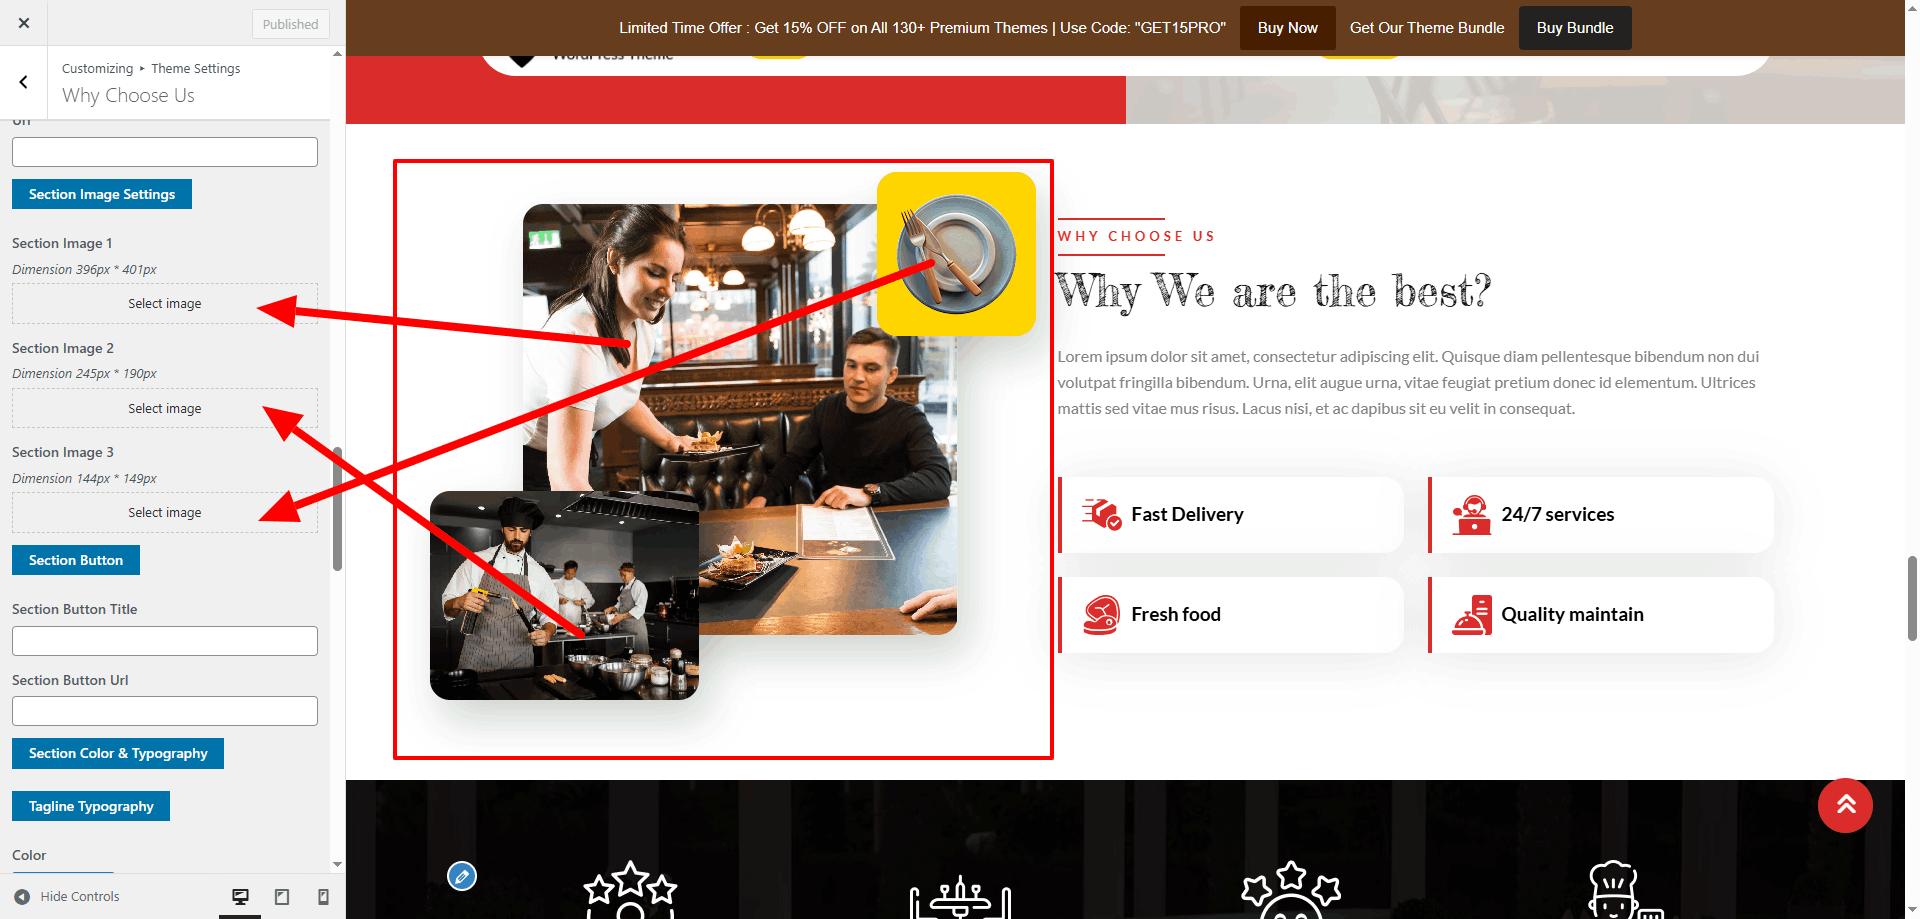
Configure "Why Choose Us" Section

The "Why Choose Us" section is customizable through the Theme Settings panel. All headings, text, and placeholder content can be updated directly in the Customizer without editing code.

  1. Go to Appearance → Customize → Theme Settings → Why Choose Us.
  2. Update the Section Heading and Tagline to reflect your brand values.
  3. Replace placeholder text with your own content highlighting key features or benefits.
  4. Adjust the number of feature boxes if supported by the theme. Add content to each box such as title, description, and icon.
  5. Upload or replace images/icons for each feature to visually represent your strengths.
  6. Scroll down to configure Color Options for background, text, and icons.
  7. Save and publish changes. The section will update instantly on the front end.

This section is ideal for showcasing your unique selling points, helping visitors quickly understand why they should choose your services or products.
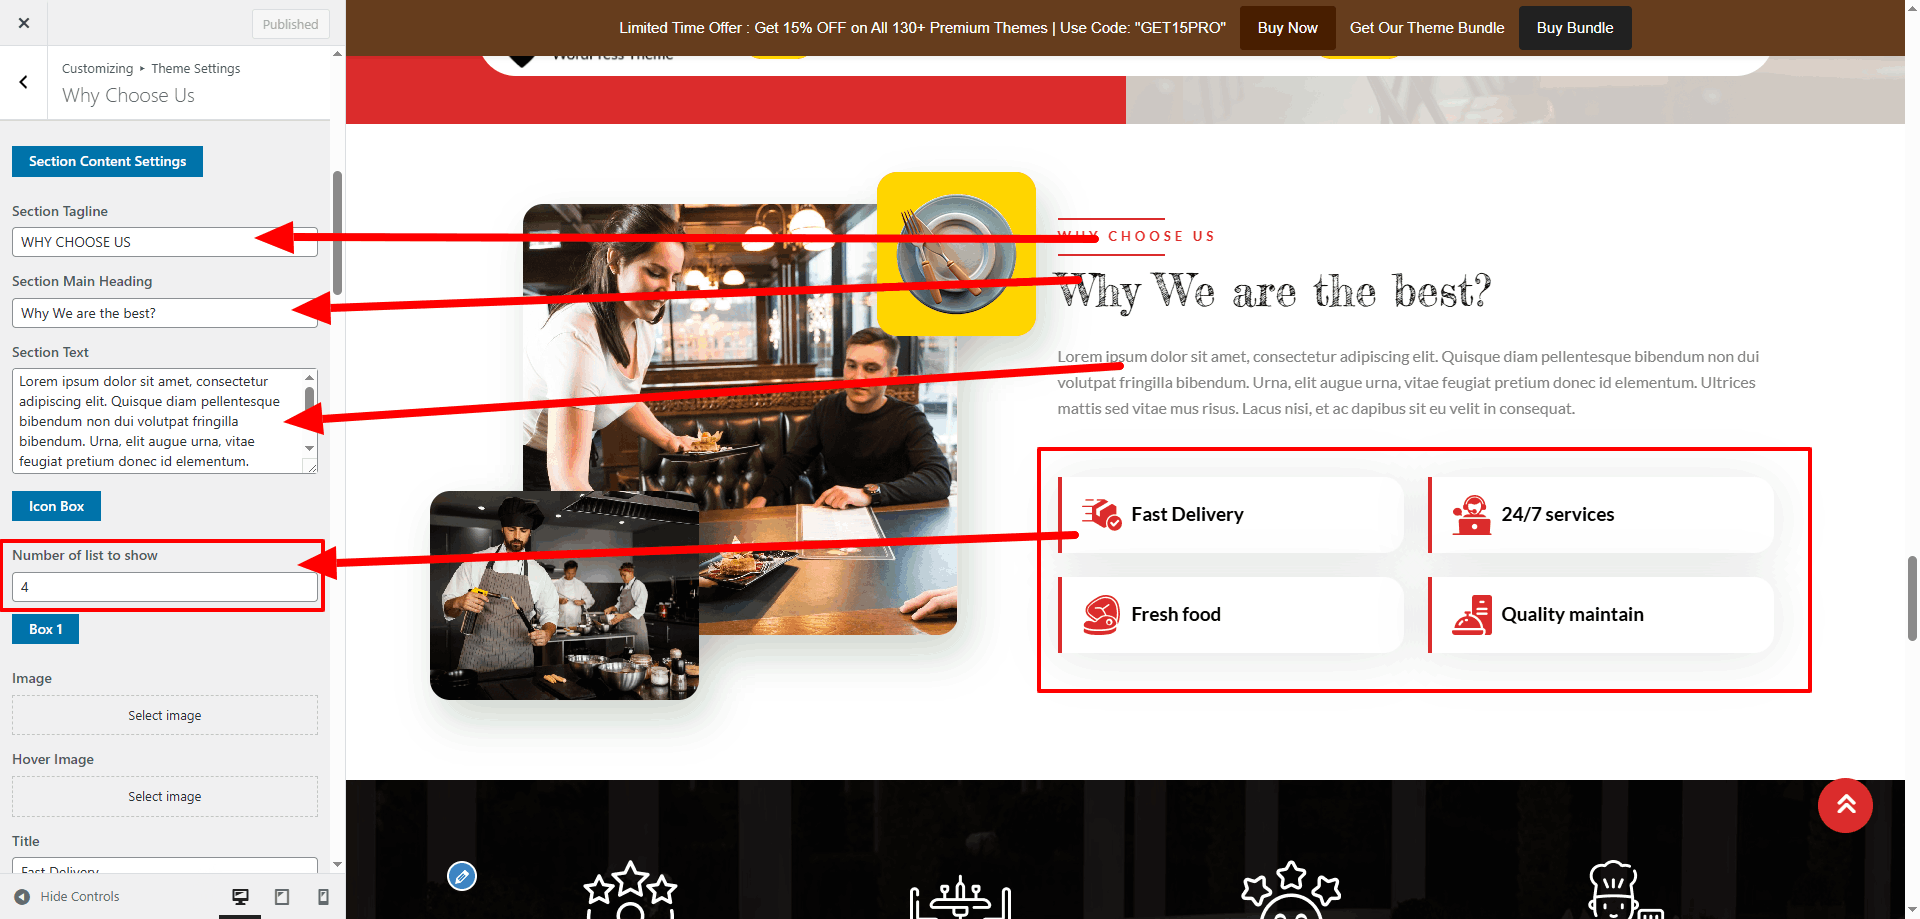
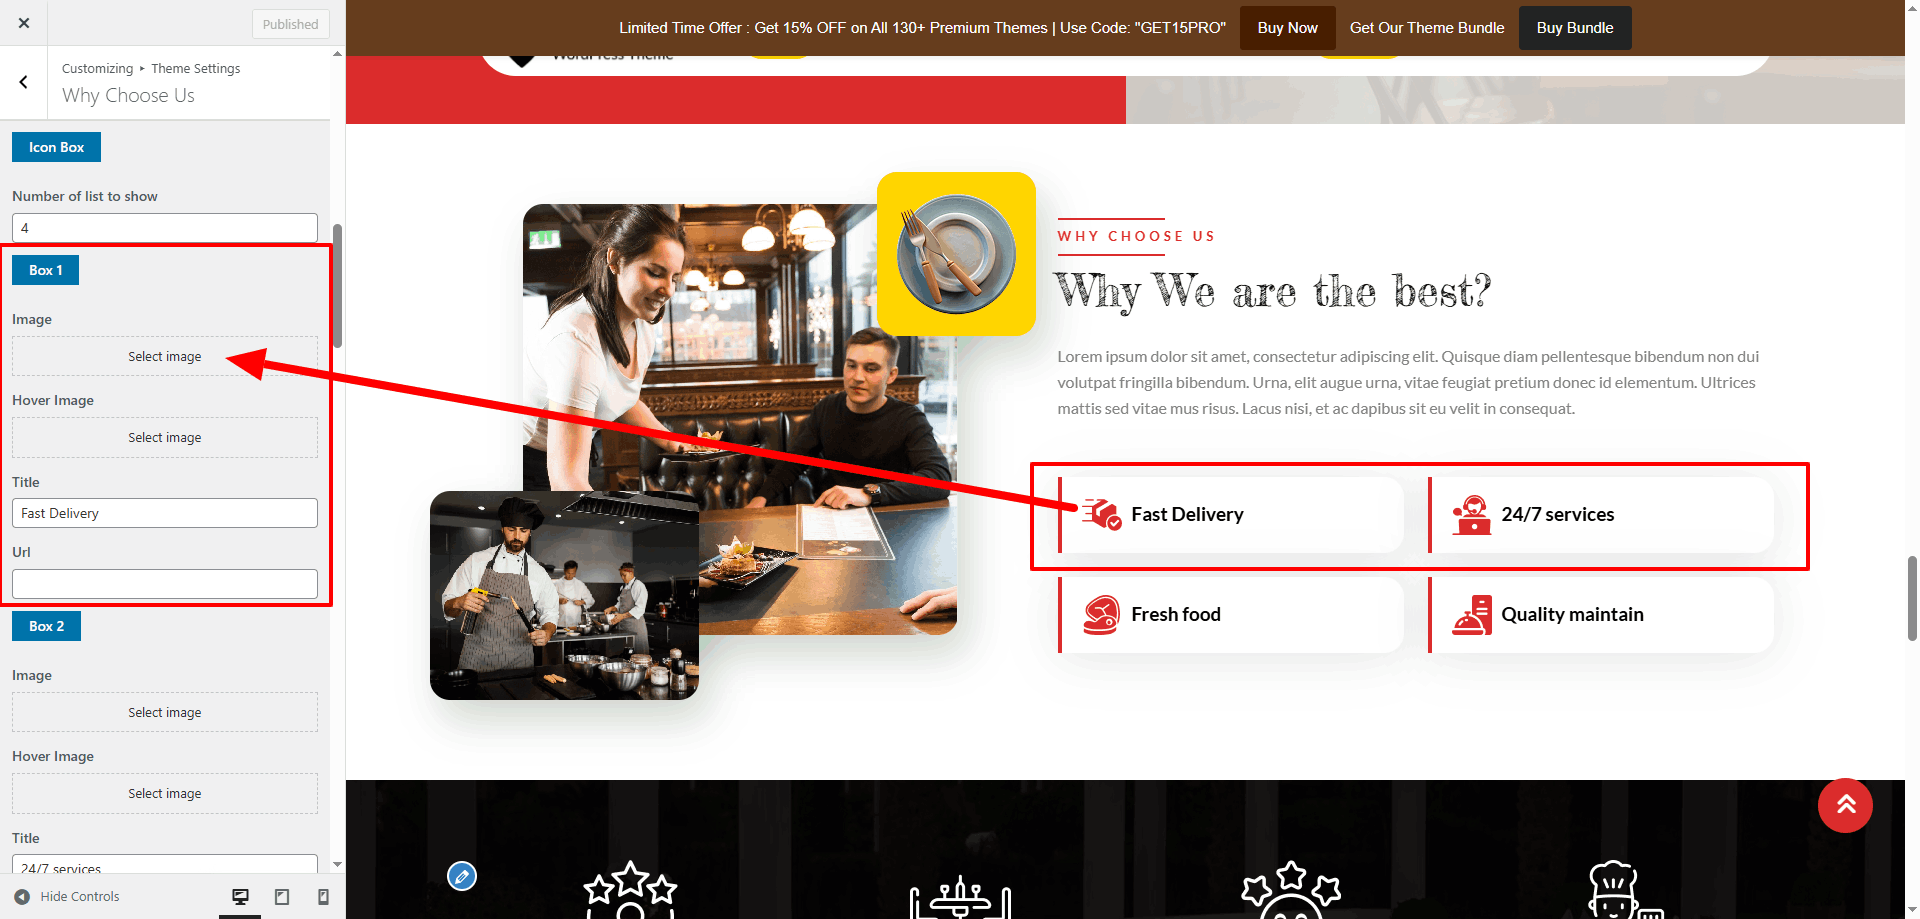
Why Choose Us Settings
Why Choose Us Editor
Why Choose Us Display

Configure "Records" Section

The Records section is fully managed through the Customizer. You can increase or decrease the number of record boxes and update their content directly.
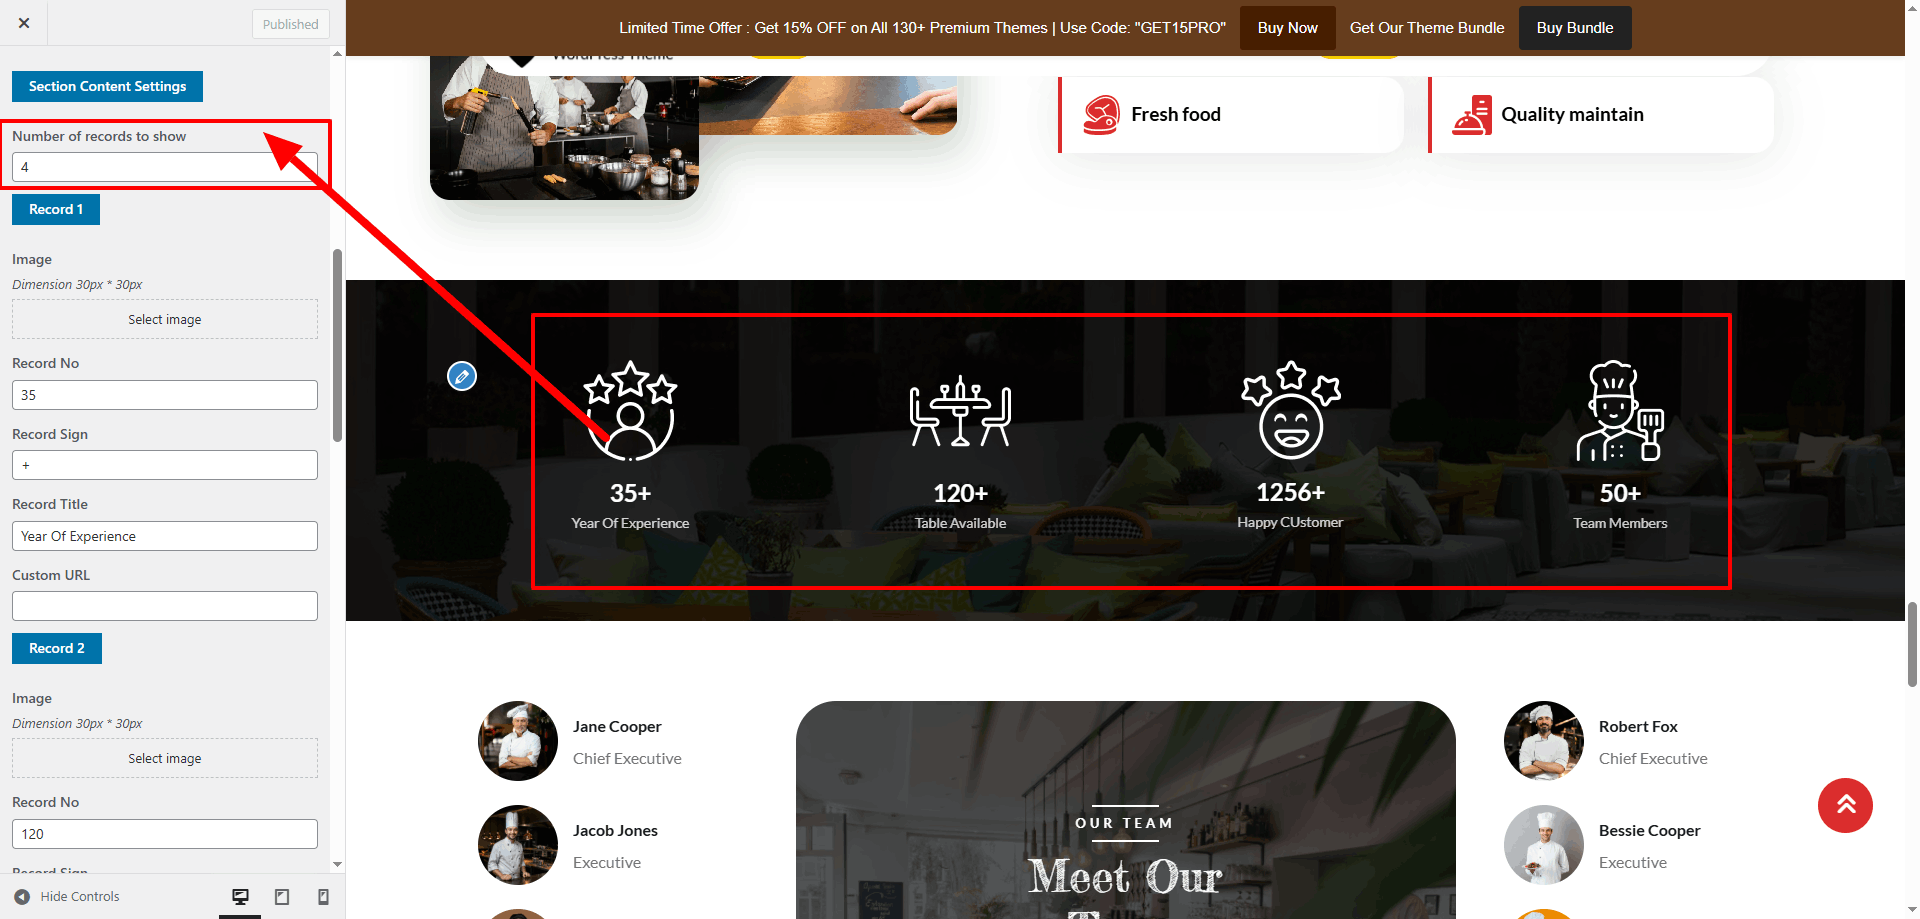
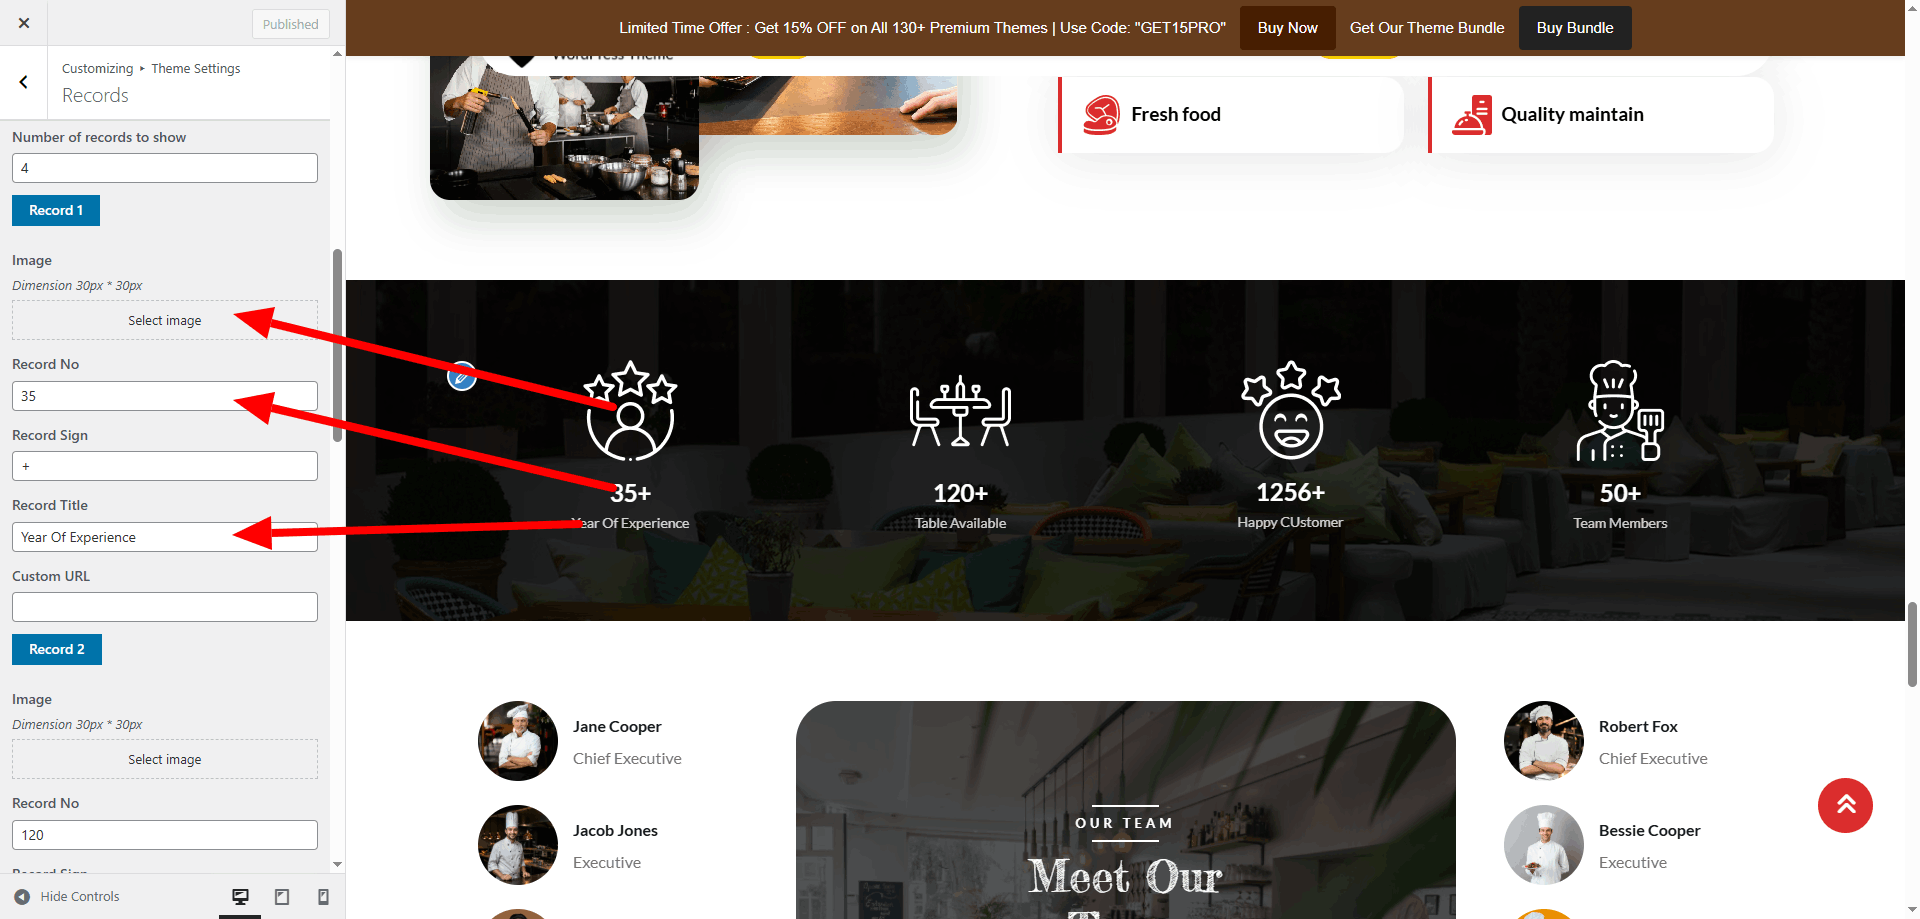
  1. Go to Appearance → Customize → Theme Settings → Records.
  2. Add or edit the content of each record box as required.
  3. Adjust the number of boxes to match your layout preference.
Records Settings

Records Display

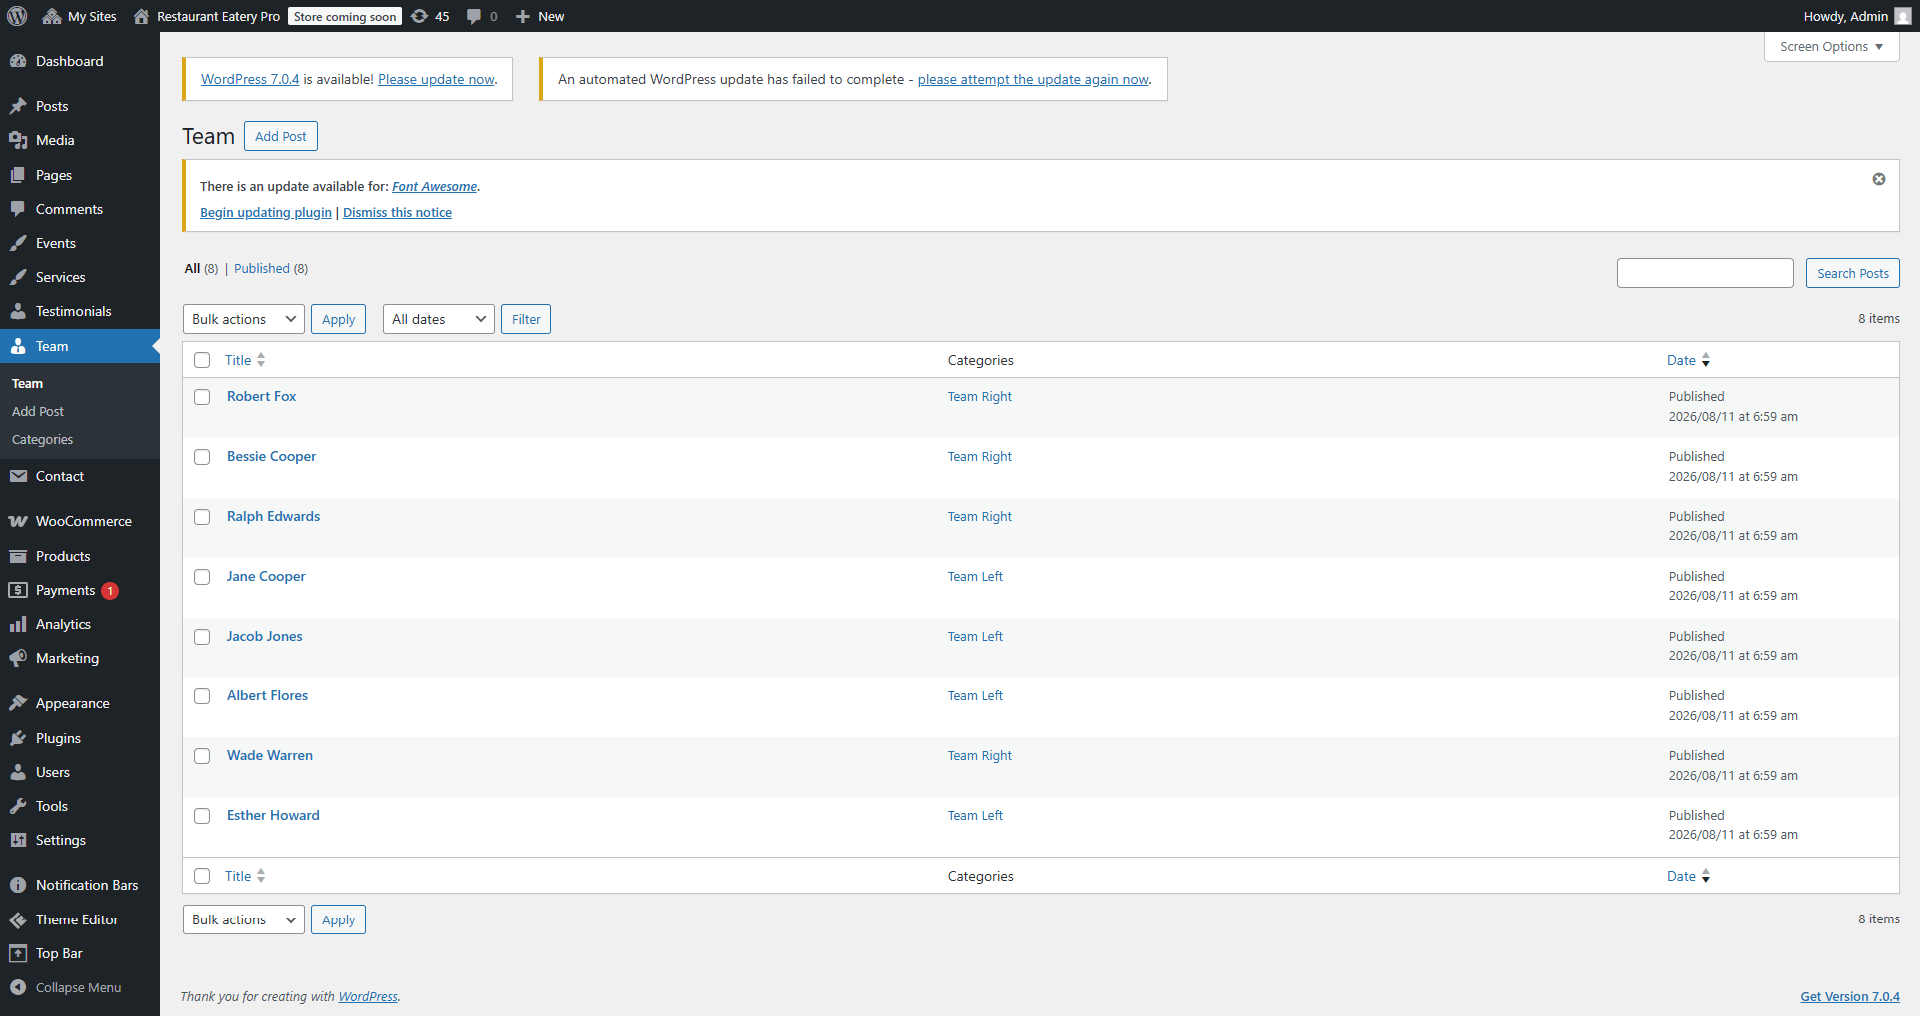
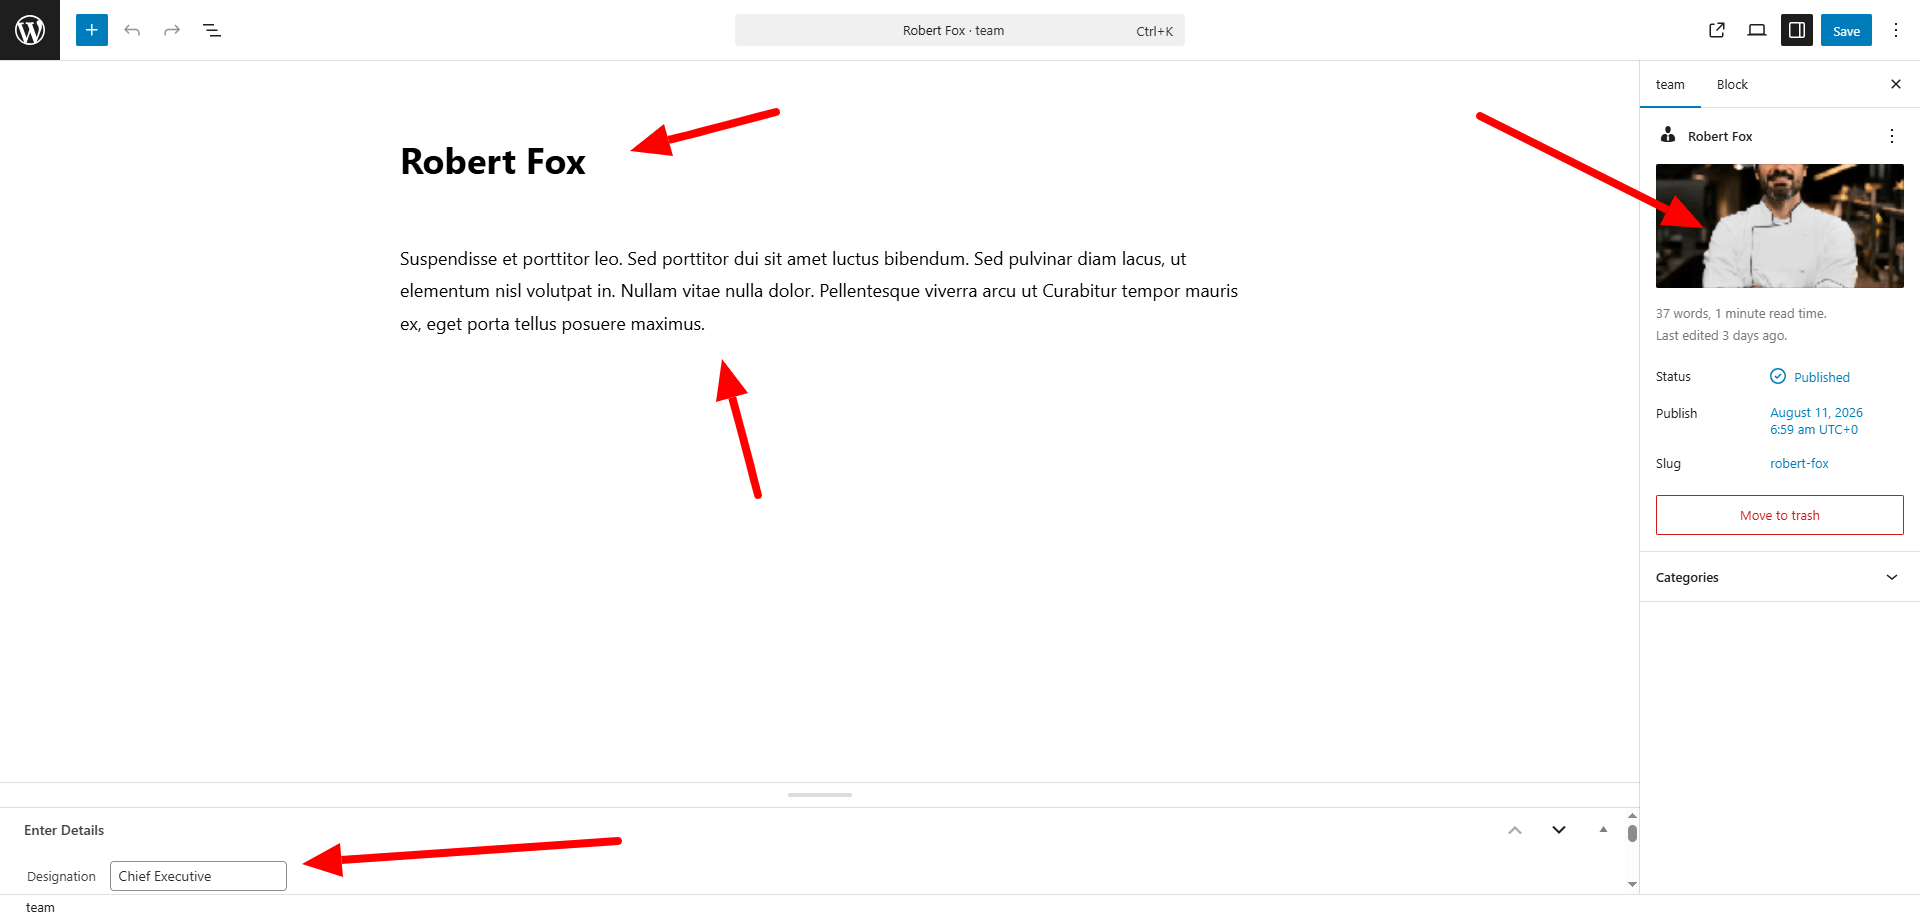
Configure "Team" Section

The Team section is powered by a custom post type. Each team member is created as a post with details and images.
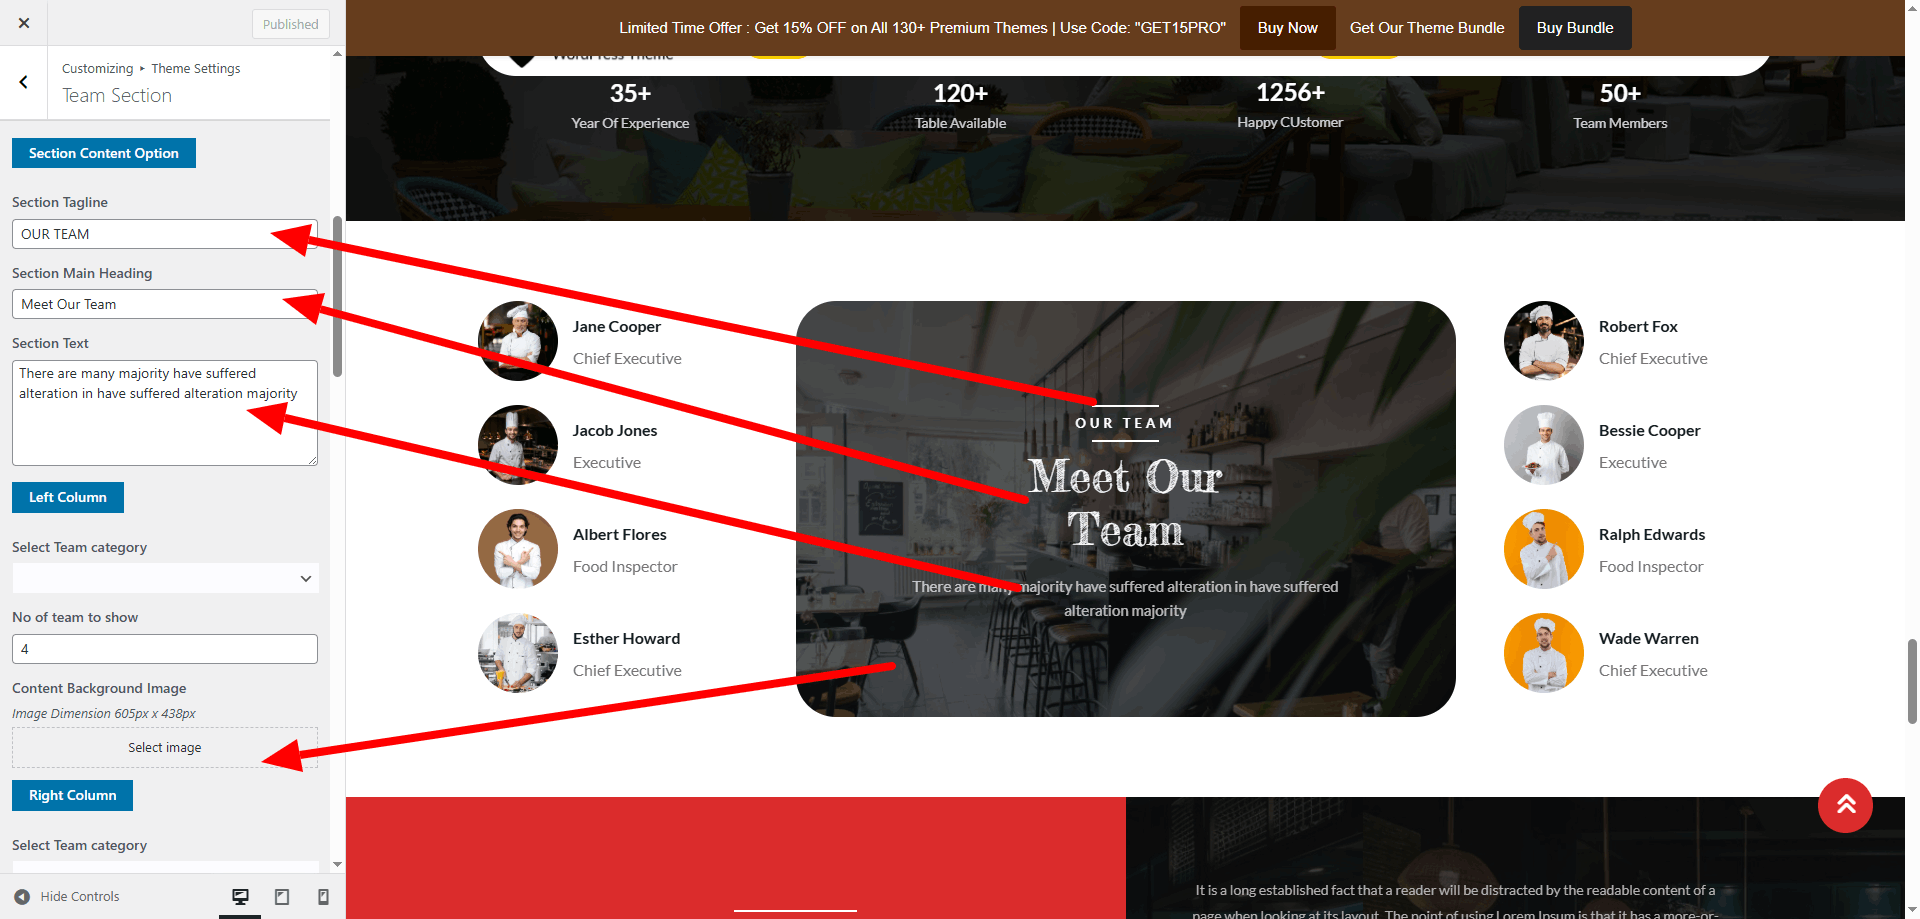
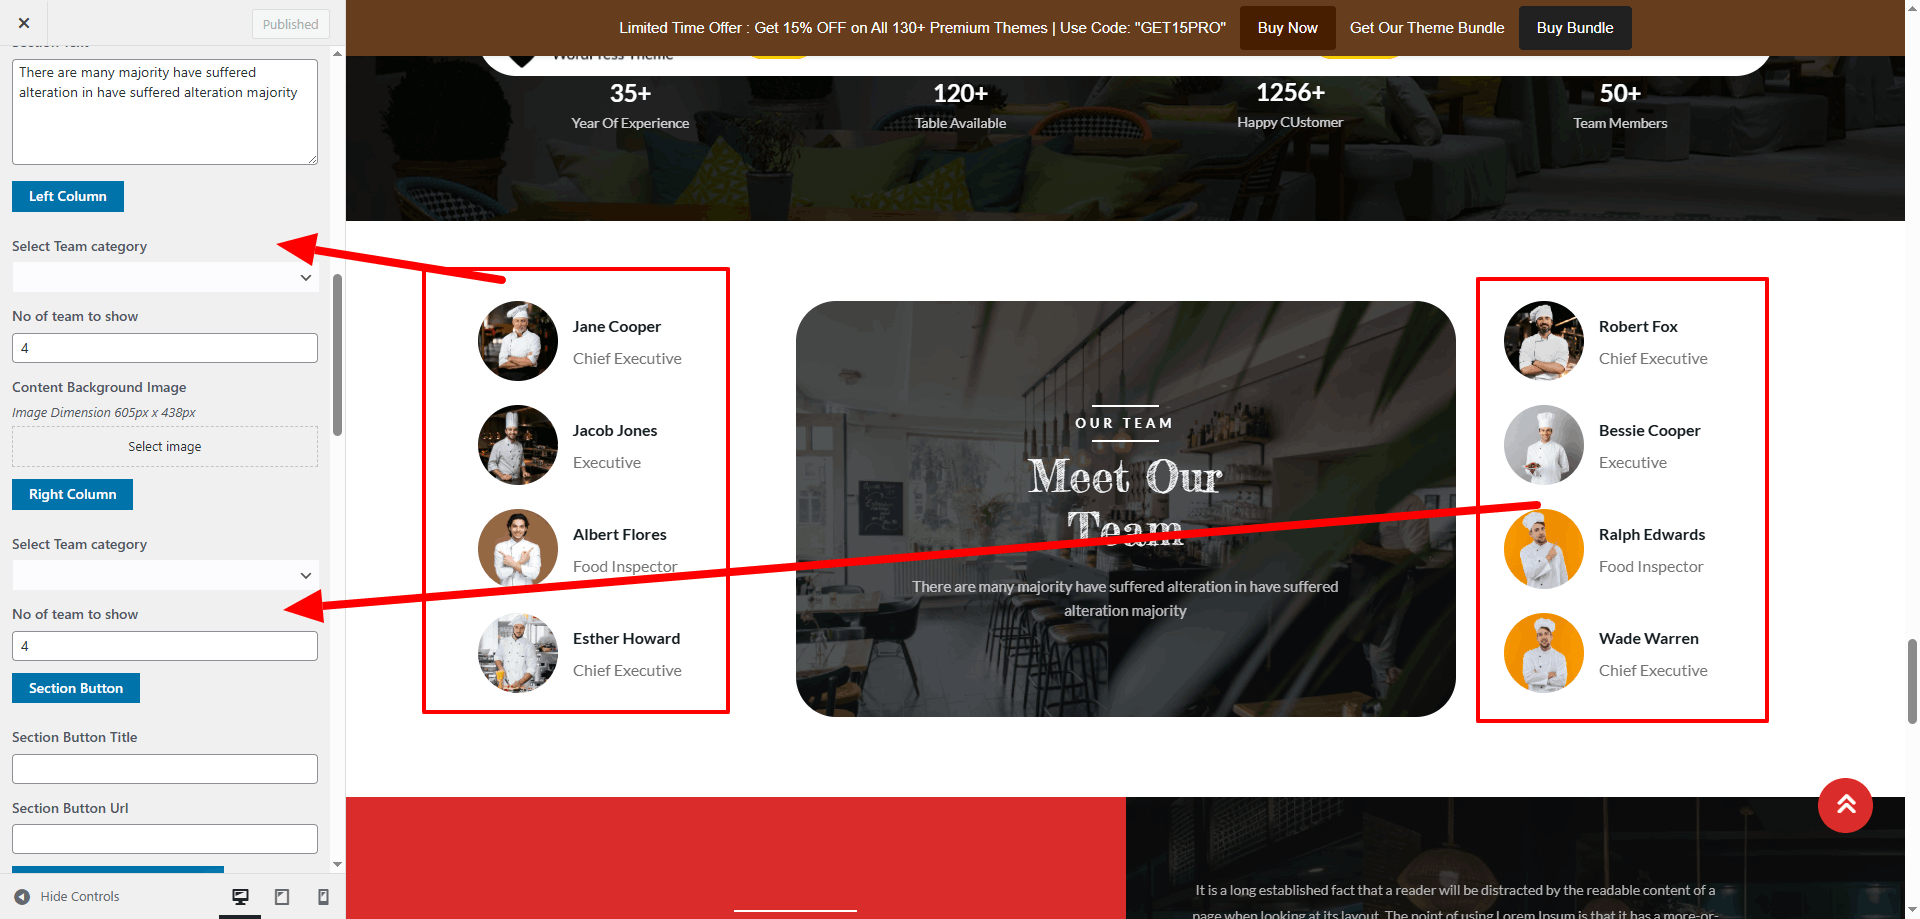
  1. Go to Appearance → Customize → Theme Settings → Team.
  2. Update the section heading, tagline, and adjust the number of team members displayed.
  3. Navigate to Dashboard → Team to manage team posts.
  4. Edit demo team members or click Add New to create your own.
  5. Fill in the member’s name, role, description, and upload a profile image.
  6. Publish the post. Repeat for each team member you want to showcase.
Team Settings

Team Post Editor

Team Member Example

Team Display

Configure "Testimonials" Section

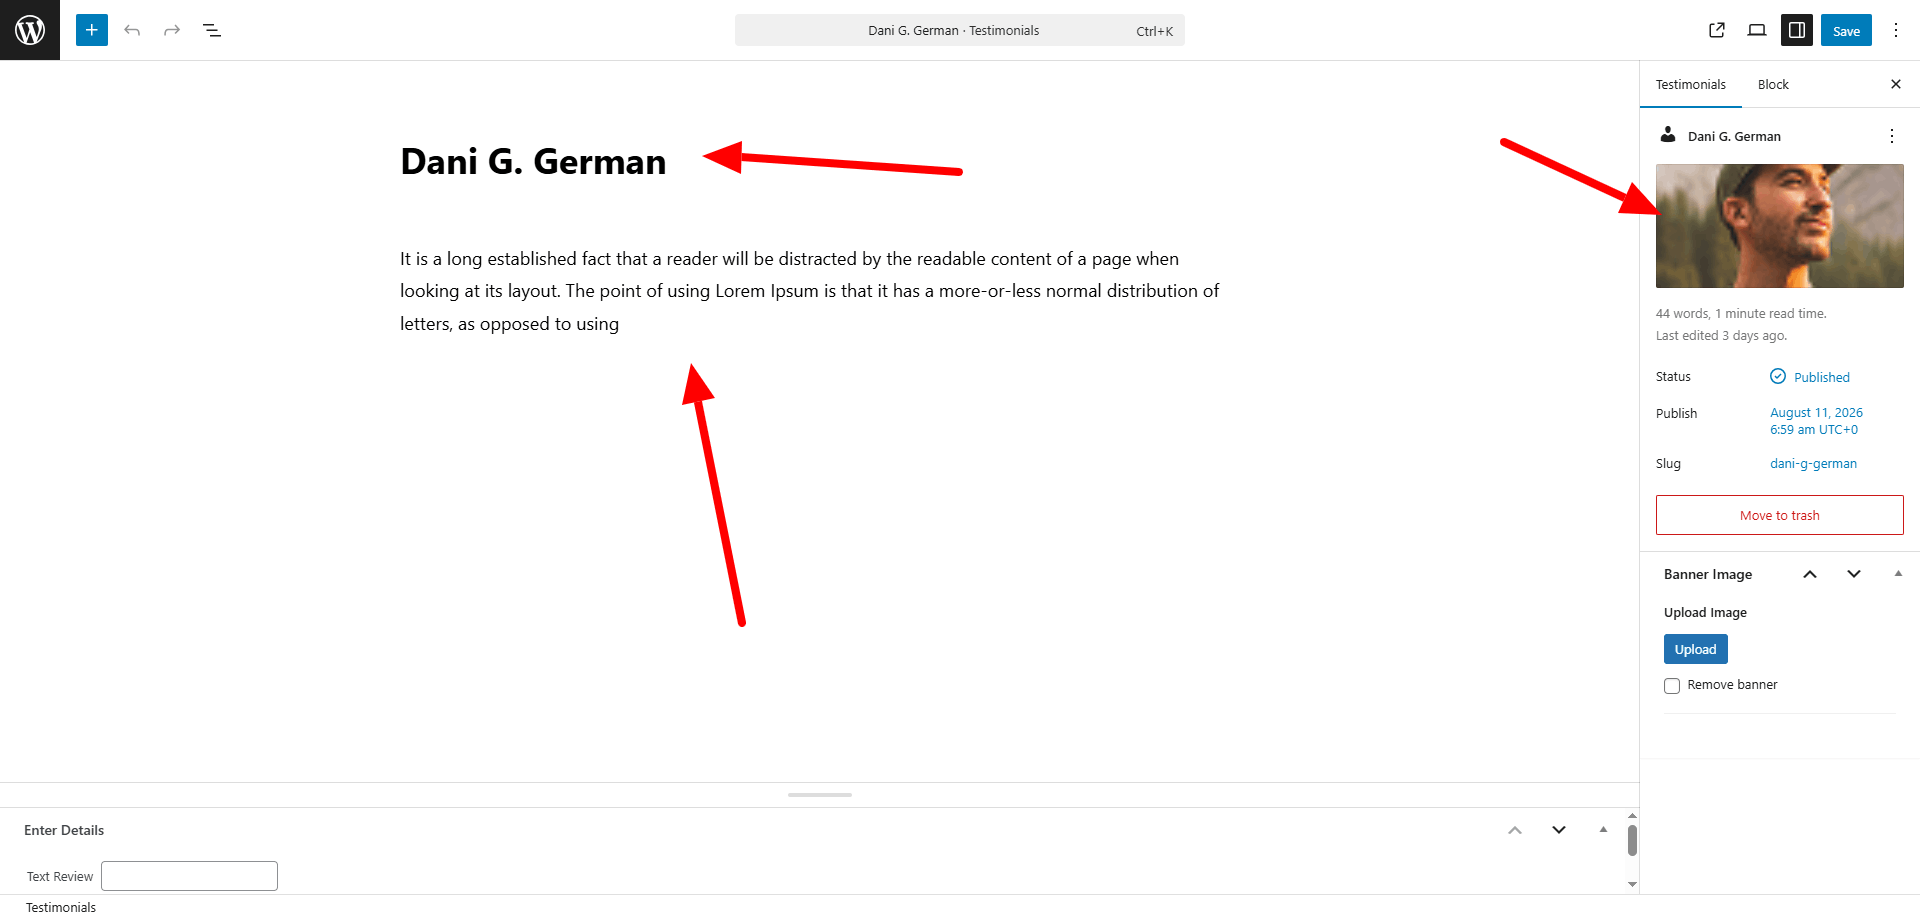
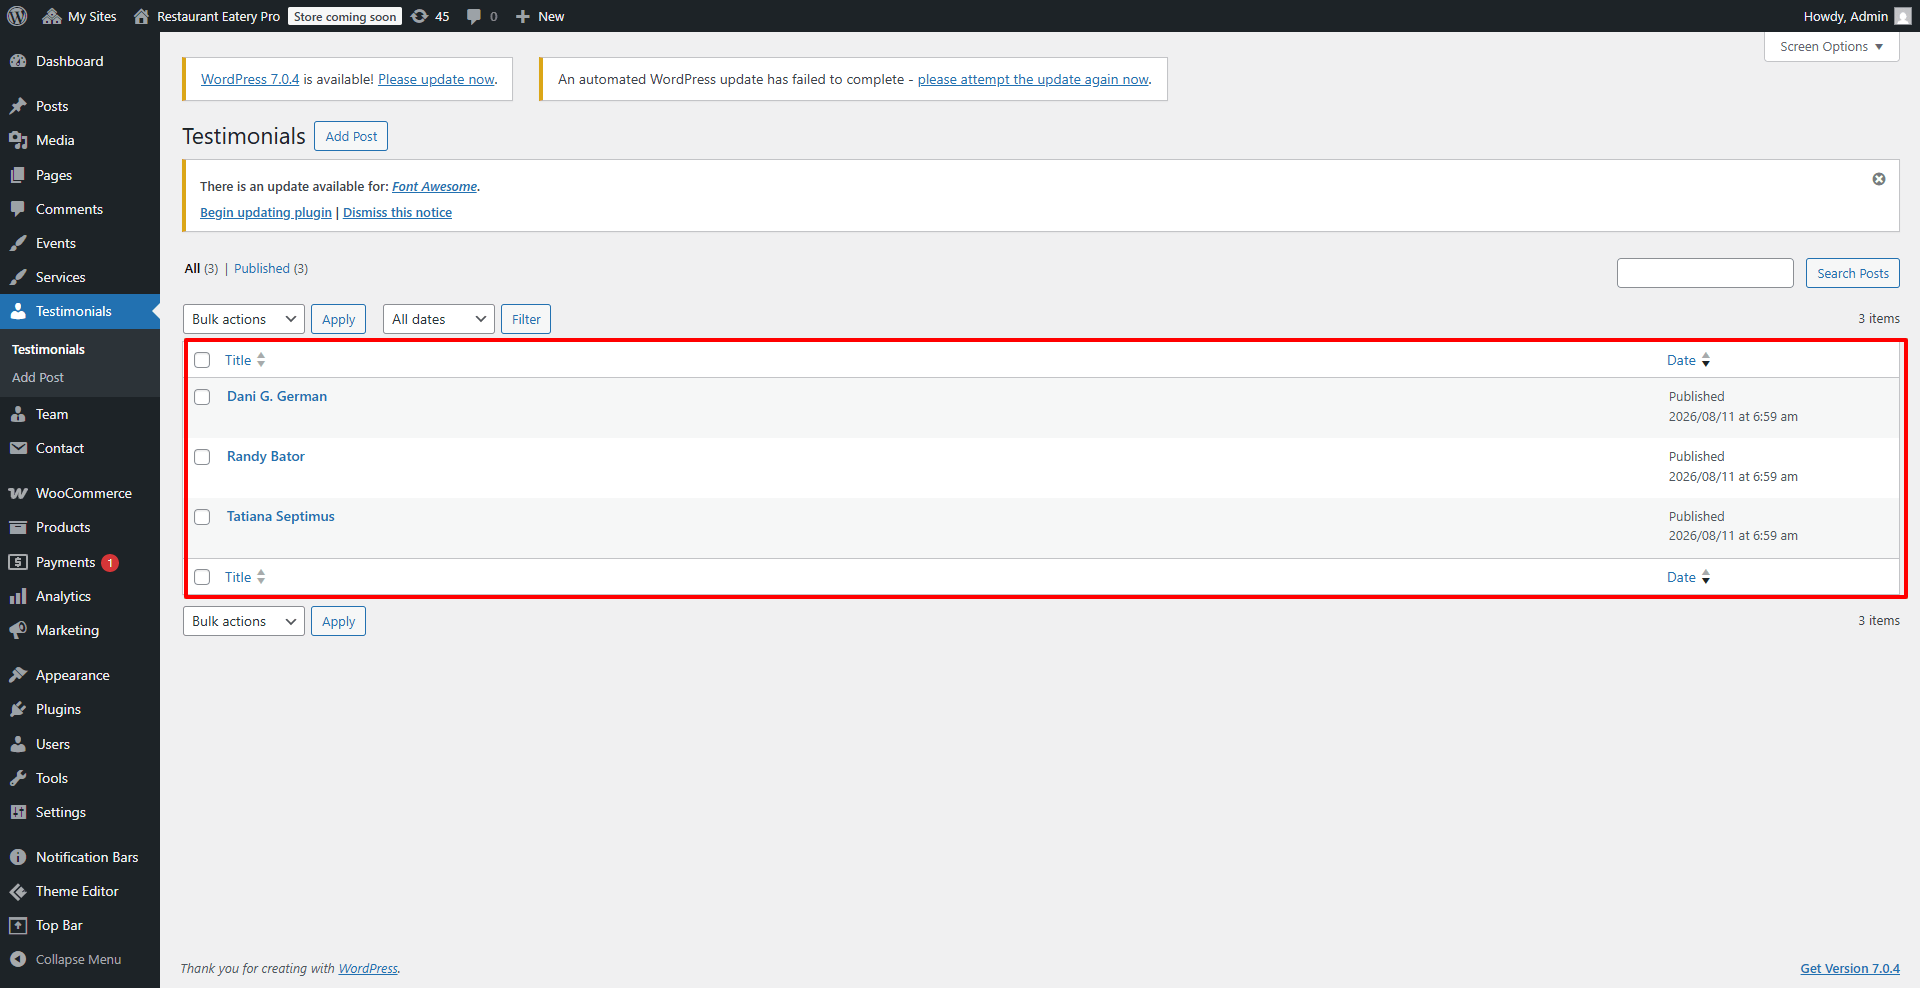
The Testimonials section is powered by a custom post type. Each testimonial is created as a post with client feedback and details.
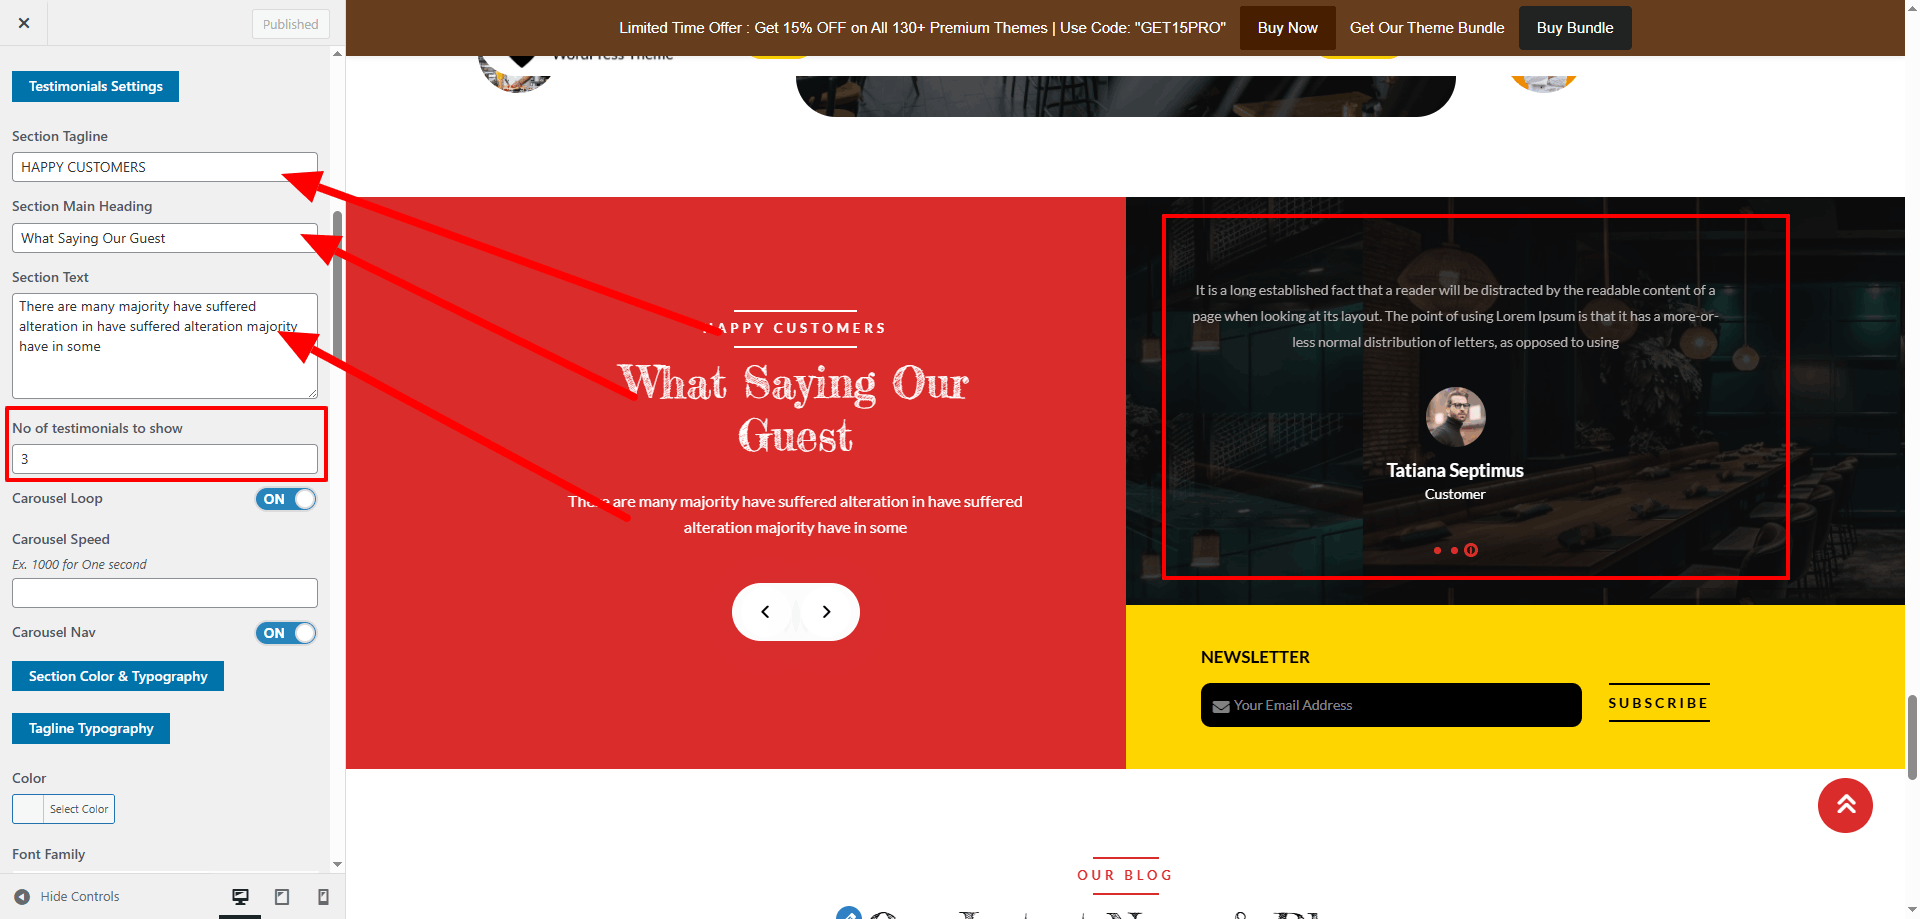
  1. Go to Appearance → Customize → Theme Settings → Testimonials.
  2. Update the section heading, tagline, and adjust the number of testimonials displayed.
  3. Navigate to Dashboard → Testimonials to manage testimonial posts.
  4. Edit demo testimonials or click Add New to create your own.
  5. Fill in the client’s name, feedback, and upload an image if required.
  6. Publish the post. Repeat for each testimonial you want to showcase.
Testimonials Settings

Testimonials Post Editor

Testimonials Display

Configure "Newsletter" Section

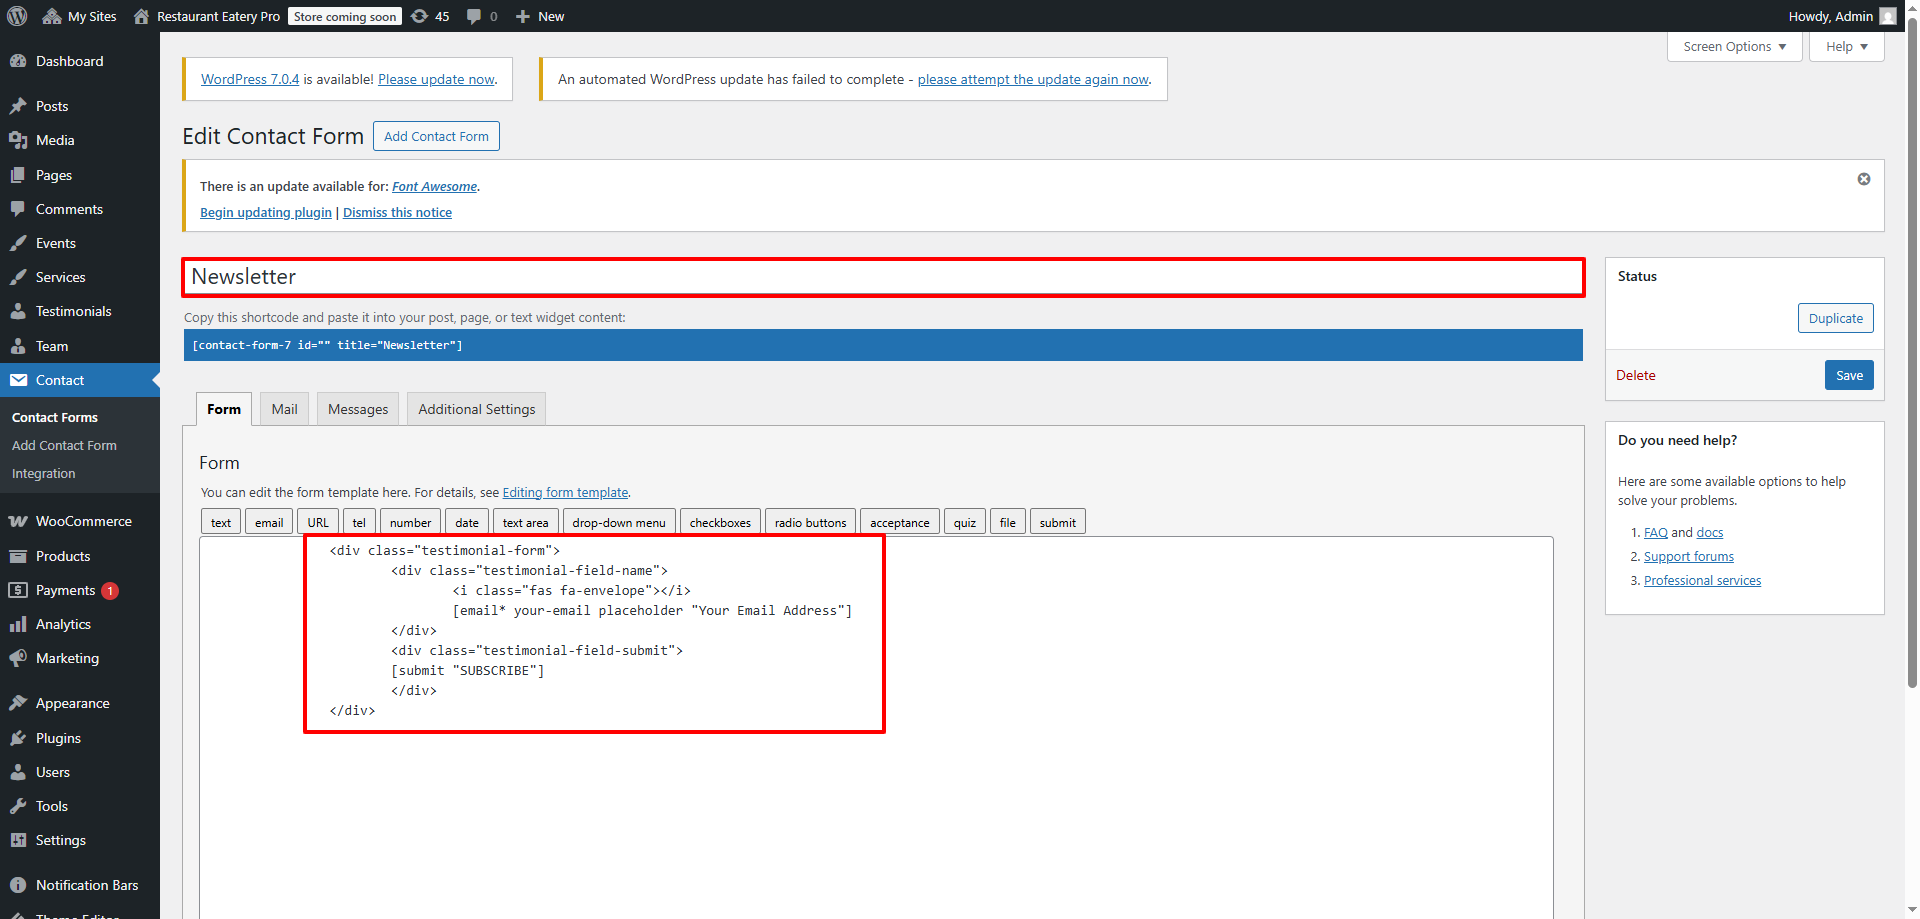
The Newsletter section is powered by a Contact Form 7 form. Headings and placeholders are managed through the Customizer, while the form fields are editable in the plugin.
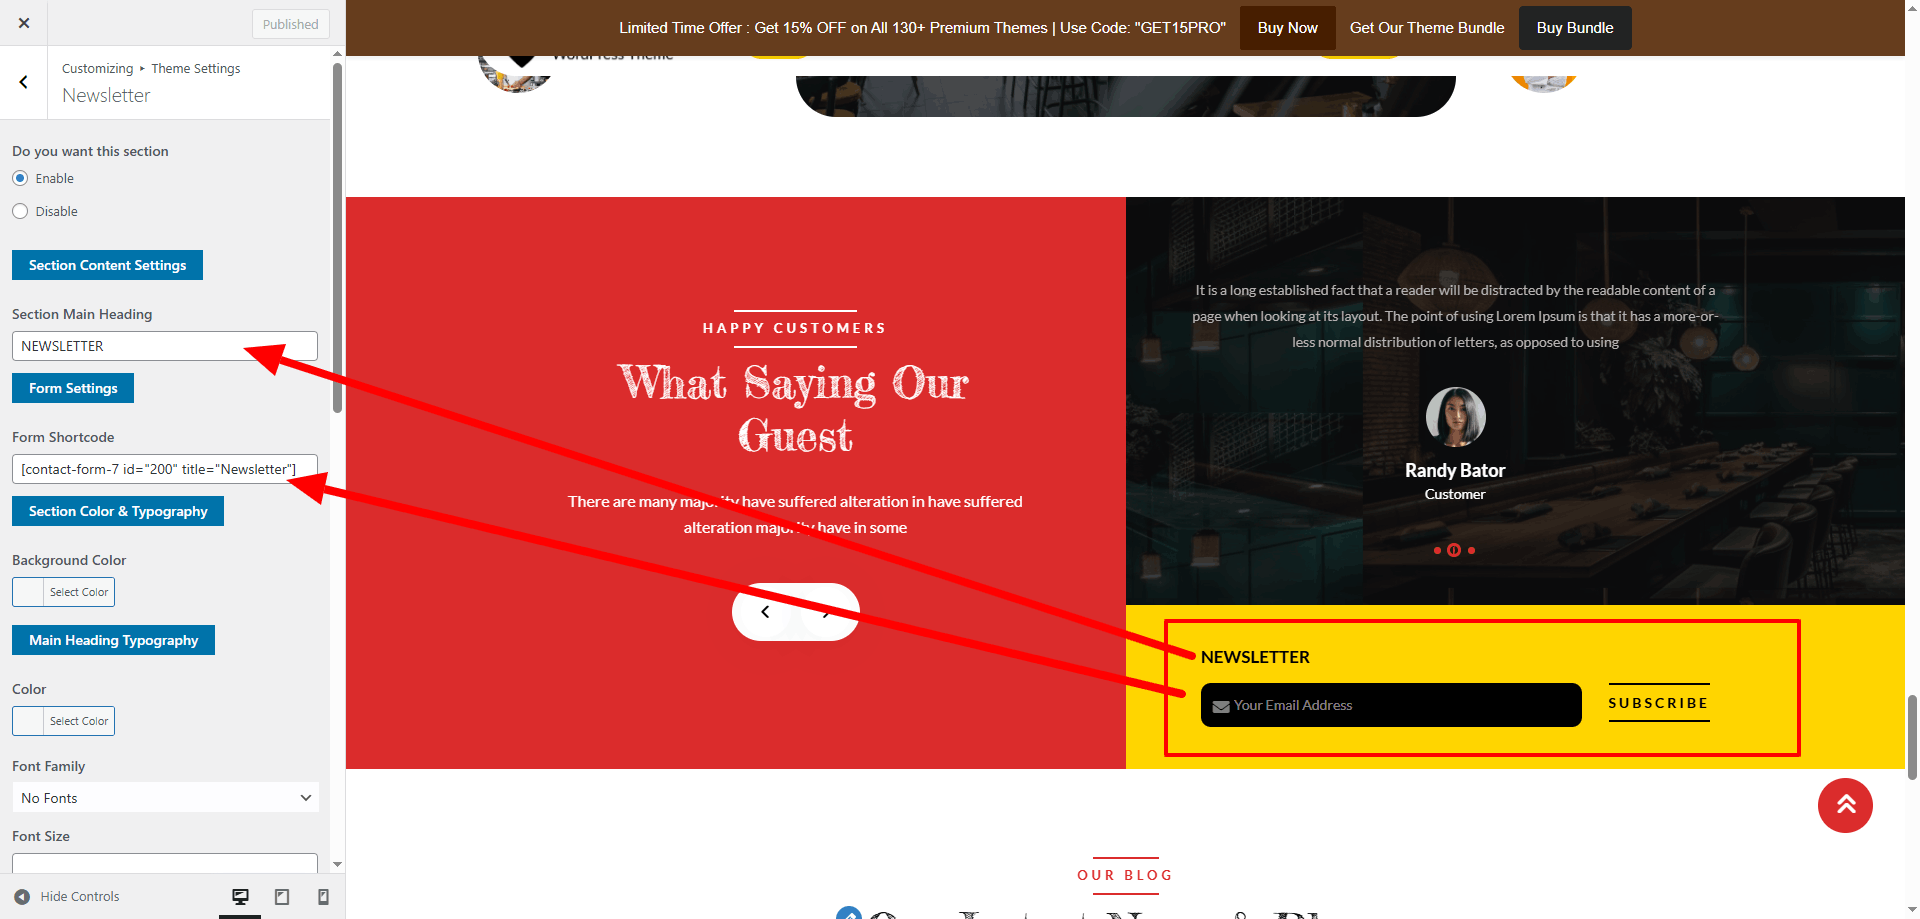
  1. Go to Appearance → Customize → Theme Settings → Newsletter.
  2. Update the section heading, tagline, and contact details.
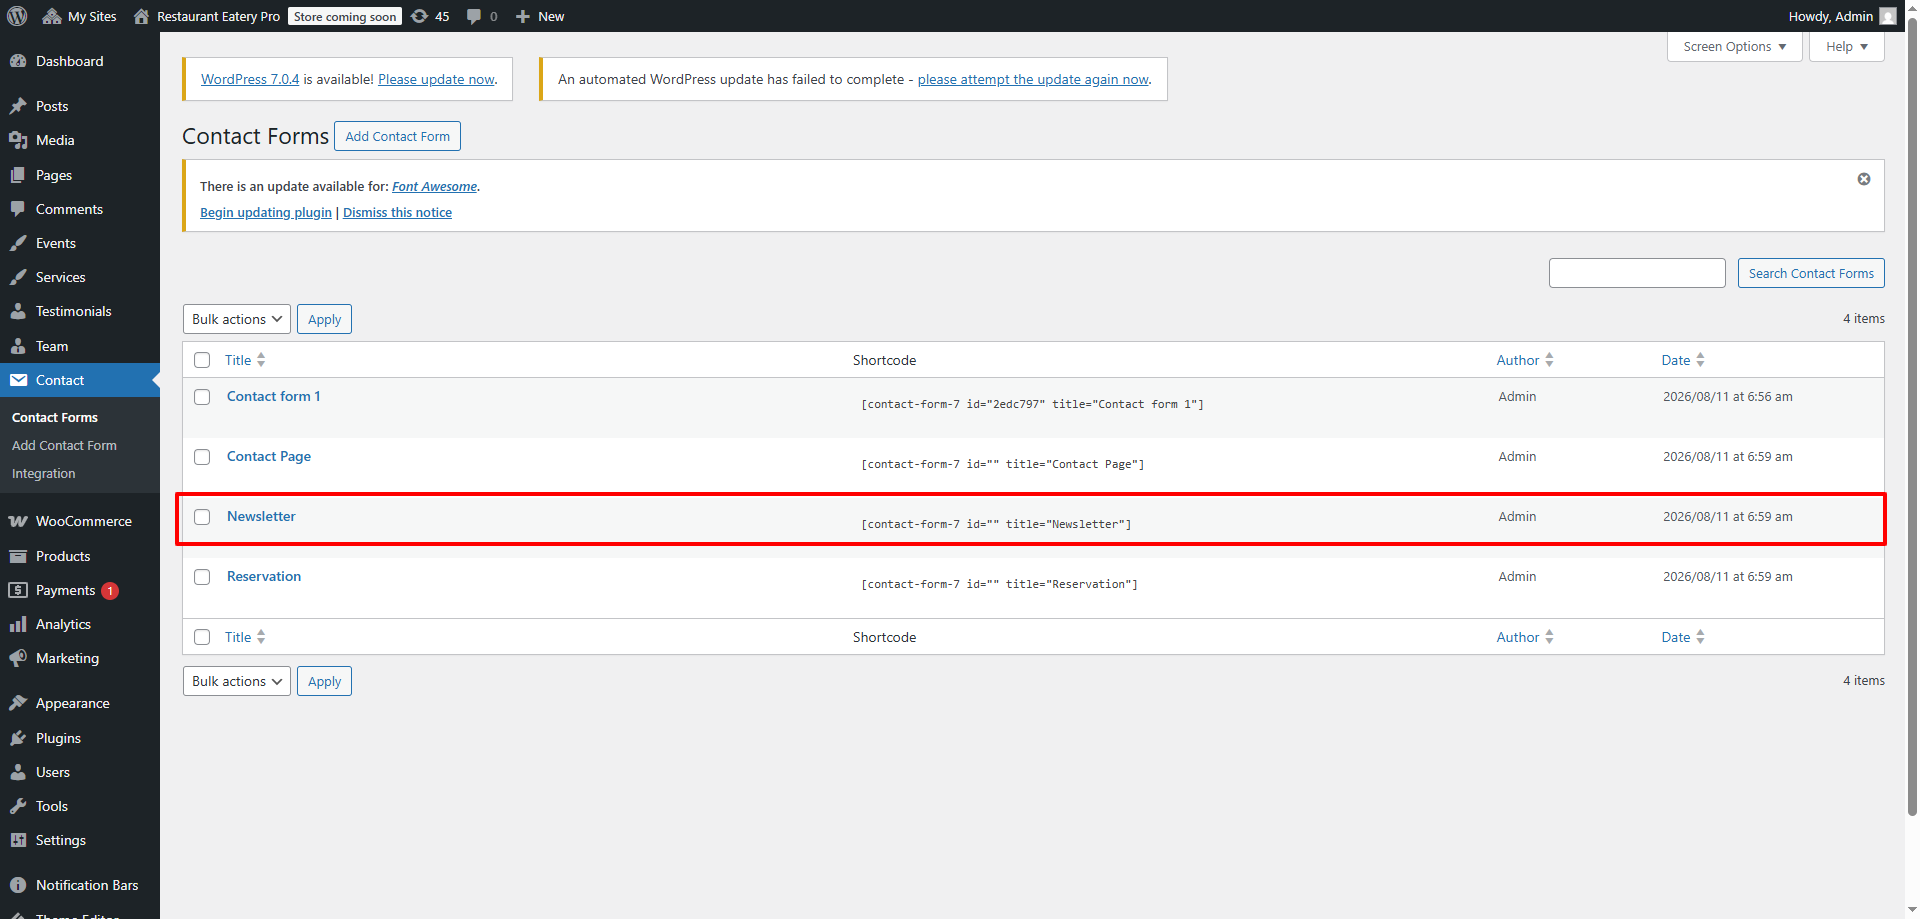
  3. Navigate to Dashboard → Contact to manage the newsletter form.
  4. Edit the demo form provided, or click Add New to create your own.
  5. Update form fields such as Name, Email, and subscription options.
  6. Update map longitude and latitude if the section includes a location map.
Newsletter Settings

Newsletter Form Editor

Newsletter Display

Configure "Blog" Section

The Blog section displays posts created in WordPress. Headings, placeholders, and excerpt length are managed through the Customizer.
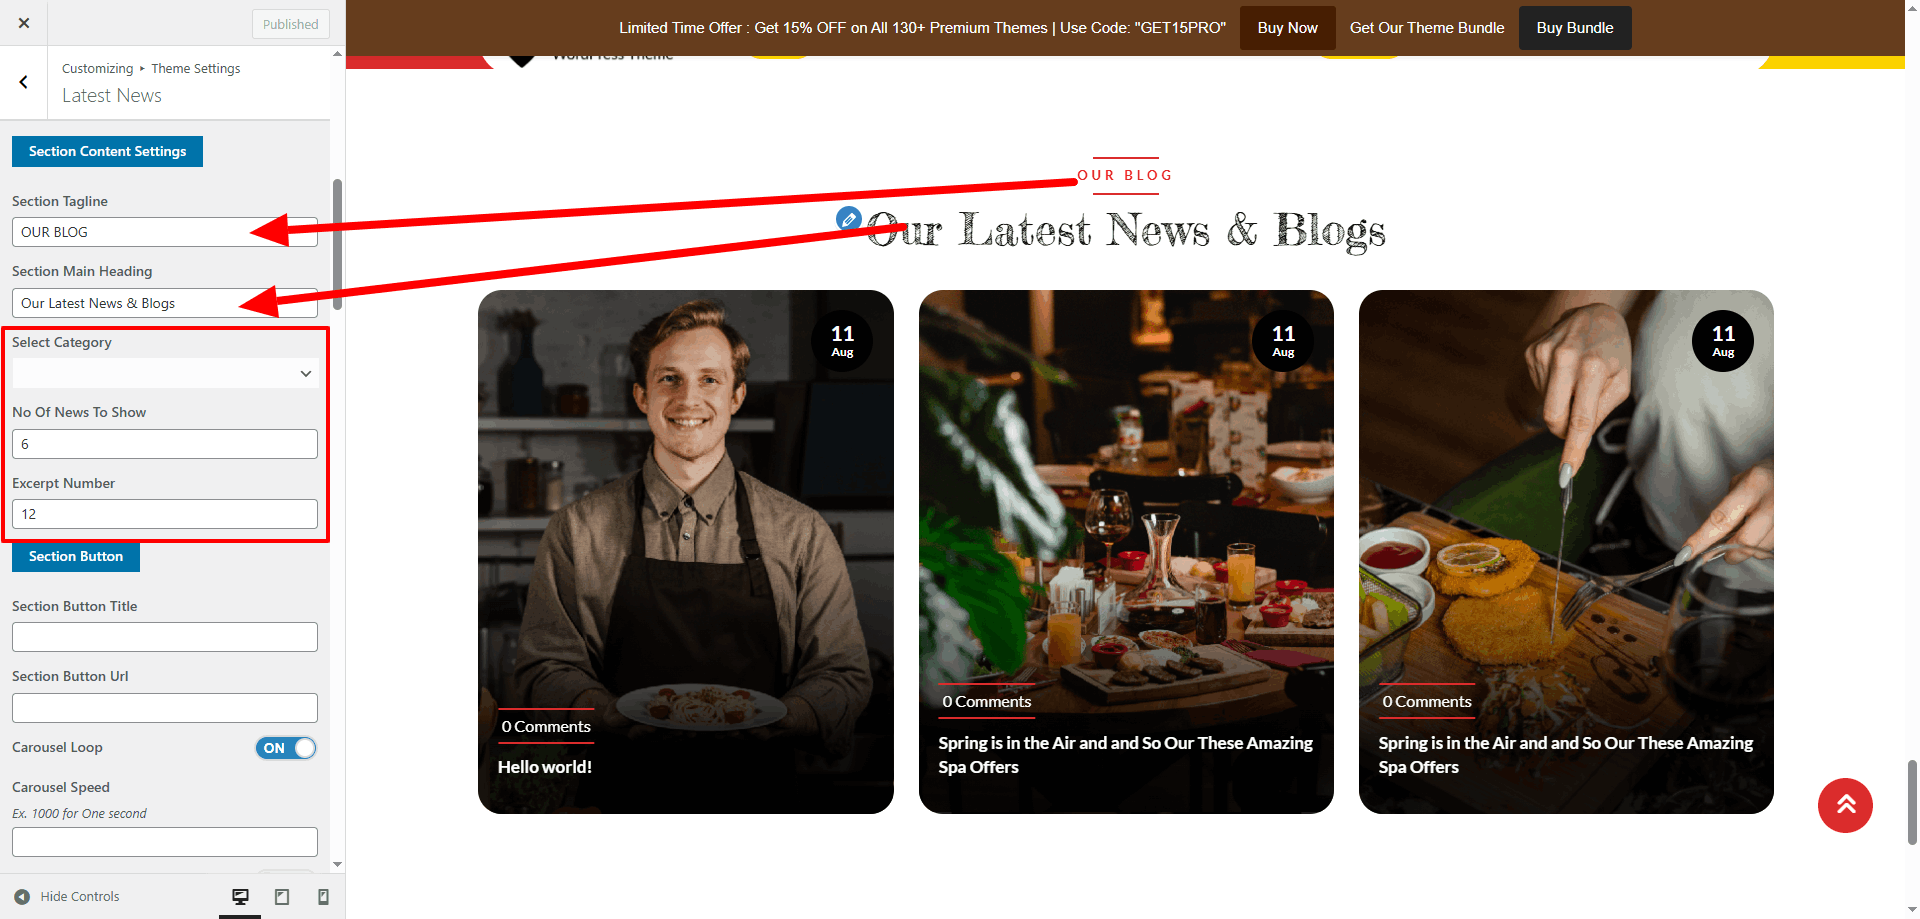
  1. Go to Appearance → Customize → Theme Settings → Blog.
  2. Update the section heading and tagline.
  3. Adjust the number of posts displayed in the section.
  4. Set the excerpt length to limit the number of words shown for each post.
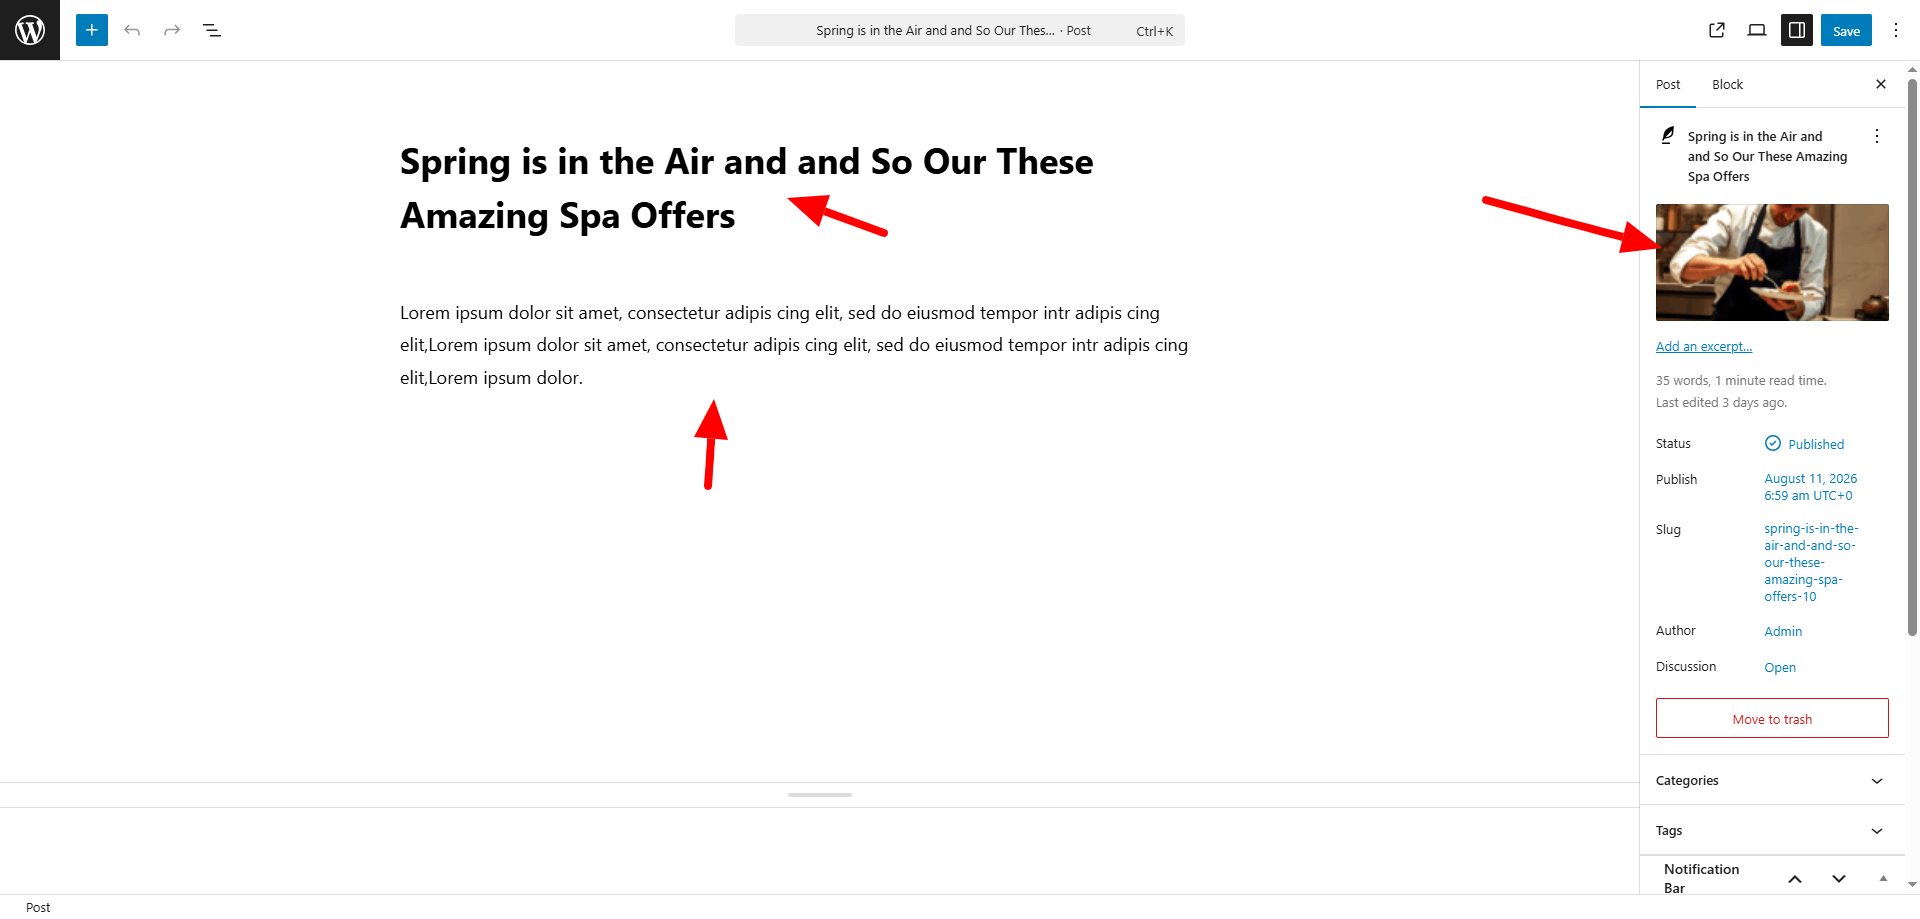
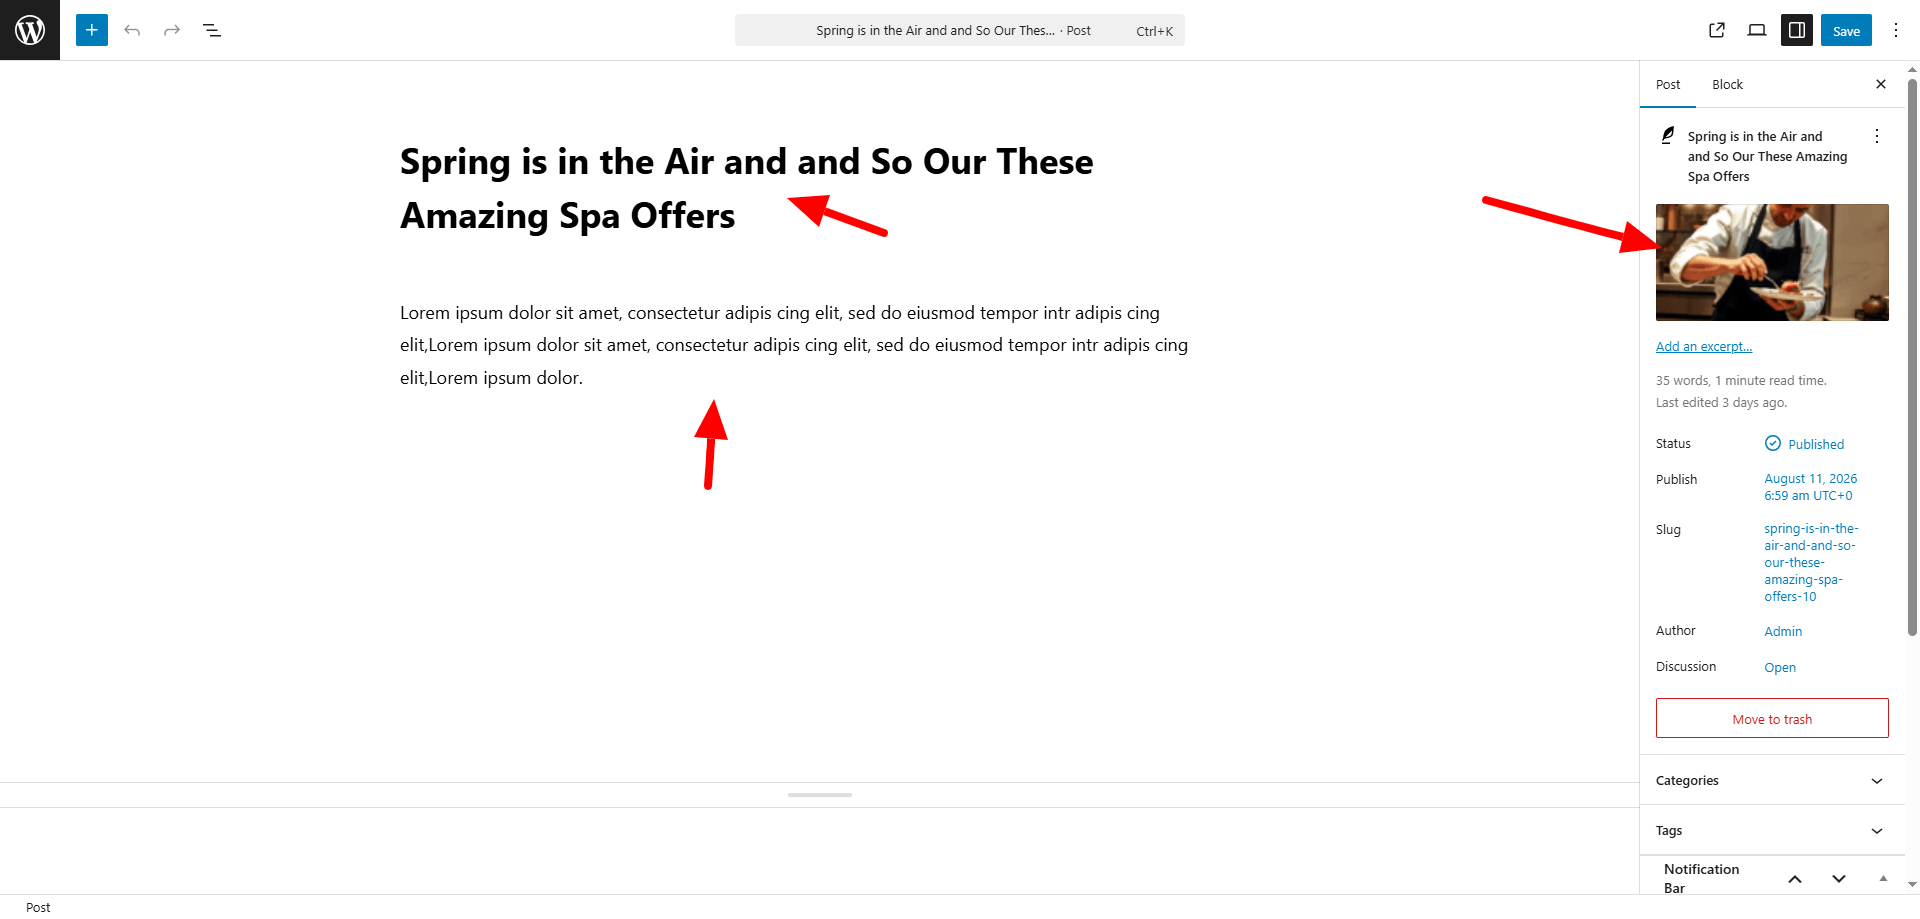
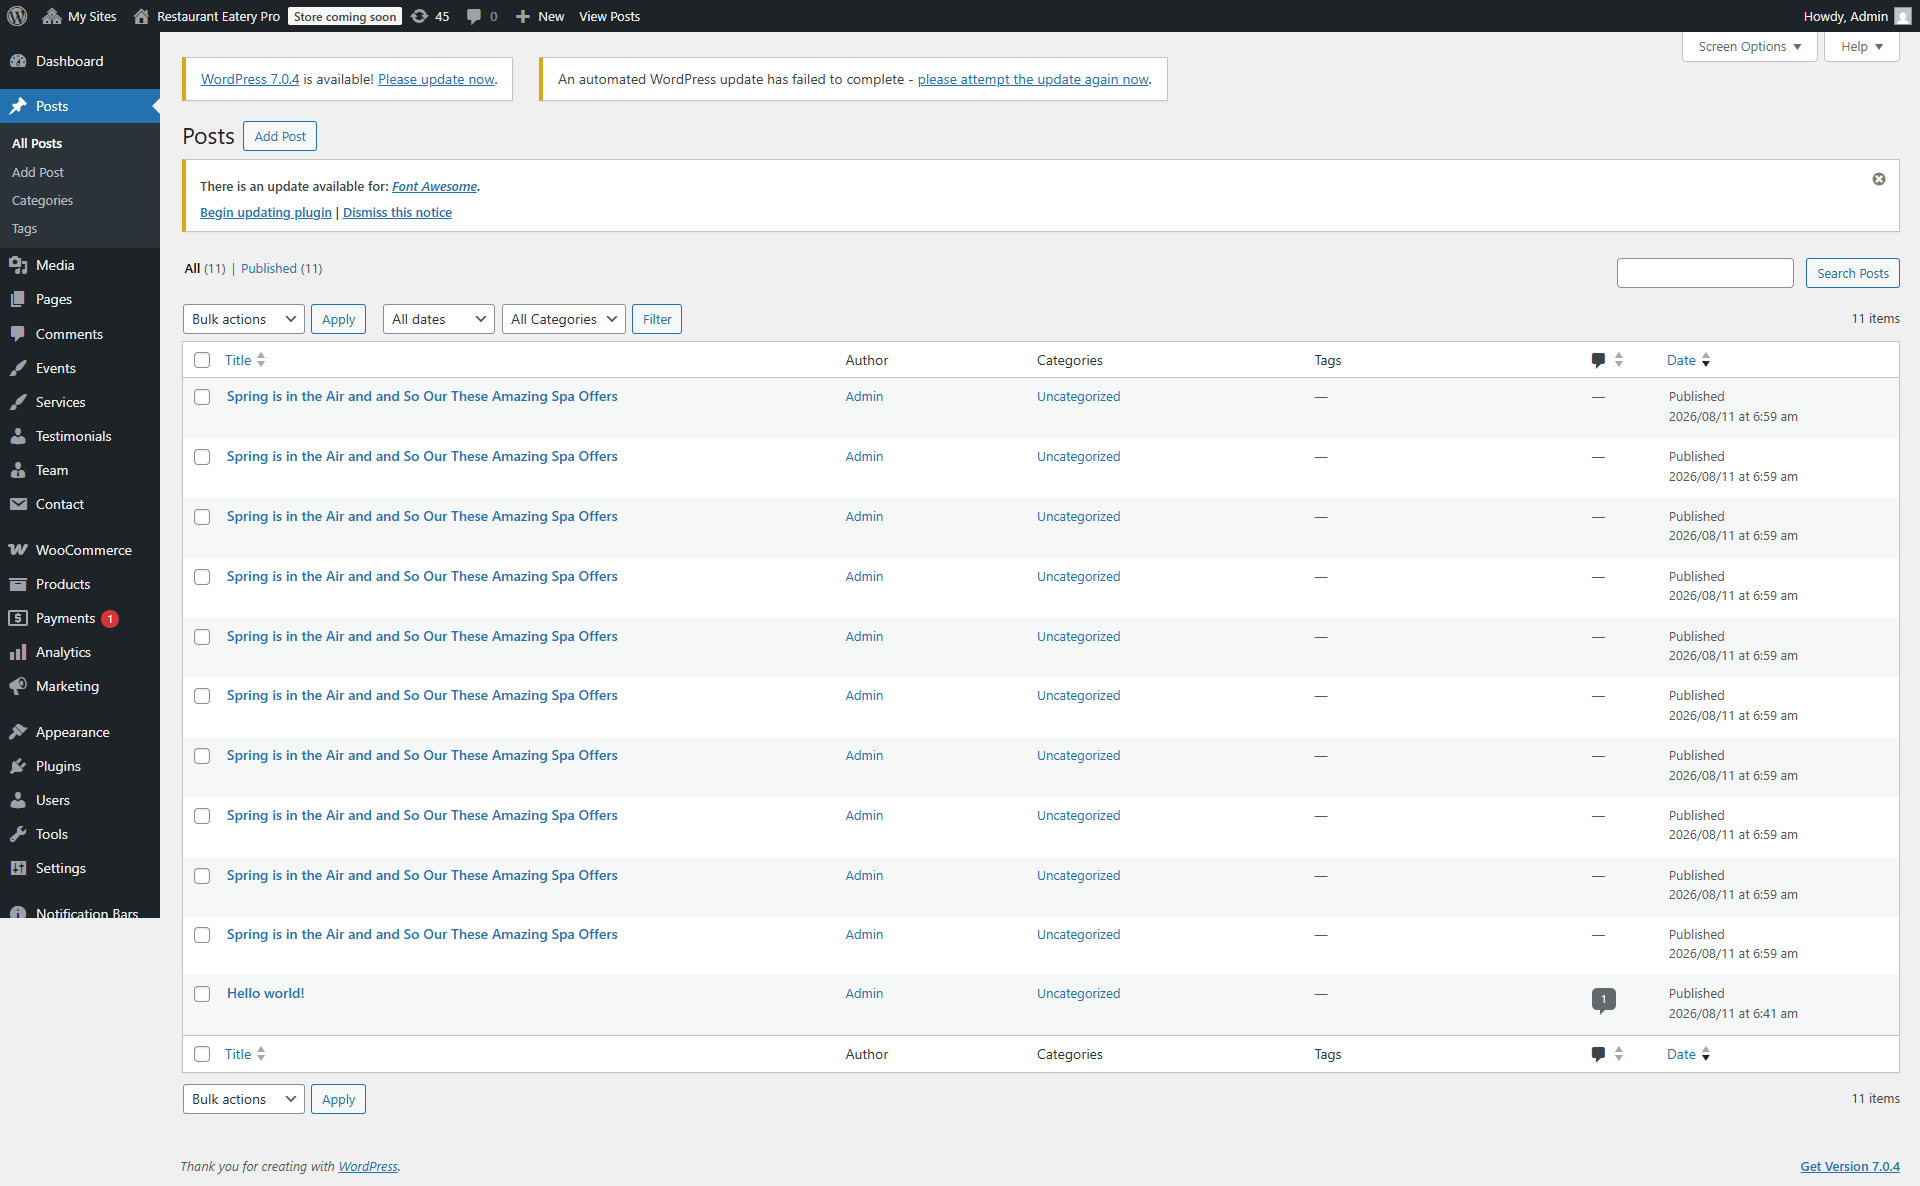
  5. Navigate to Dashboard → Posts to manage blog posts.
  6. Edit demo posts or click Add New to create your own.
  7. Fill in the post title, content, categories, and upload a featured image.
  8. Publish the post. Repeat for each blog entry you want to showcase.
Blog Settings

Blog Post Editor

Blog Example

Blog Display

Page Banner

If you want to change the default page banner then open "General Settings" present under theme settings pannel scroll to the bottom and check the settings specified in below screenshot. When you change the image then it will change the banner of all the pages.
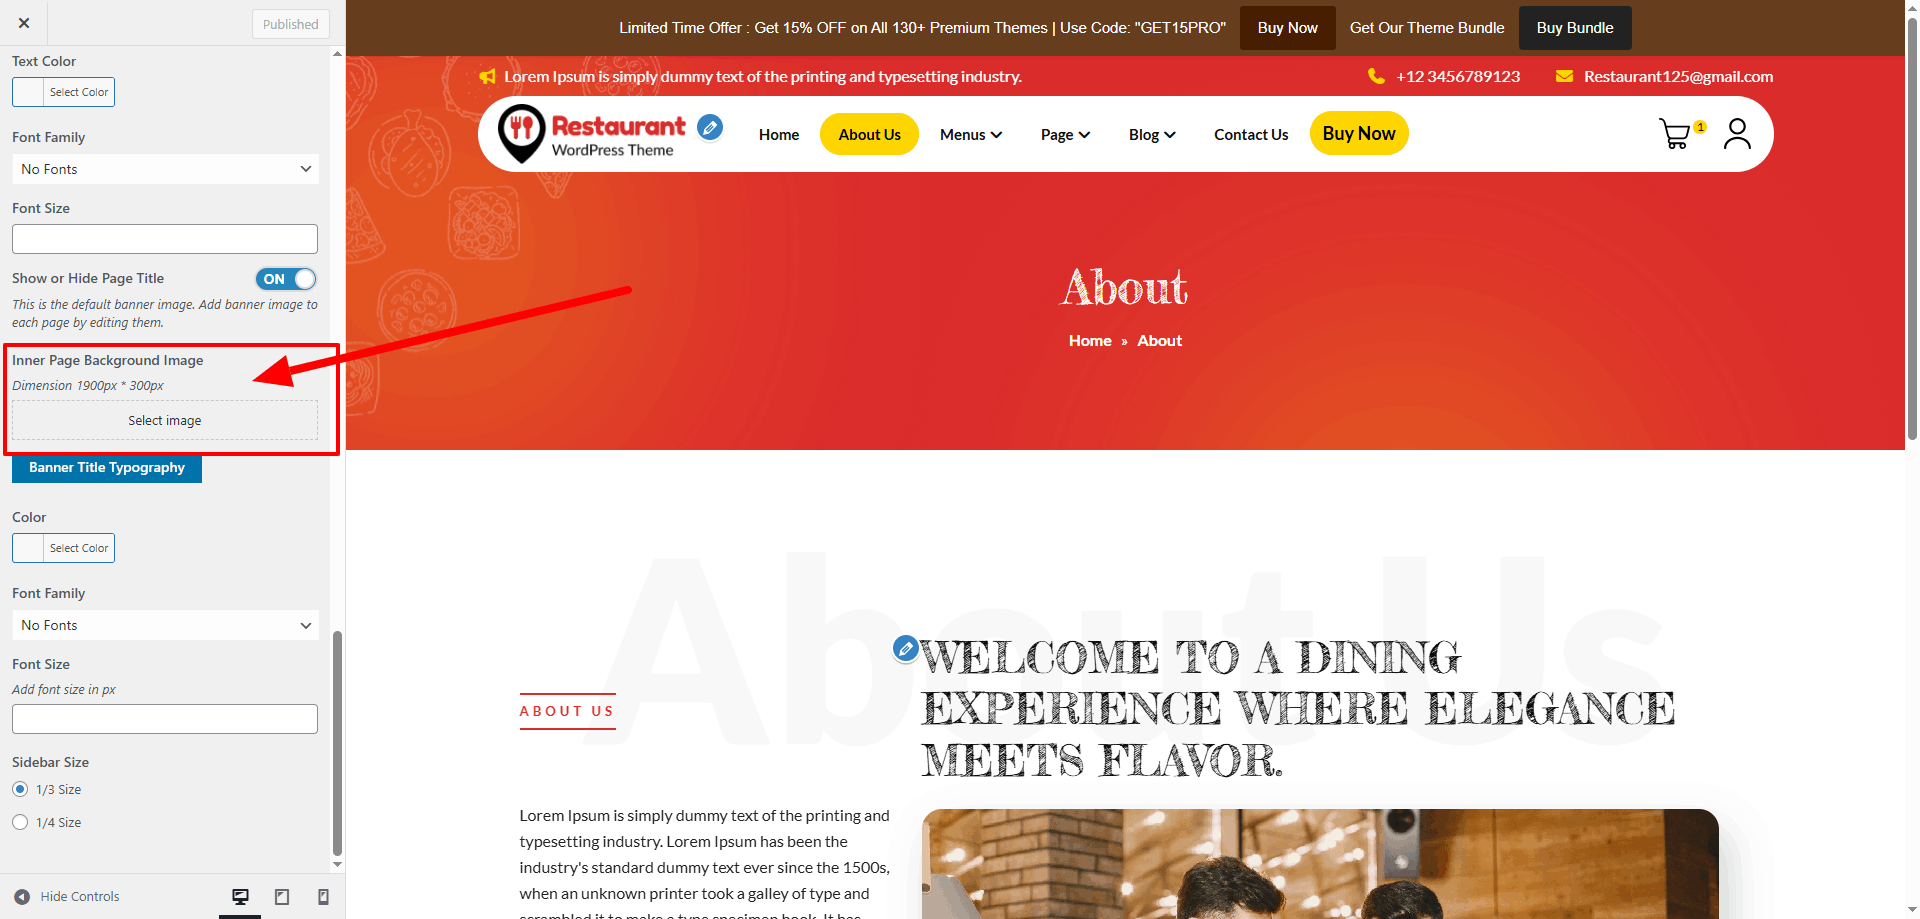
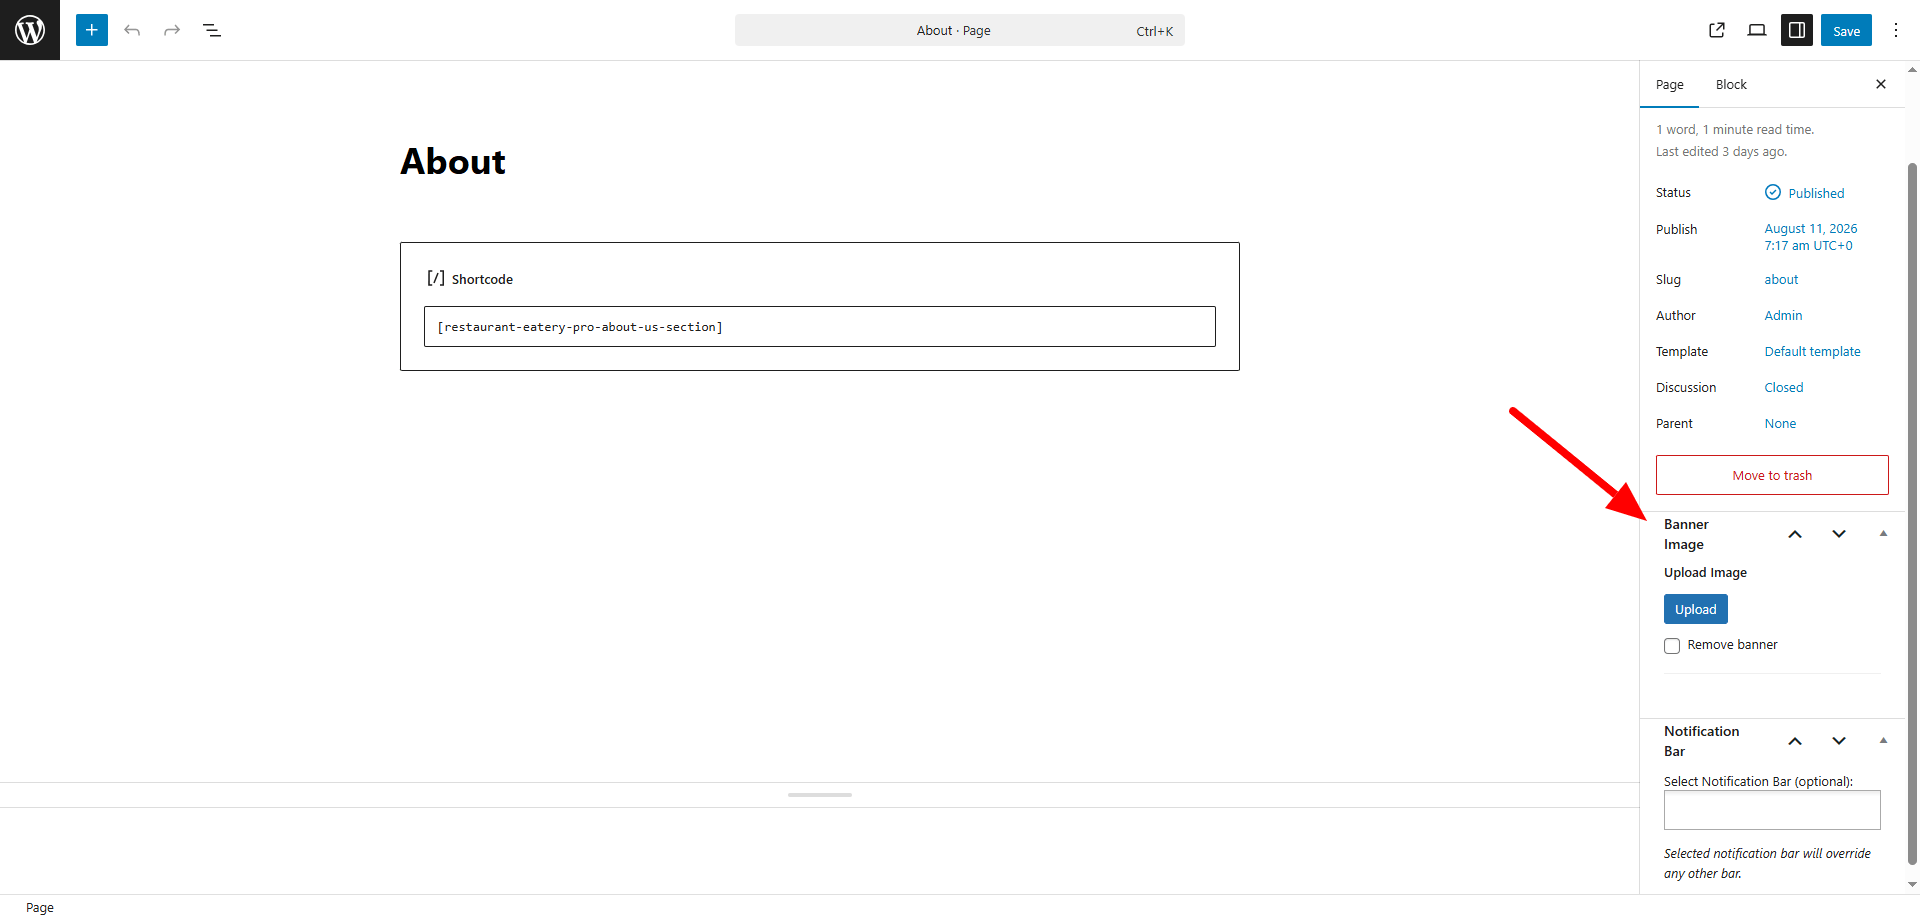
But if you would like add different banner to each pages then you need to add the banner indivisualy to each page. Edit the page for example. we are editing contact page, on the bottom right side column you will see the setting of page banner. Upload the image from here.
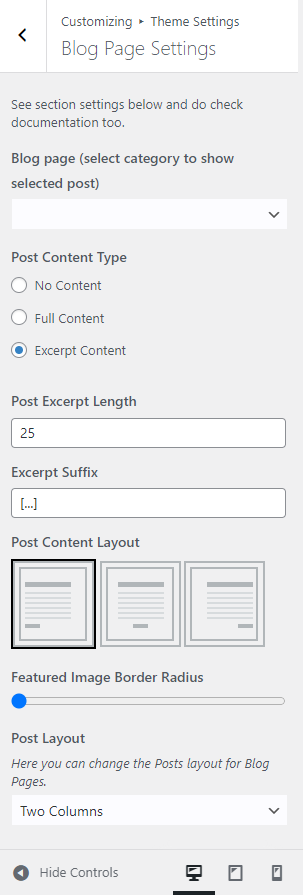
Blog Page Settings

This section contains all the settings related to blog. To access this open General Settings
Single Post Page

This section contains all the settings related to single post page. To access this open Appearance - Customize - Theme Settings - Single Post Page

Single Post Page

This section contains all the genearl settings. To access this open General Settings.

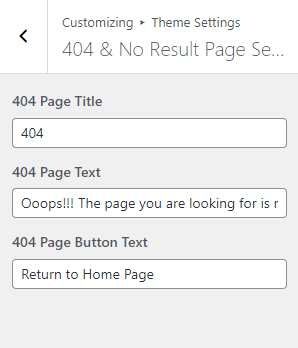
404 Page Settings

This section contains 404 page settings. To access this open 404 Page Settings
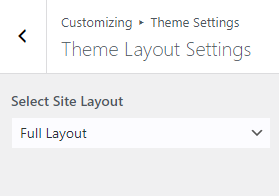
Theme Layout Settings

This section contains full and boxd layout settings. To access this open Theme Layout Settings
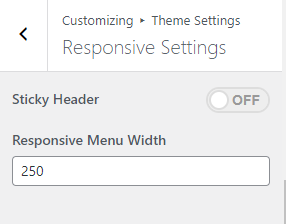
Responsive Settings

Here you can disable the sticky menu from the mobile or tablet view. Also you can set the width of mobile menu sidebar. To access this open Responsive Settings
Copyright © 2026 Restaurant Eatery Wordpress Theme. All Right Reserved.