Description: Find answers to your questions and get support for any issues you encounter while using the theme.
Template Installation
Description: Step-by-step instructions to install the Optical Glasses Pro theme using WordPress Admin or FTP.
Installation via WordPress Admin
The template installation process is simple and can be done in two ways.
Step 1: Log into your WordPress dashboard.
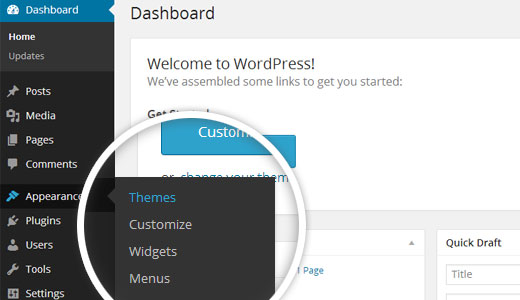
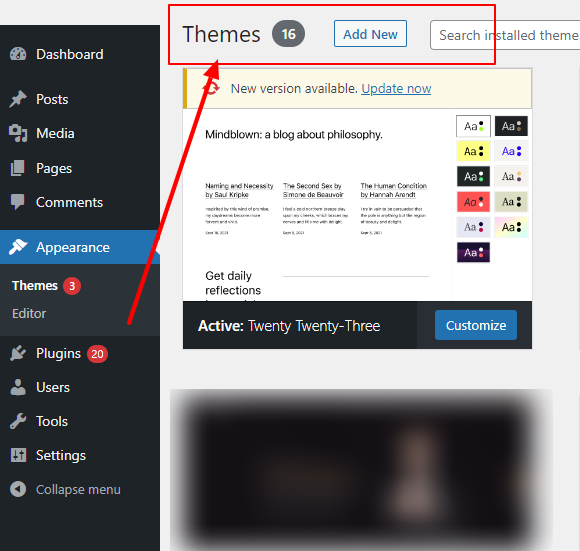
Step 2: Go to Appearance → Themes as shown below.
Step 3: Click the "Add New" button.
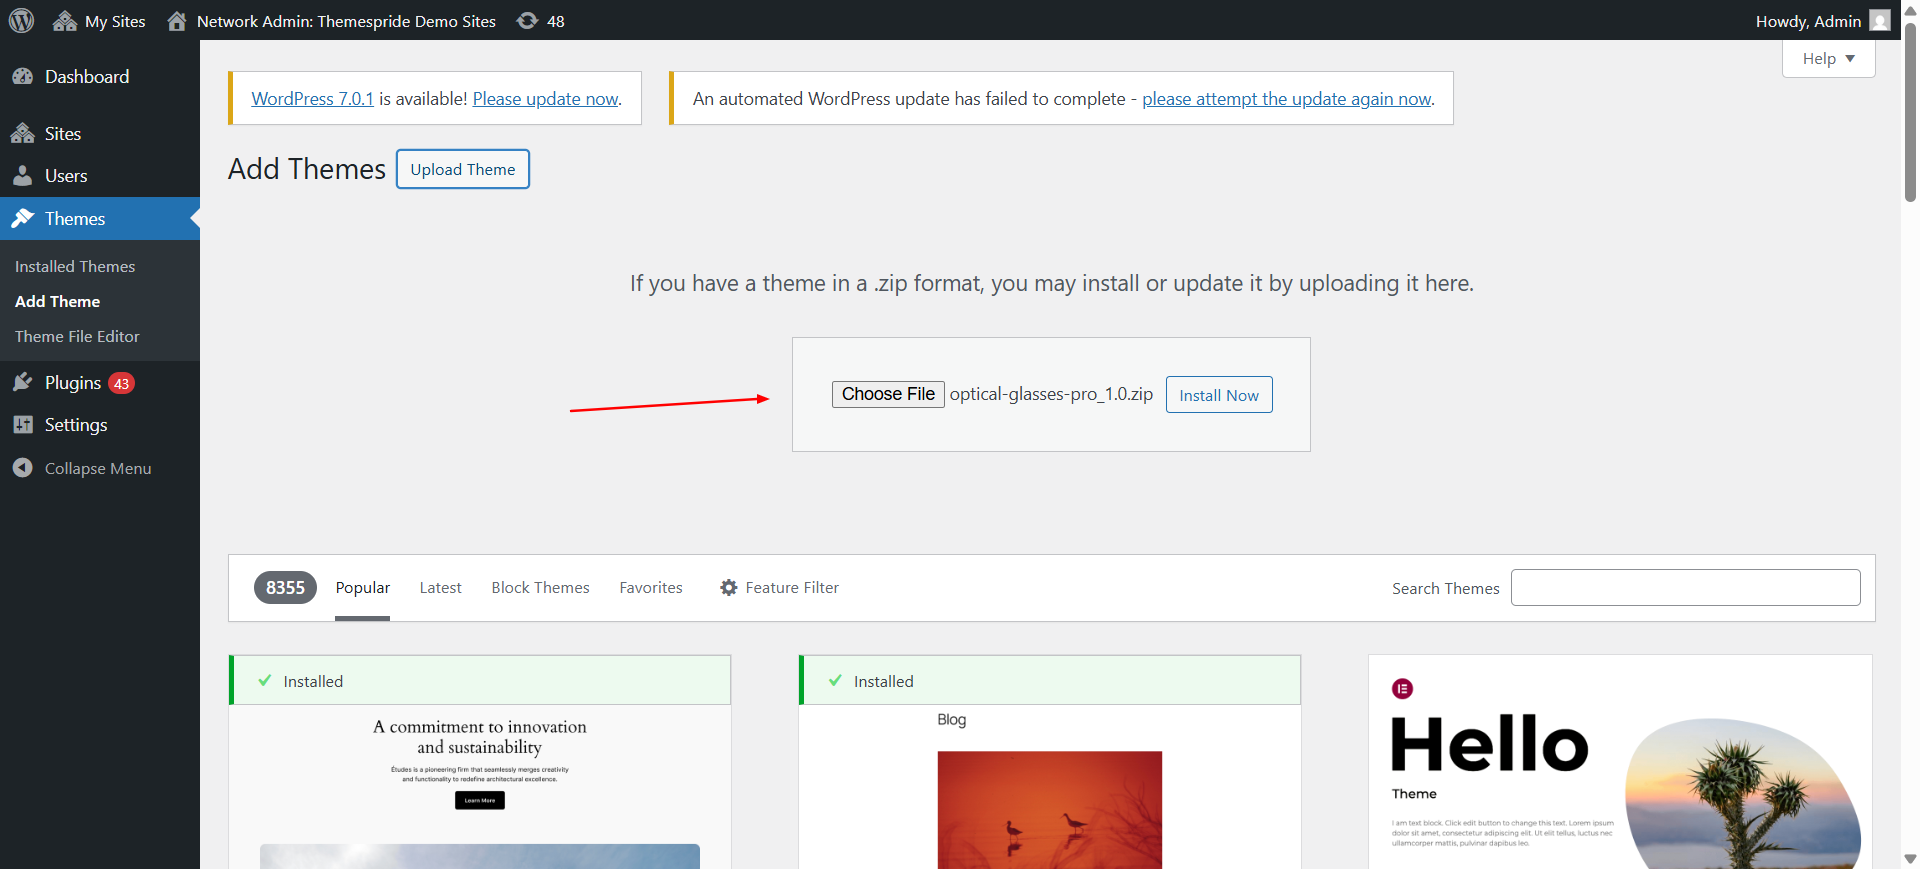
Step 4: Click the upload button and select the theme zip file:
File name:optical-glasses-pro_1.0.zip (version may vary)
Step 5: WordPress will install your theme and prompt you to activate it.
Installation via FTP
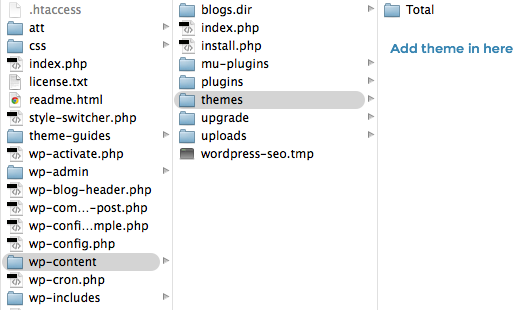
Login to your FTP client and upload the theme folder to wp-content/themes.
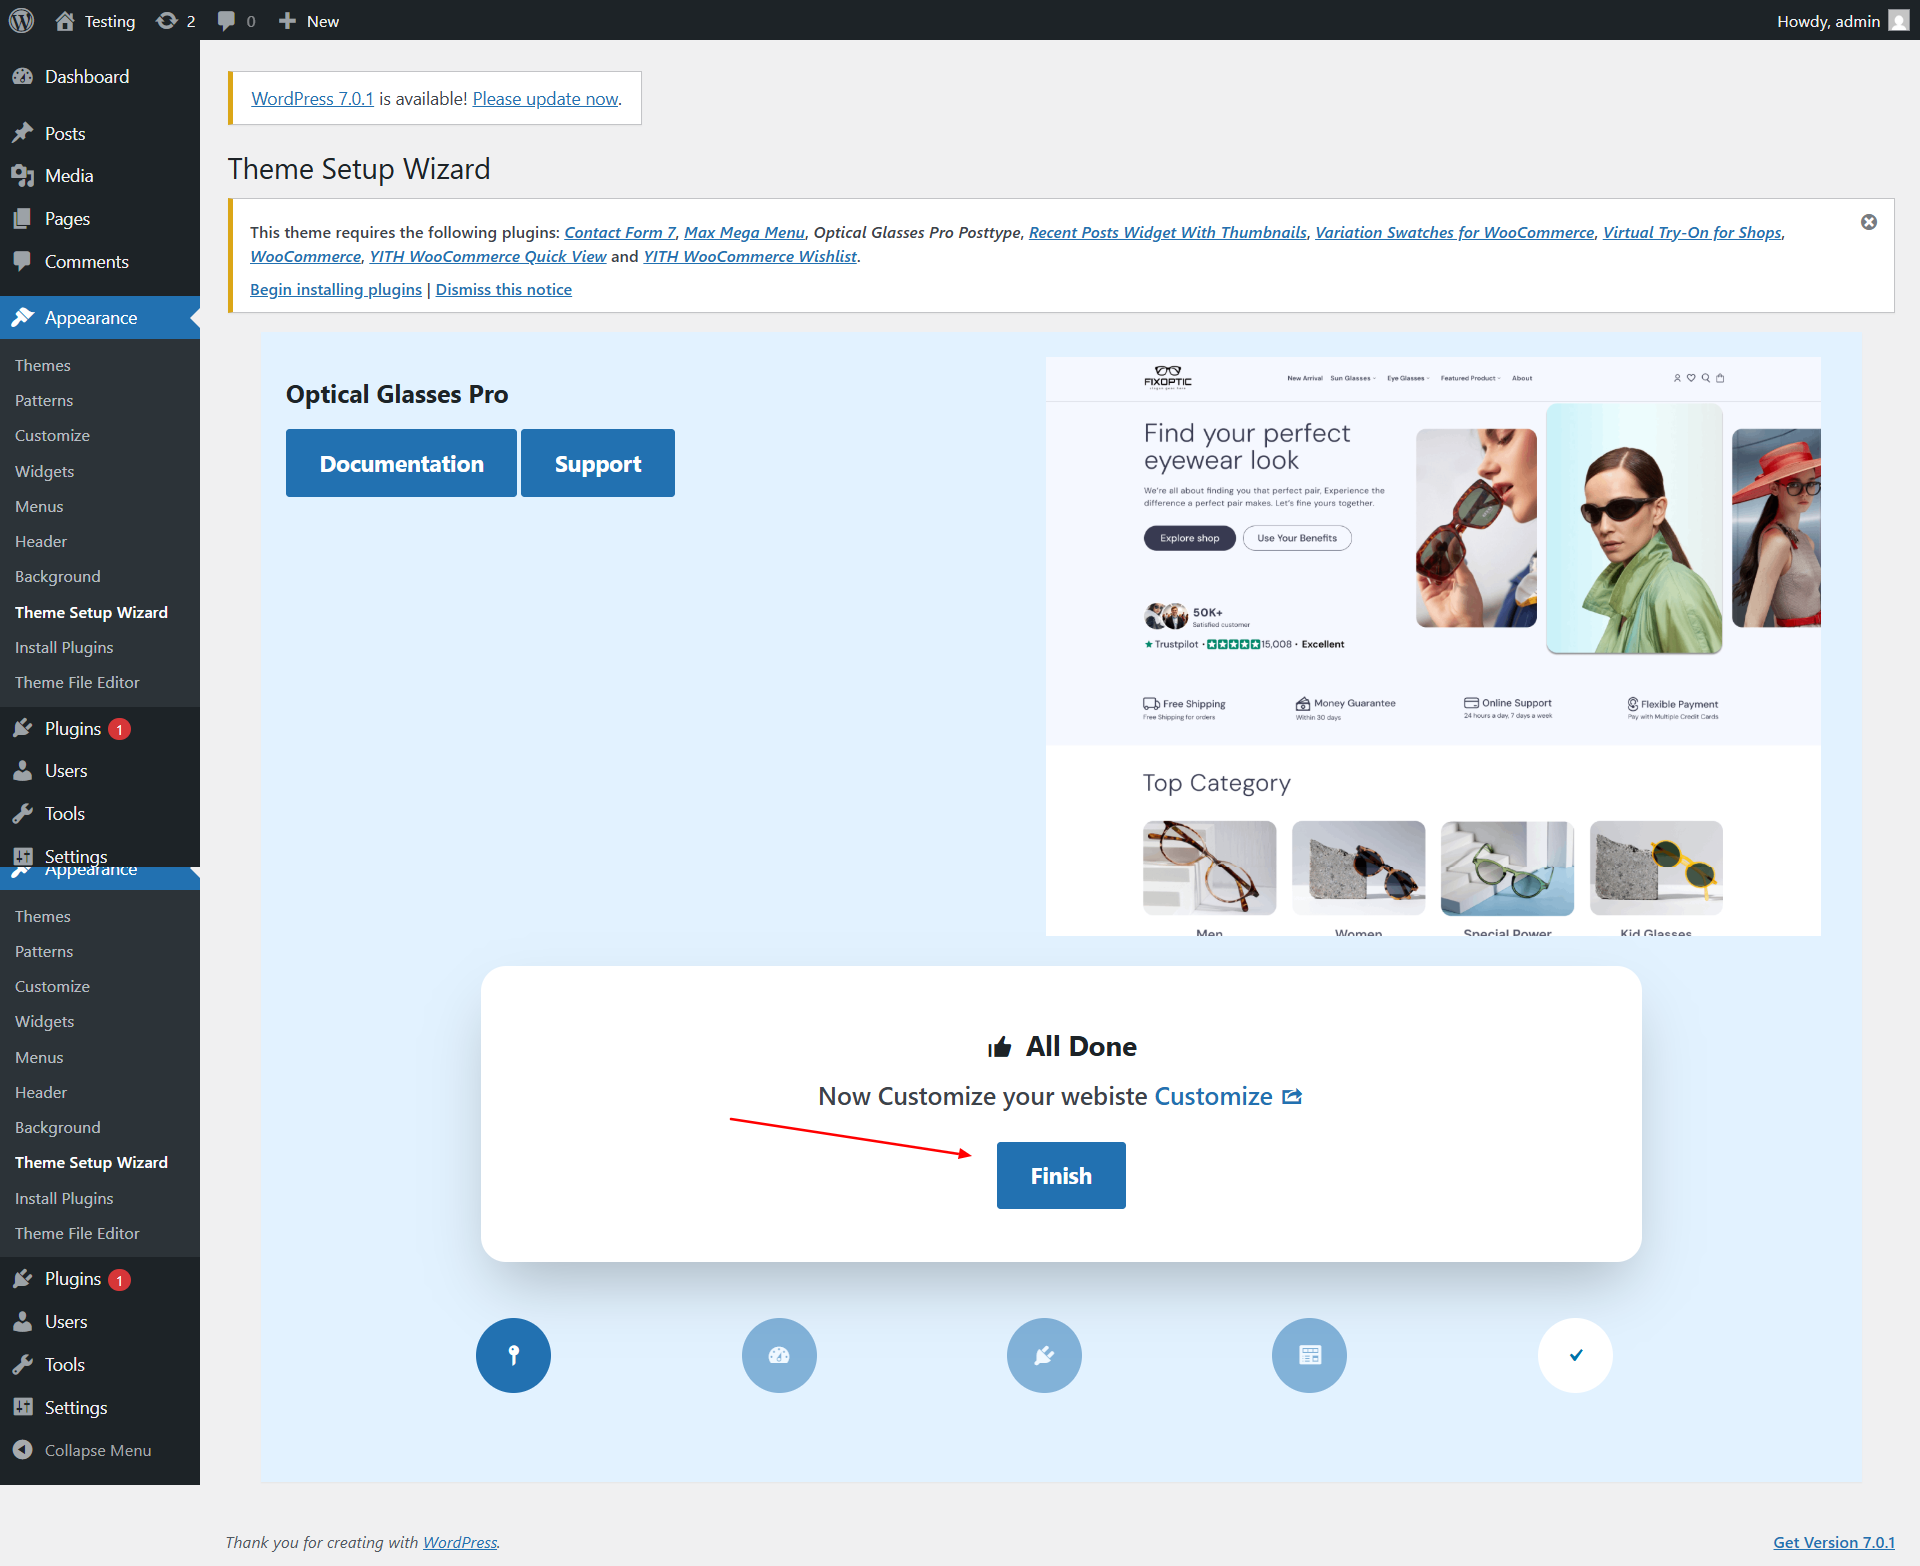
Once activated, you will be redirected to the Theme Setup Wizard.
Demo Importer
Description: Learn how to import demo content to quickly set up your site like the live demo.
To import demo content exactly as shown on our live demo site, follow these steps:
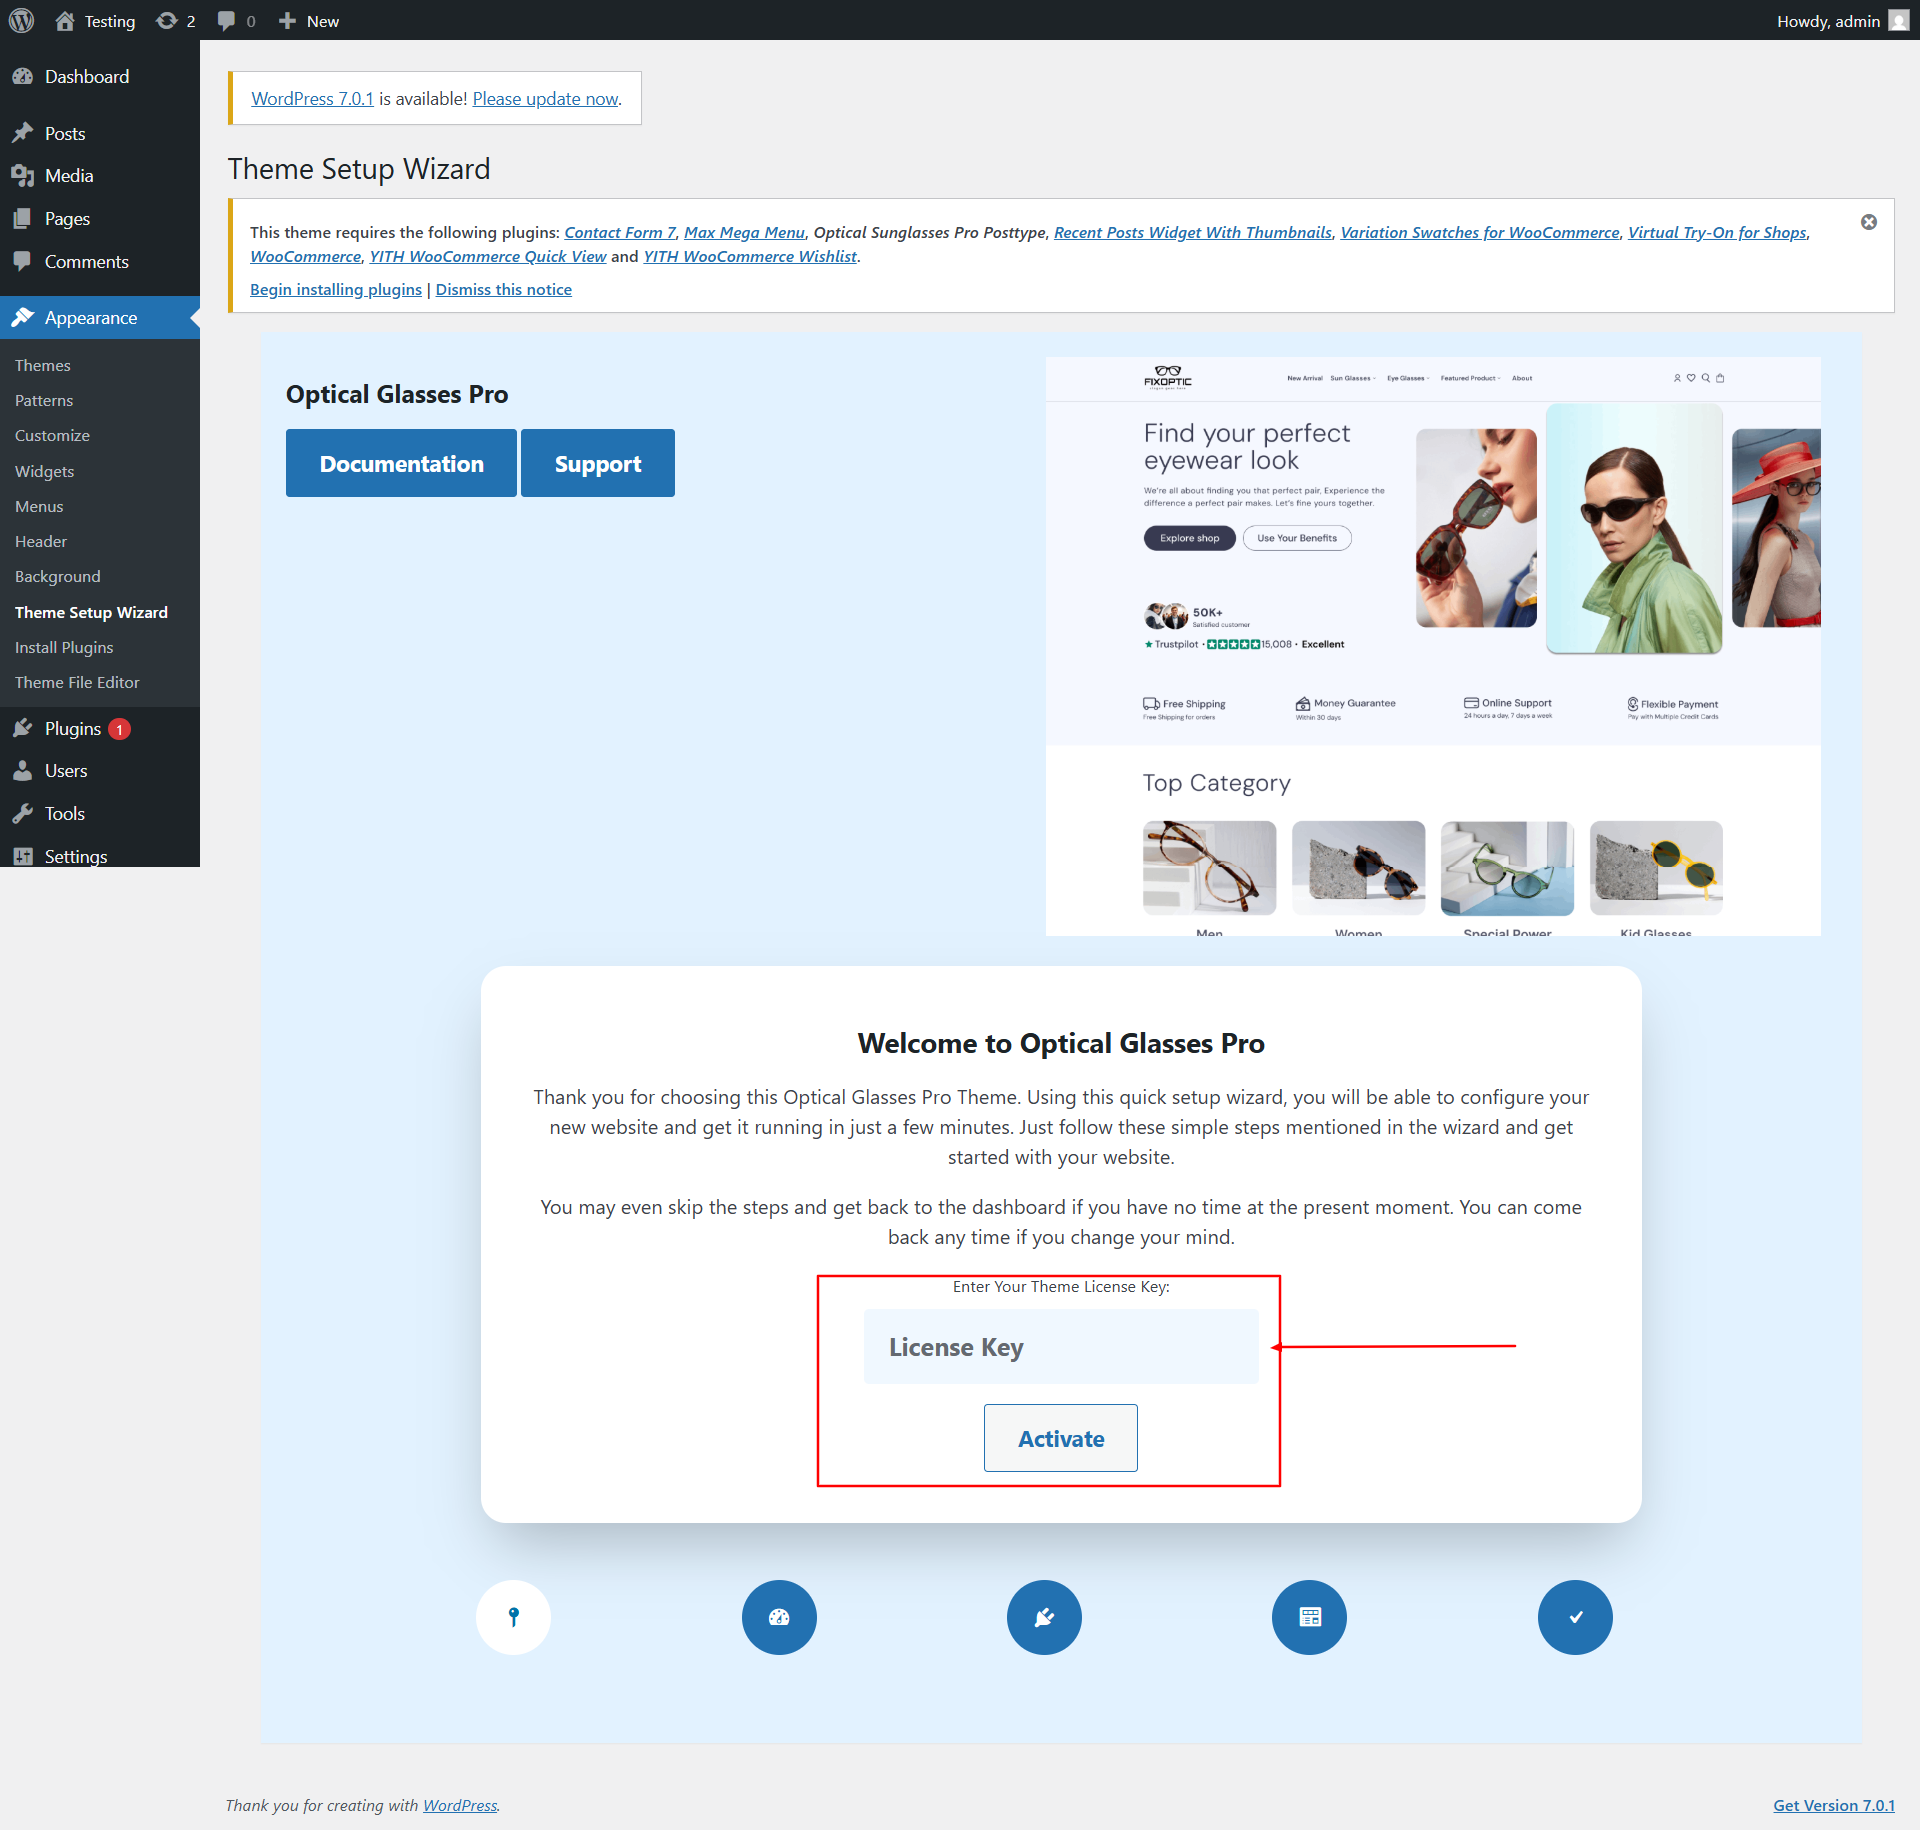
Go to Appearance → Theme Setup Wizard.
Add your activation key received via email.
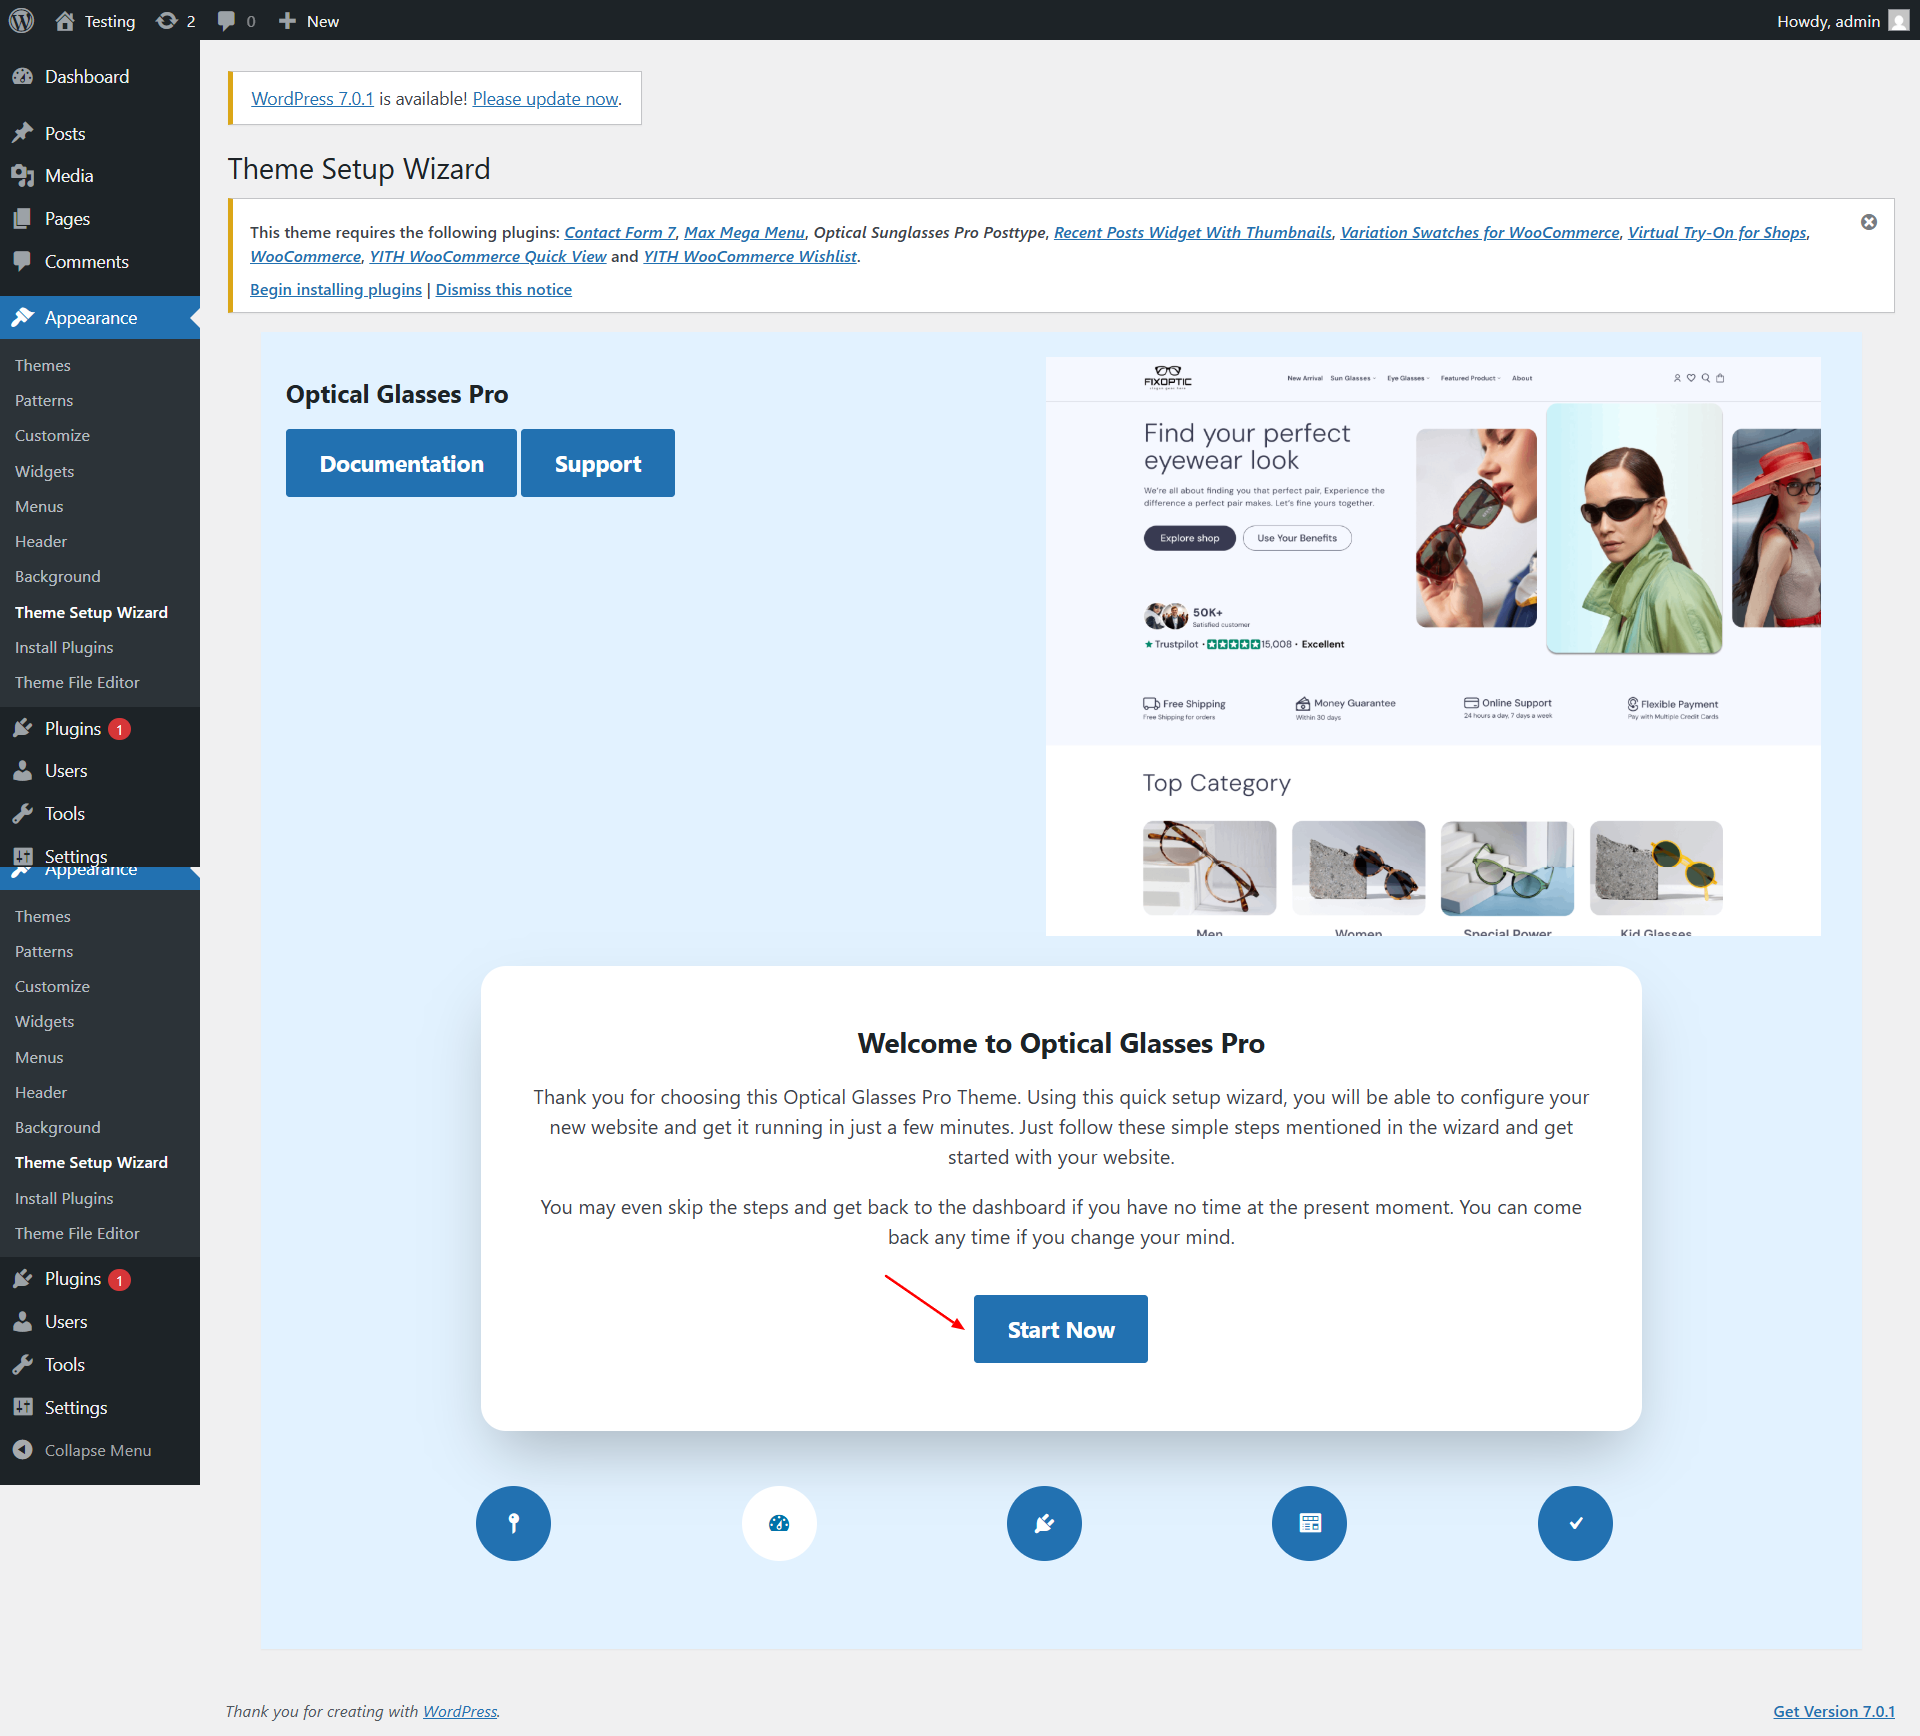
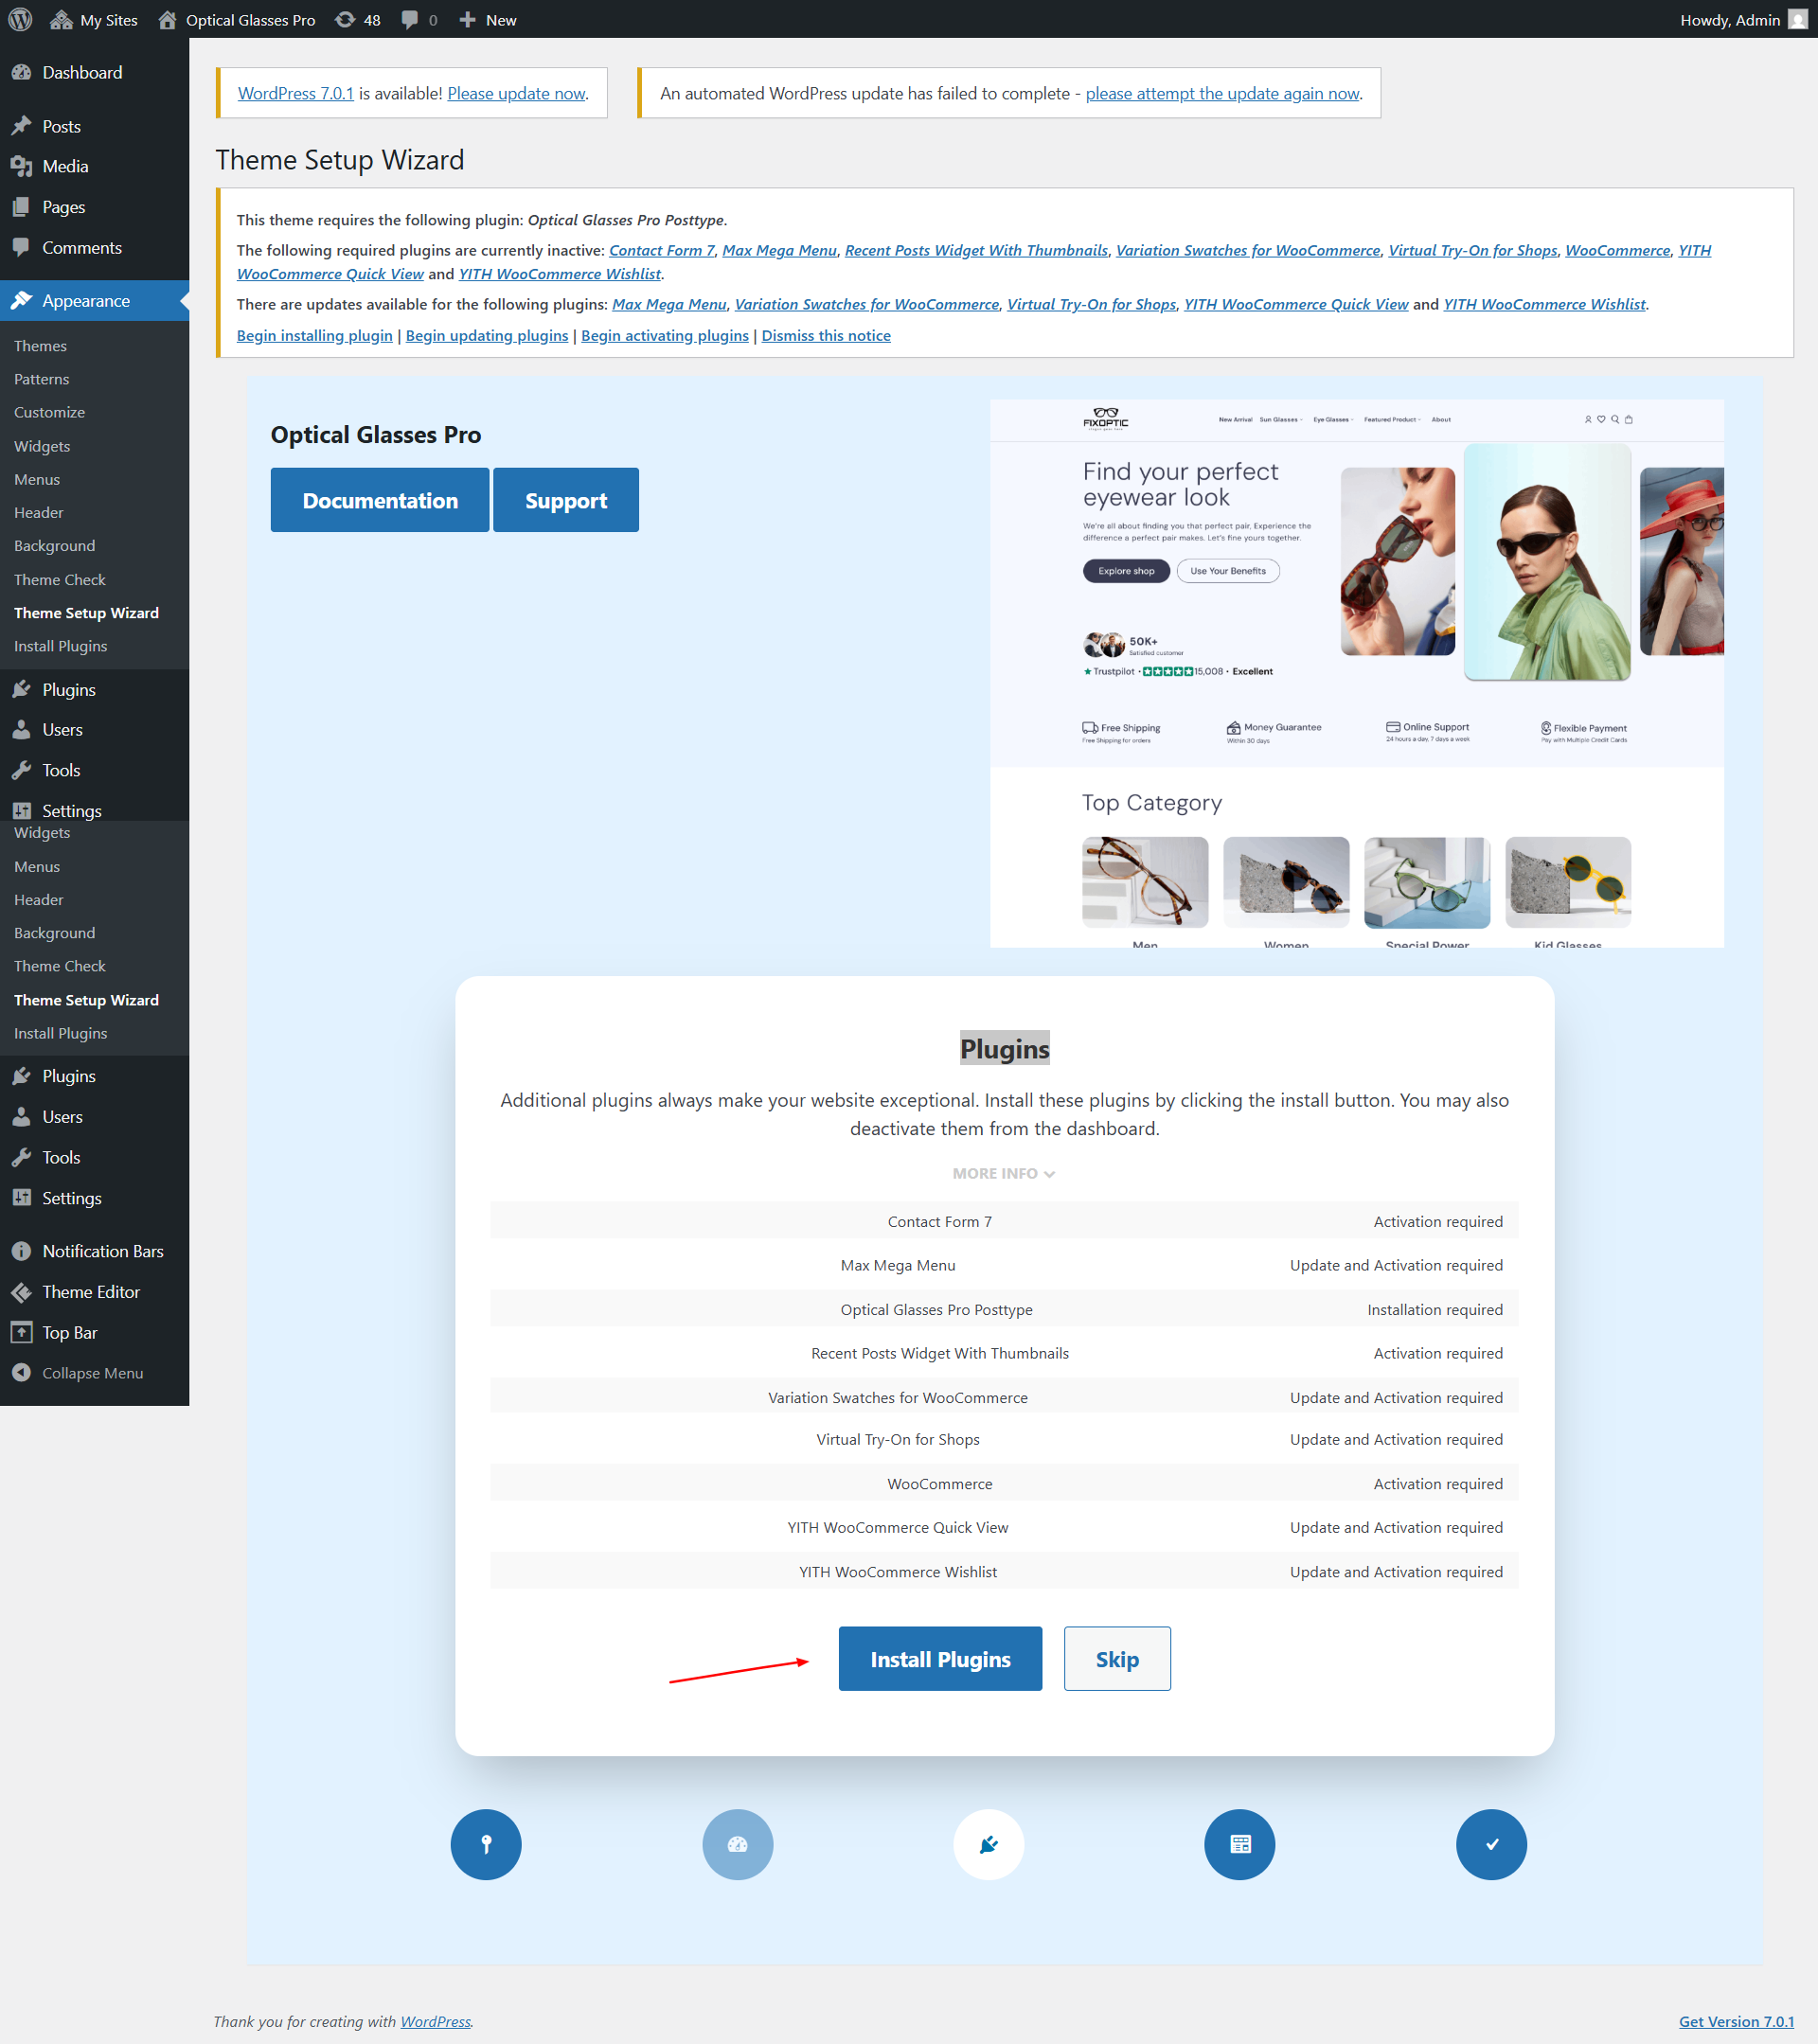
Click “Start Now”. Plugins required will be listed under “More Info”.
Click “Install Plugins” to begin installation.
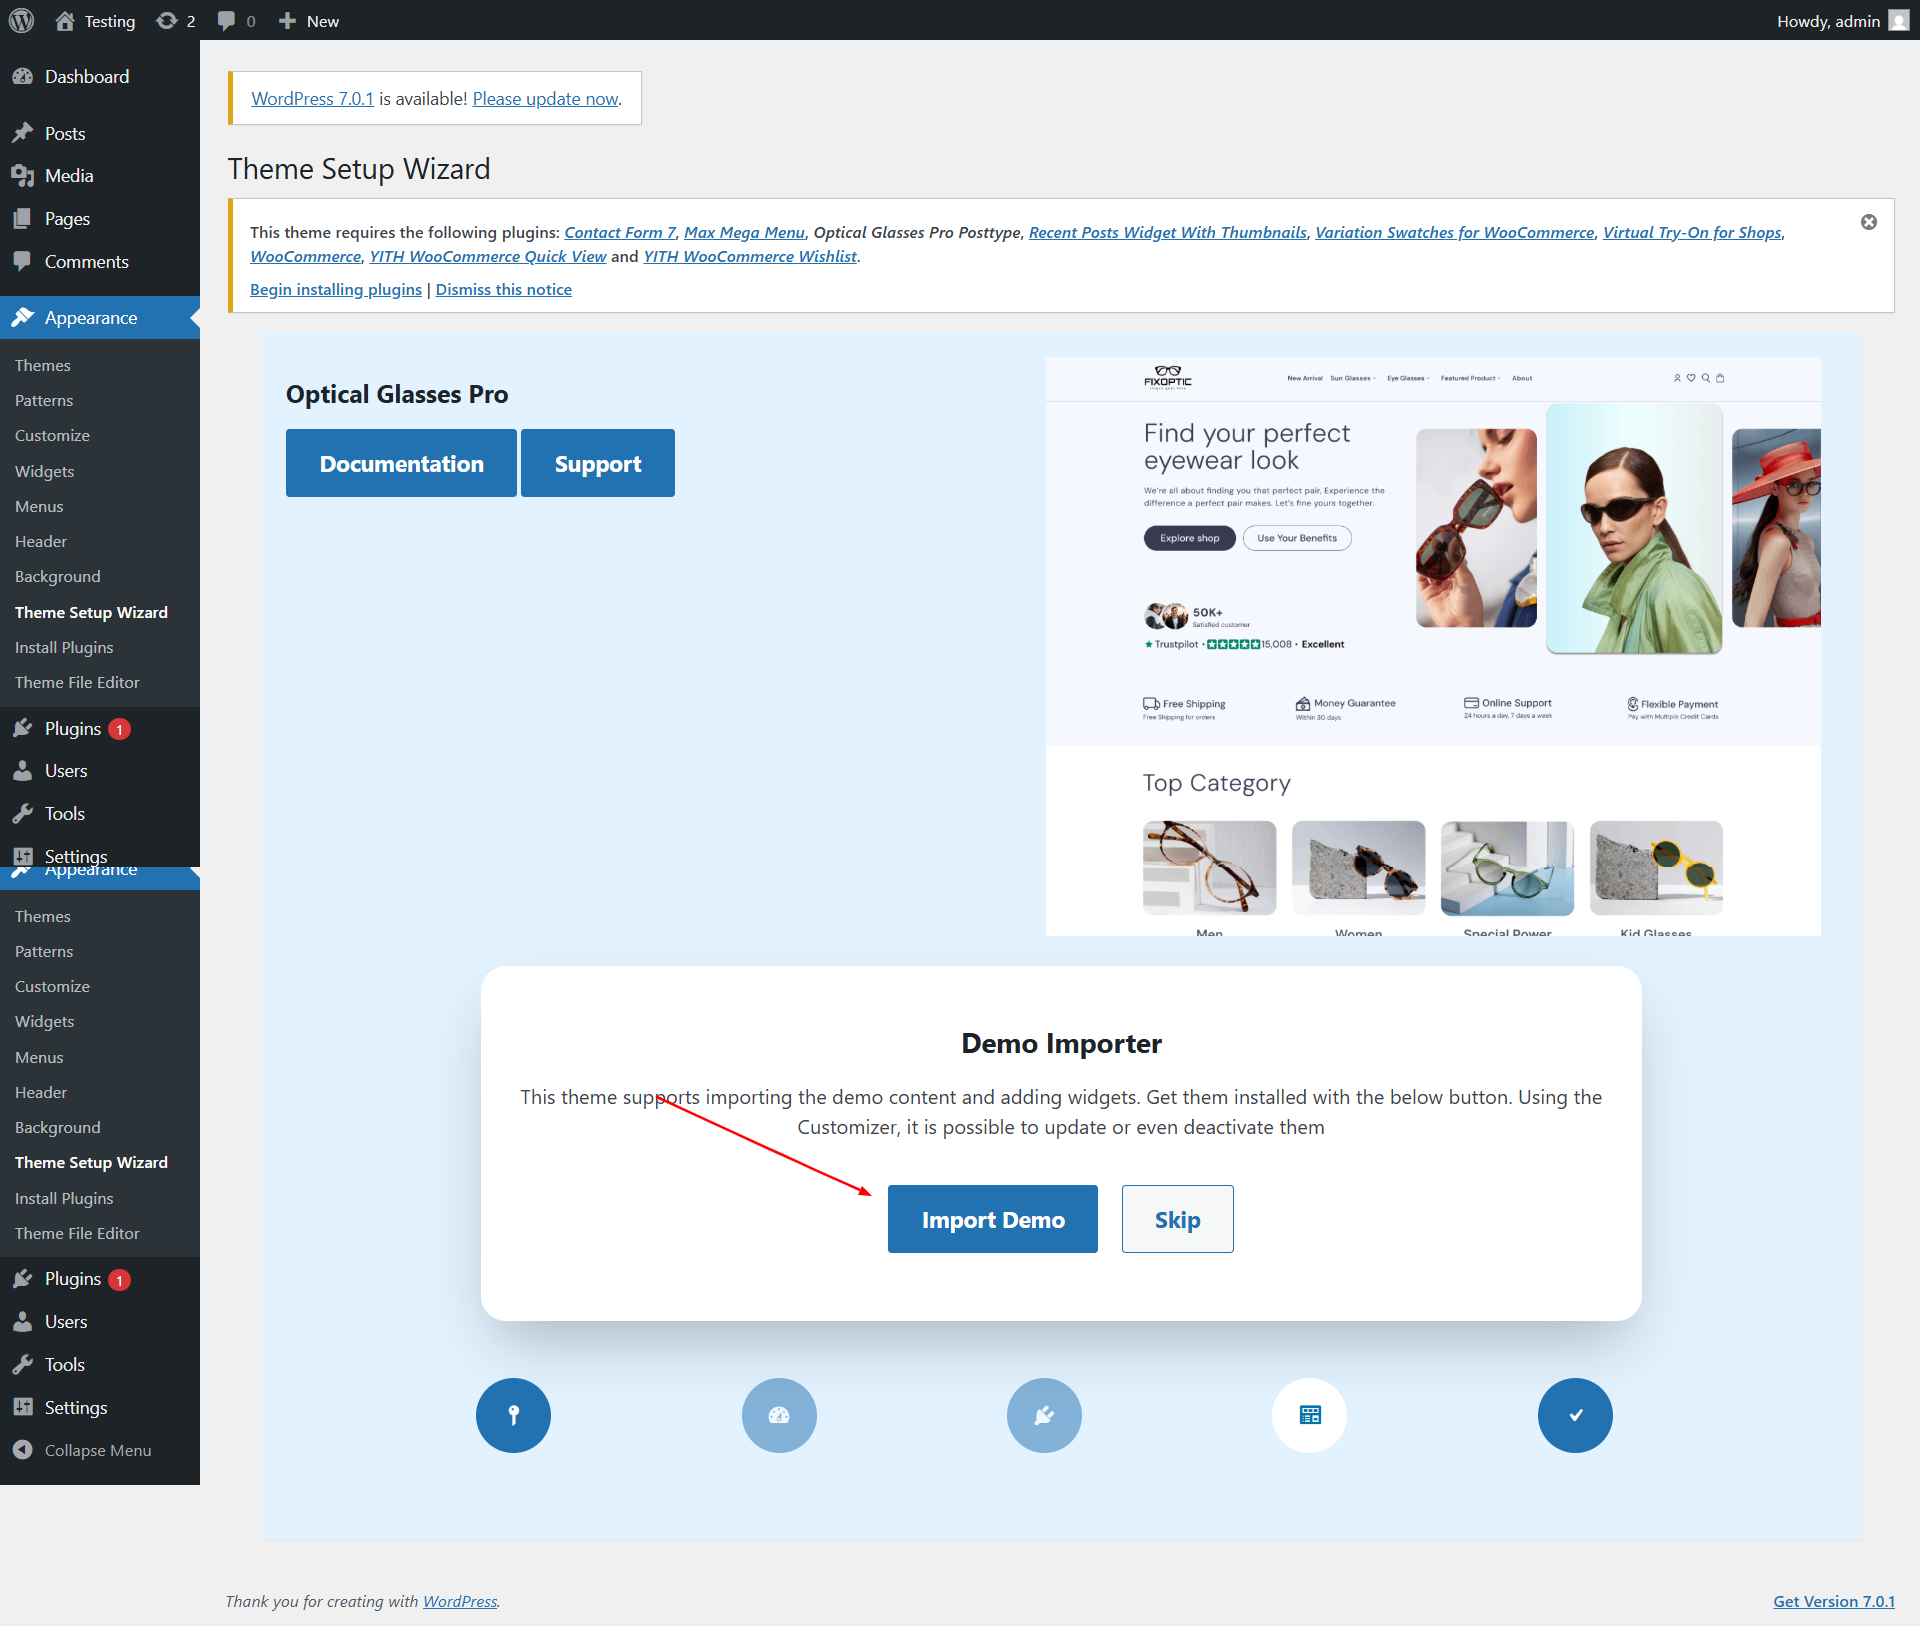
Click “Import Demo” to install demo content.
Once complete, your homepage will display the demo content.
Customize Demo
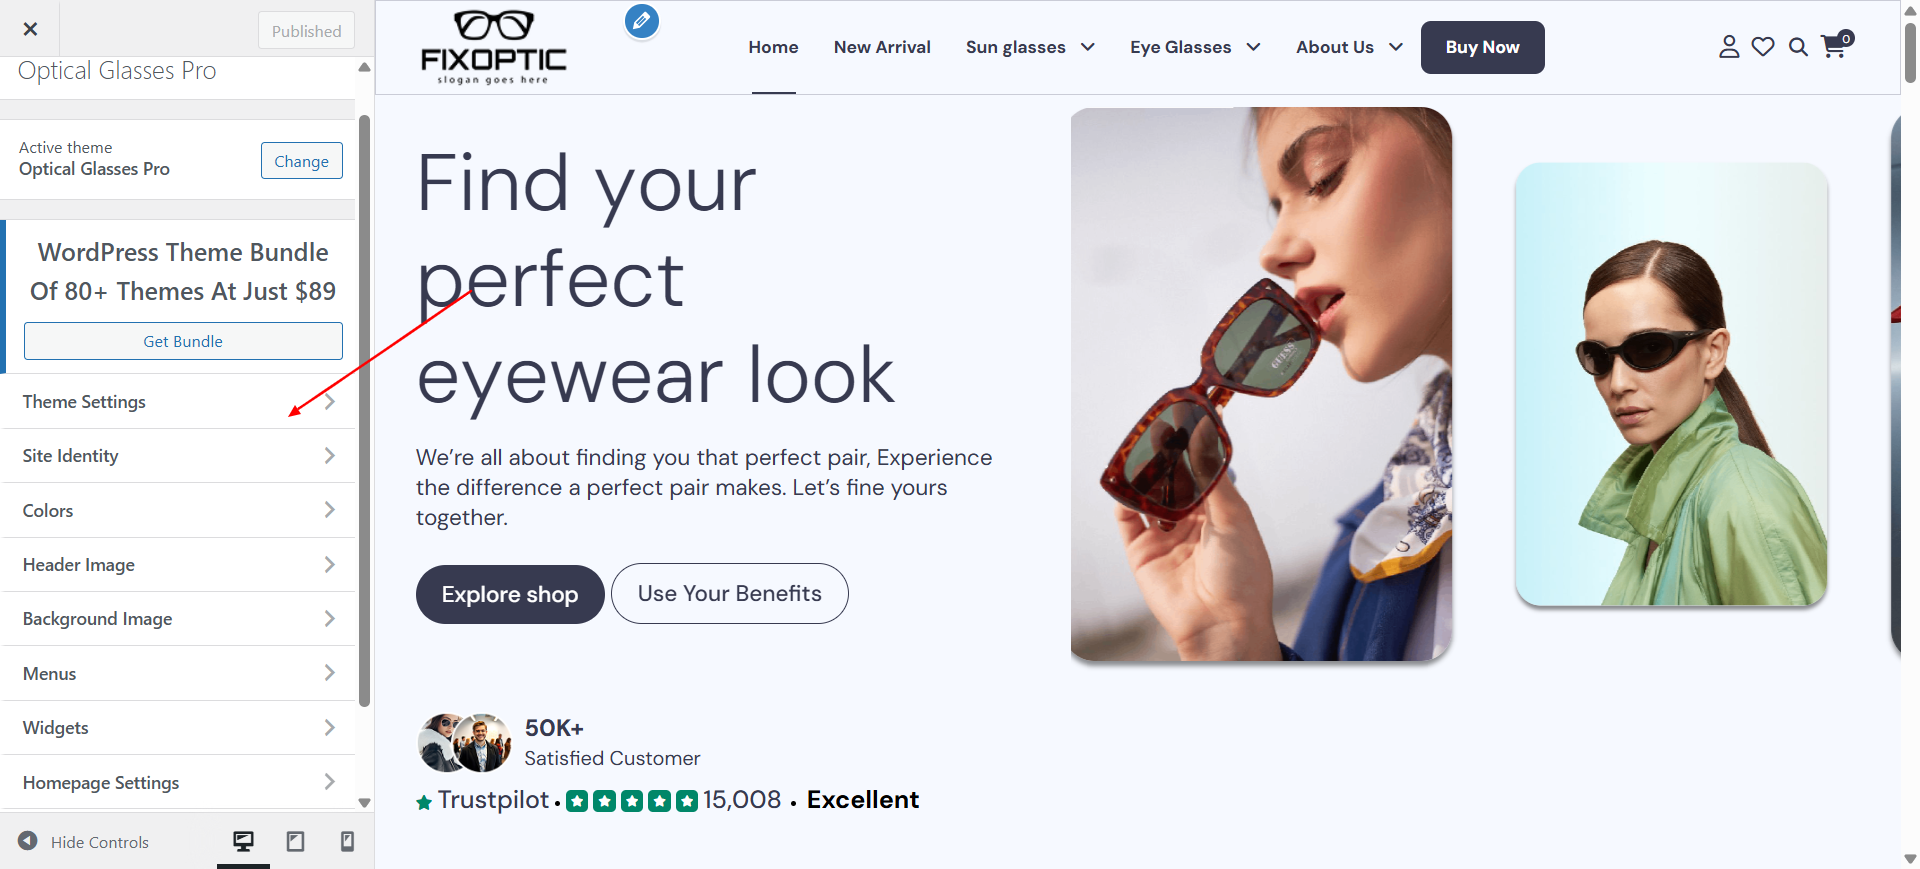
Customize your site via Appearance → Customize → Theme Settings.
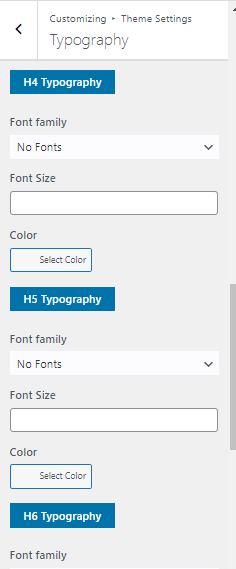
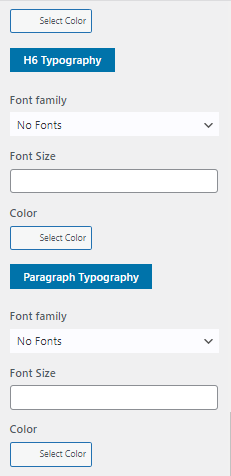
Section Reordering & Typography
Description: Customize the look and feel of your site by changing colors, fonts, and section order.
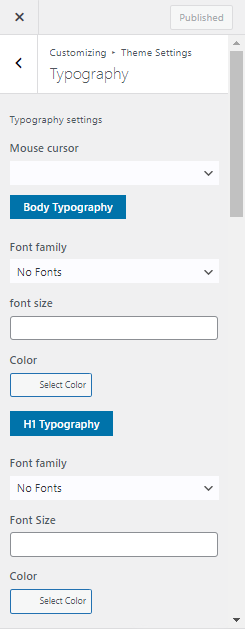
You can change global theme colors and fonts in one click.
Each section includes options to customize content, titles, buttons, and background colors.
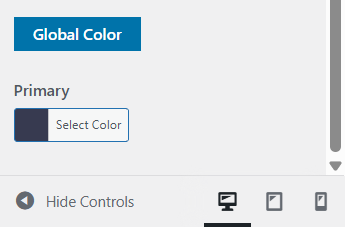
Global Color
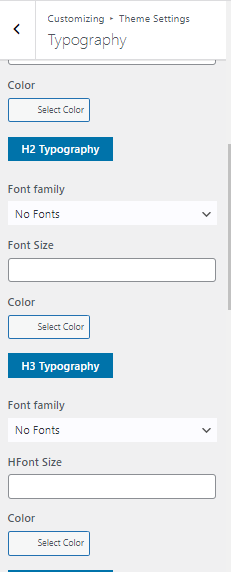
Change the full theme color under Appearance → Customize → Theme Settings → Typography.
Scroll to the bottom and select both color options to apply the gradient.
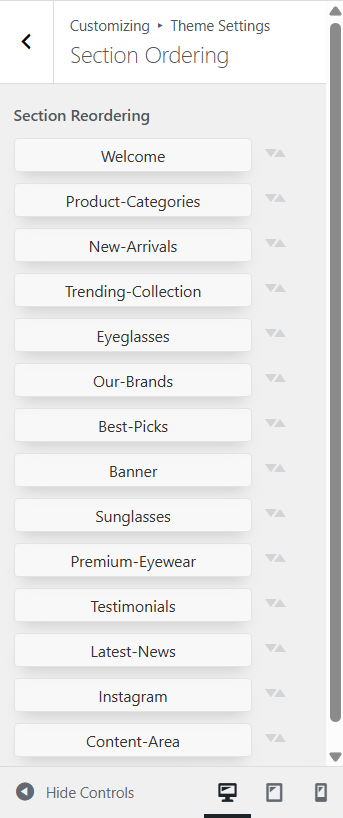
Section Reordering
Drag and reorder theme sections to fit your layout preferences.
Configure "Header"
Description: Configure your site header, upload your logo, and manage navigation menus.
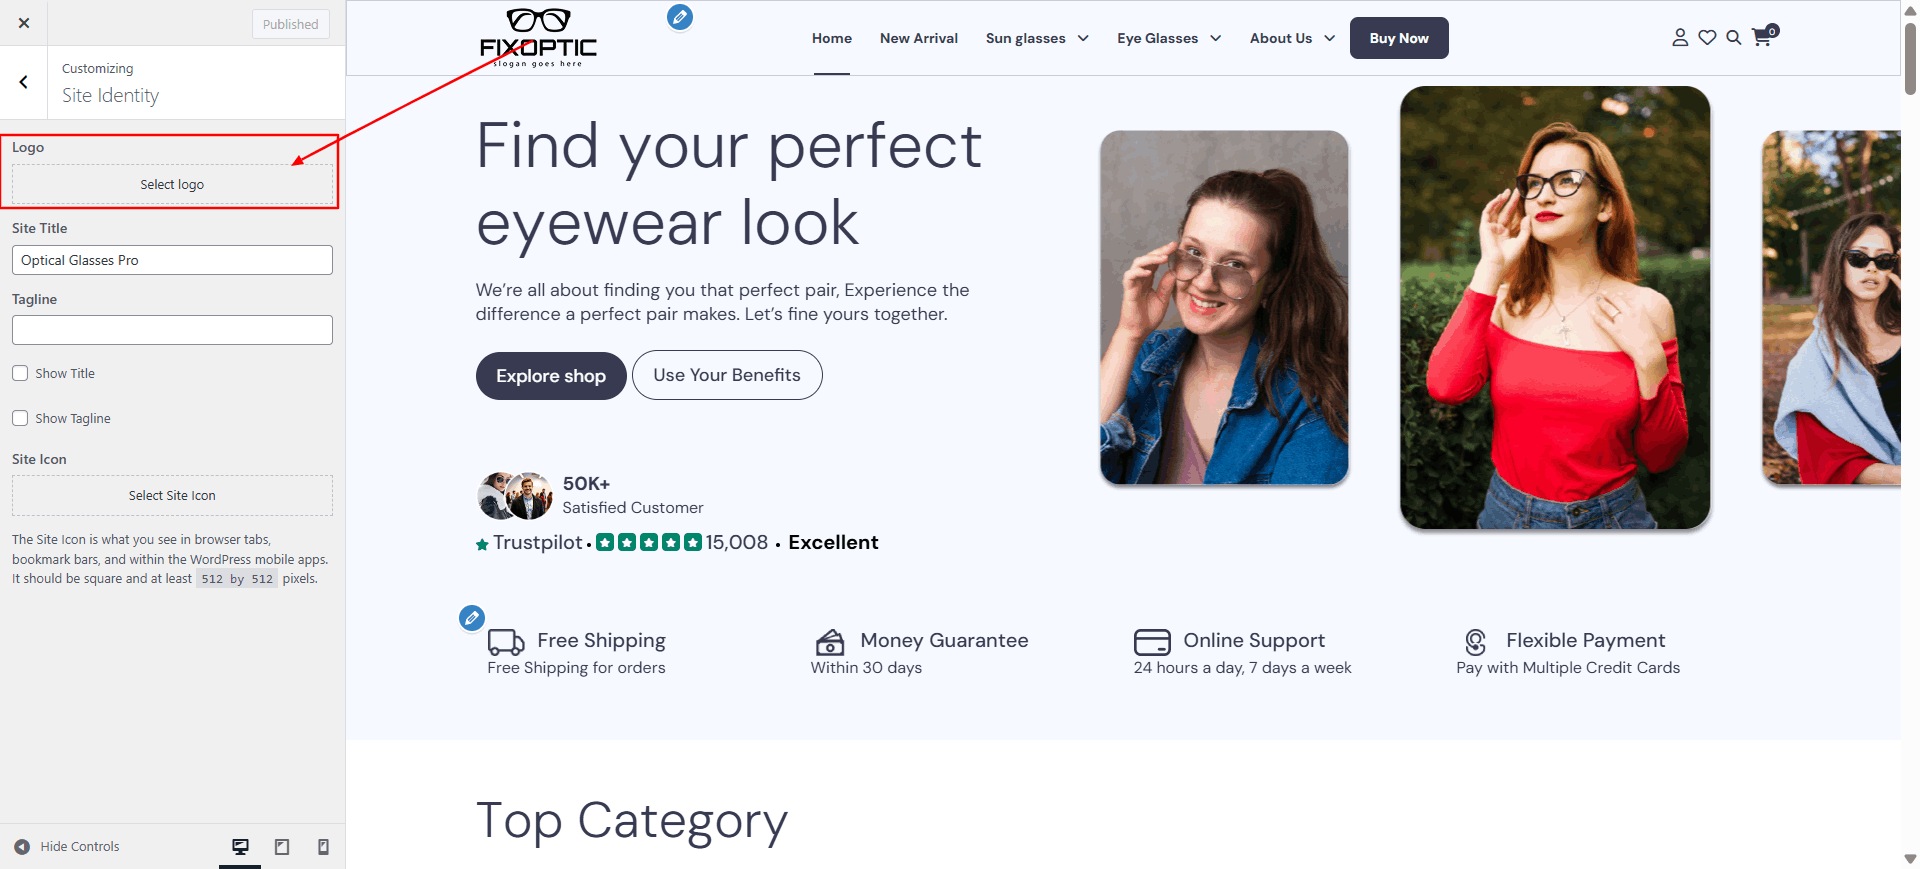
Navigate to Appearance → Customize → Site Identity and upload your logo.
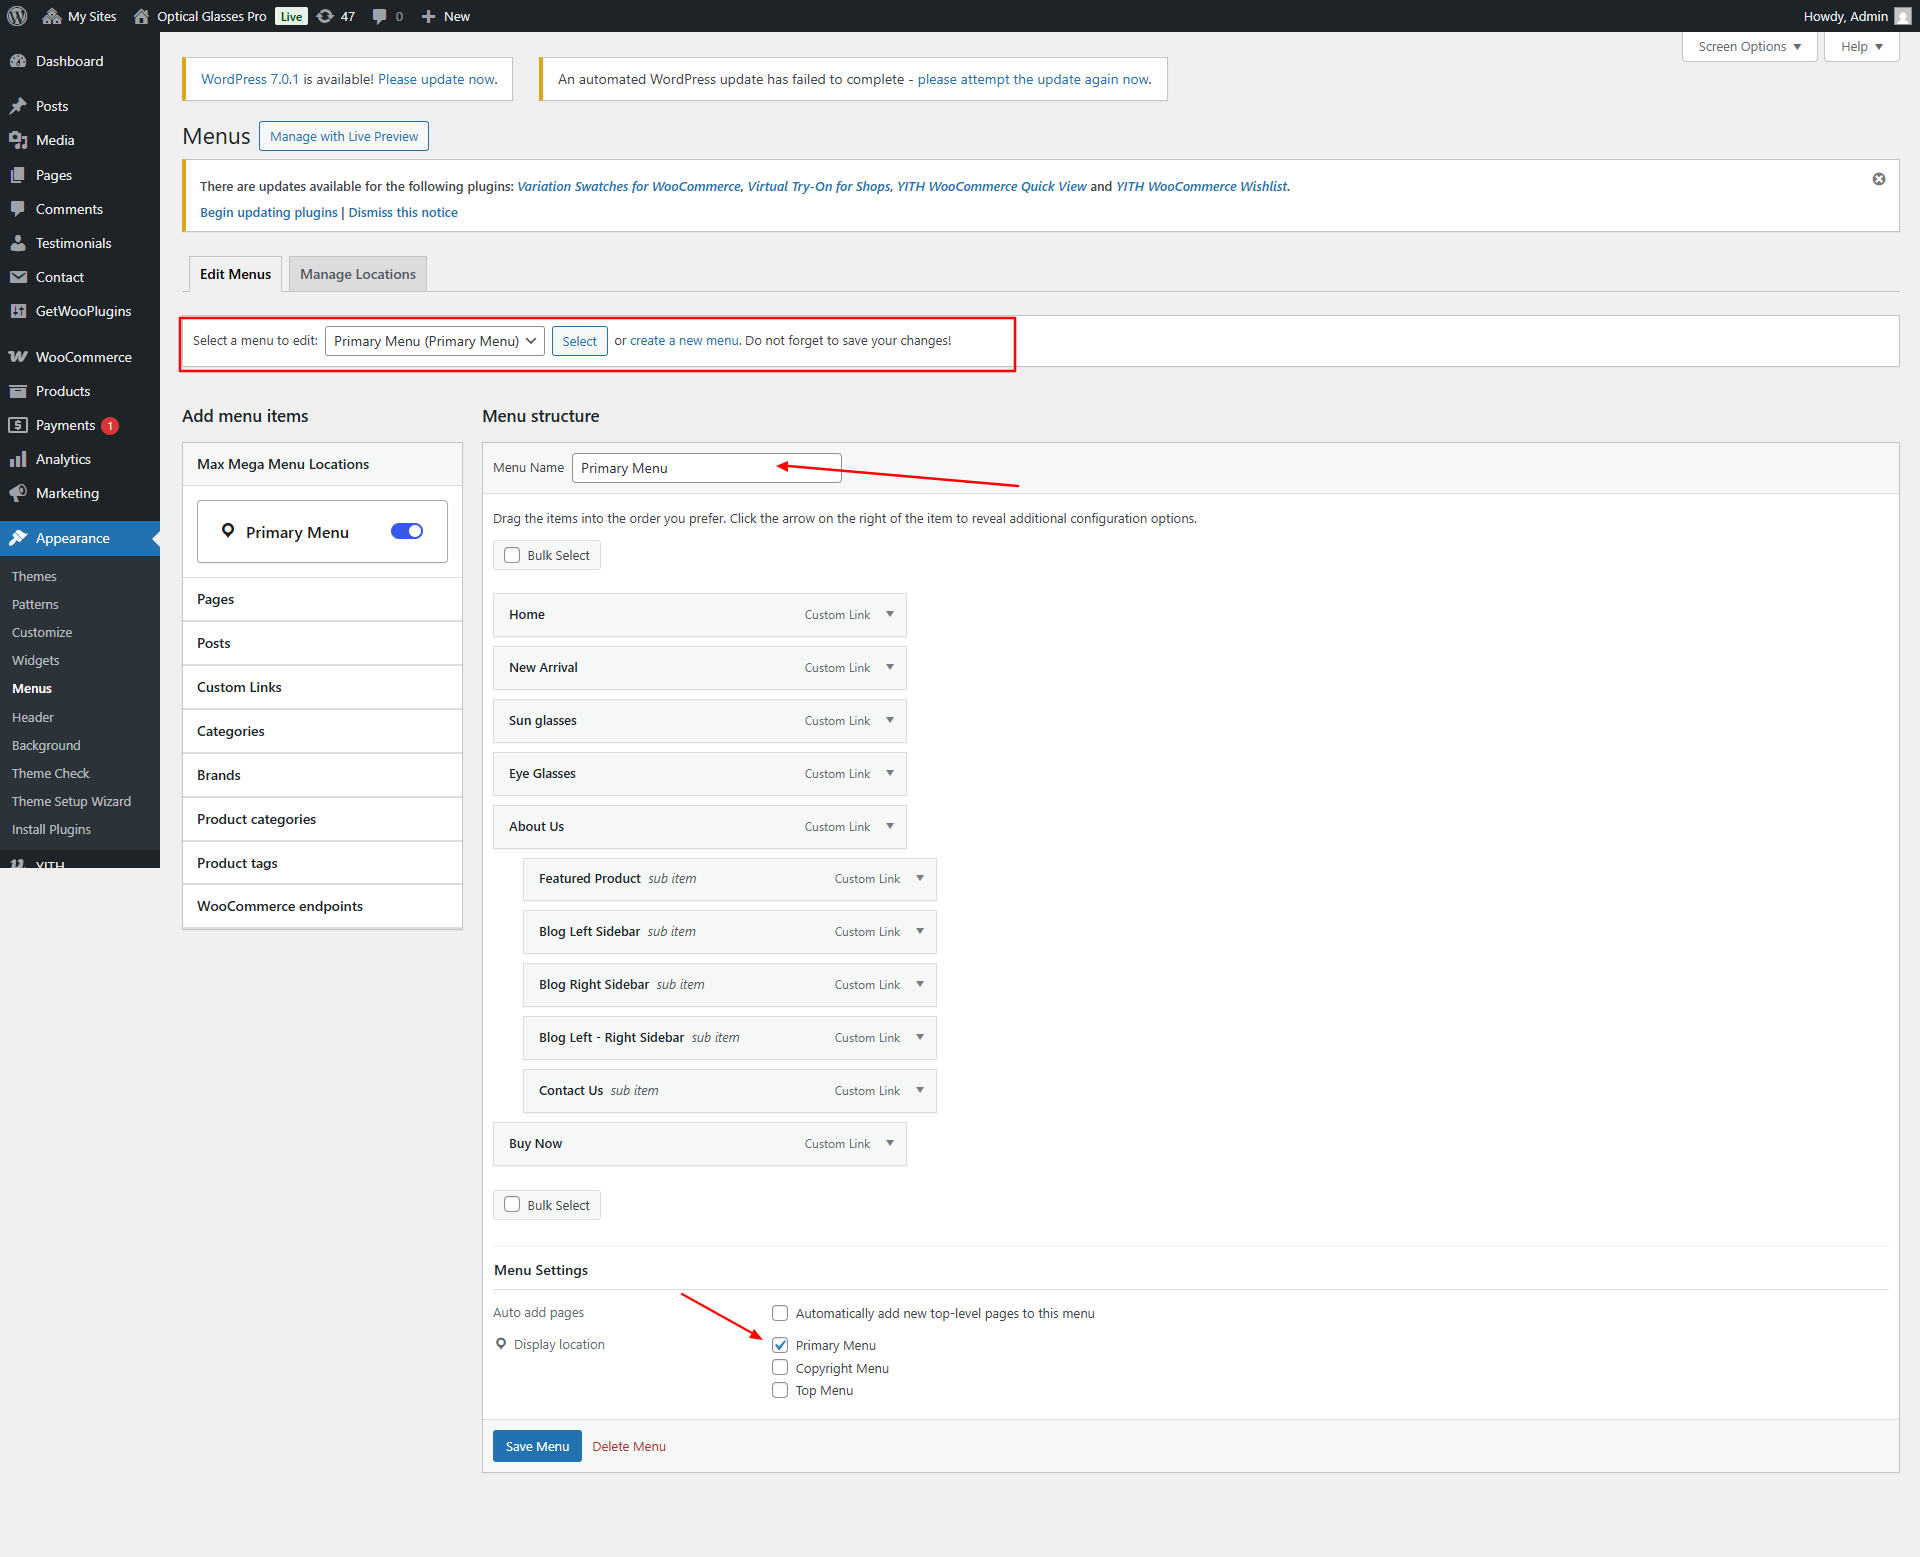
Manage the header menu from Appearance → Menus in the dashboard.
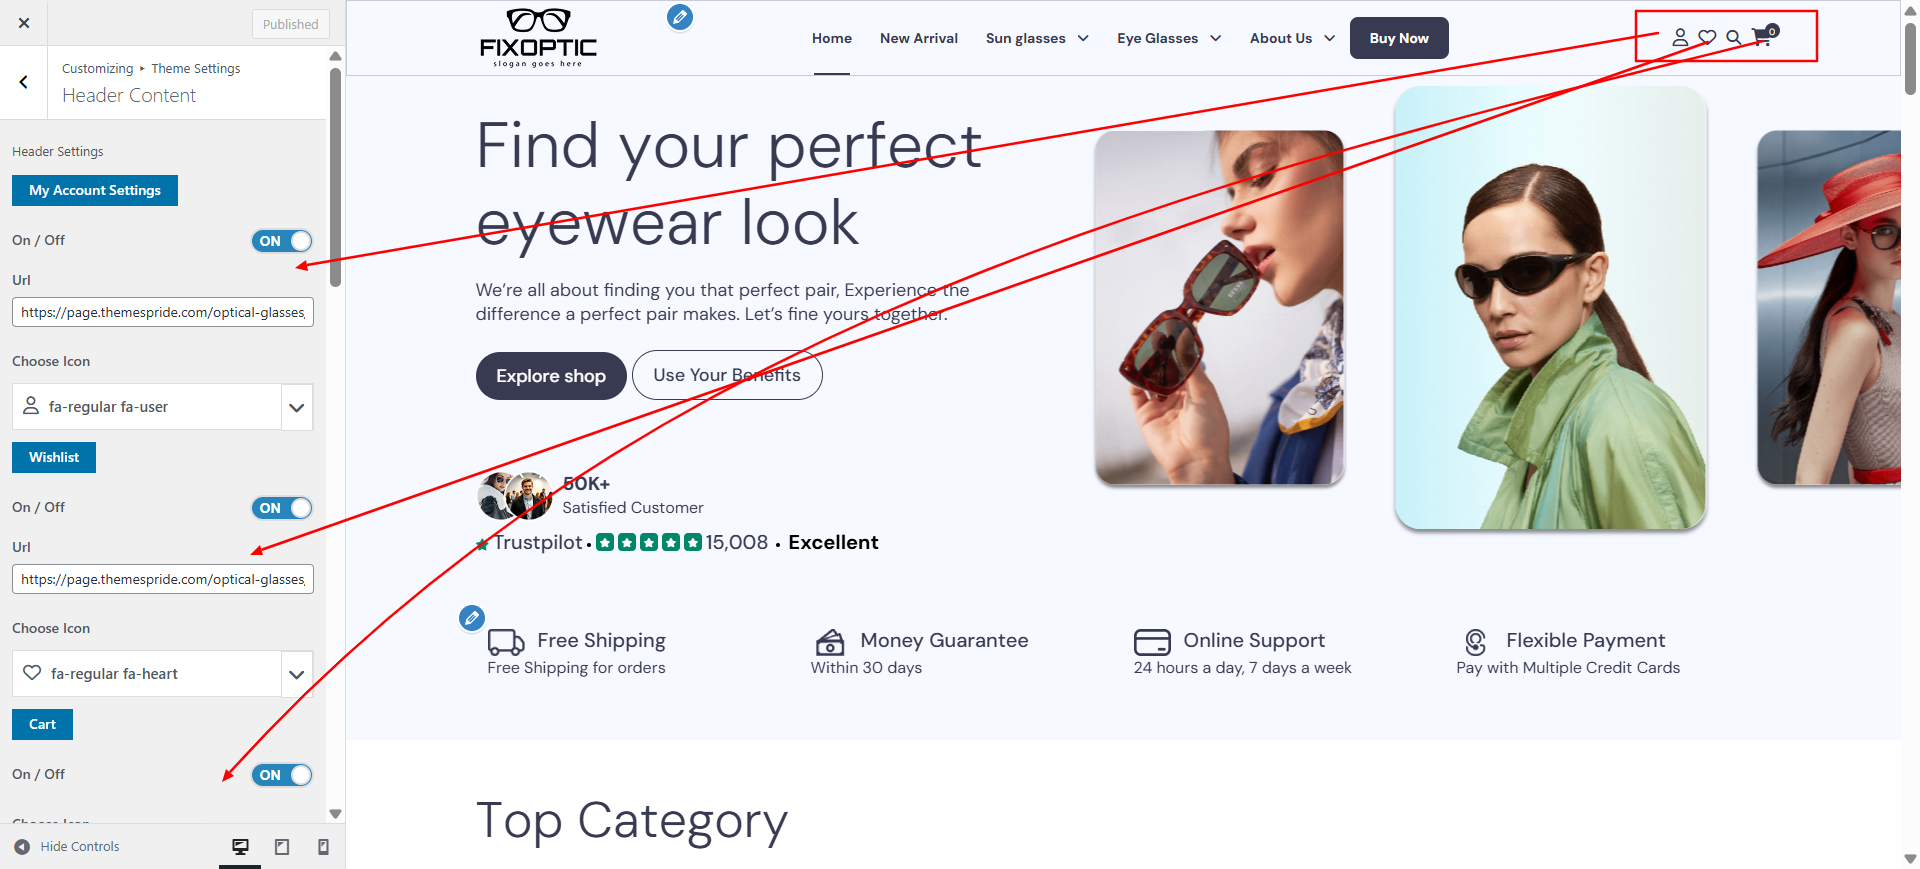
Now go to Appearance → Customize → Theme Settings → Header to update header button details.
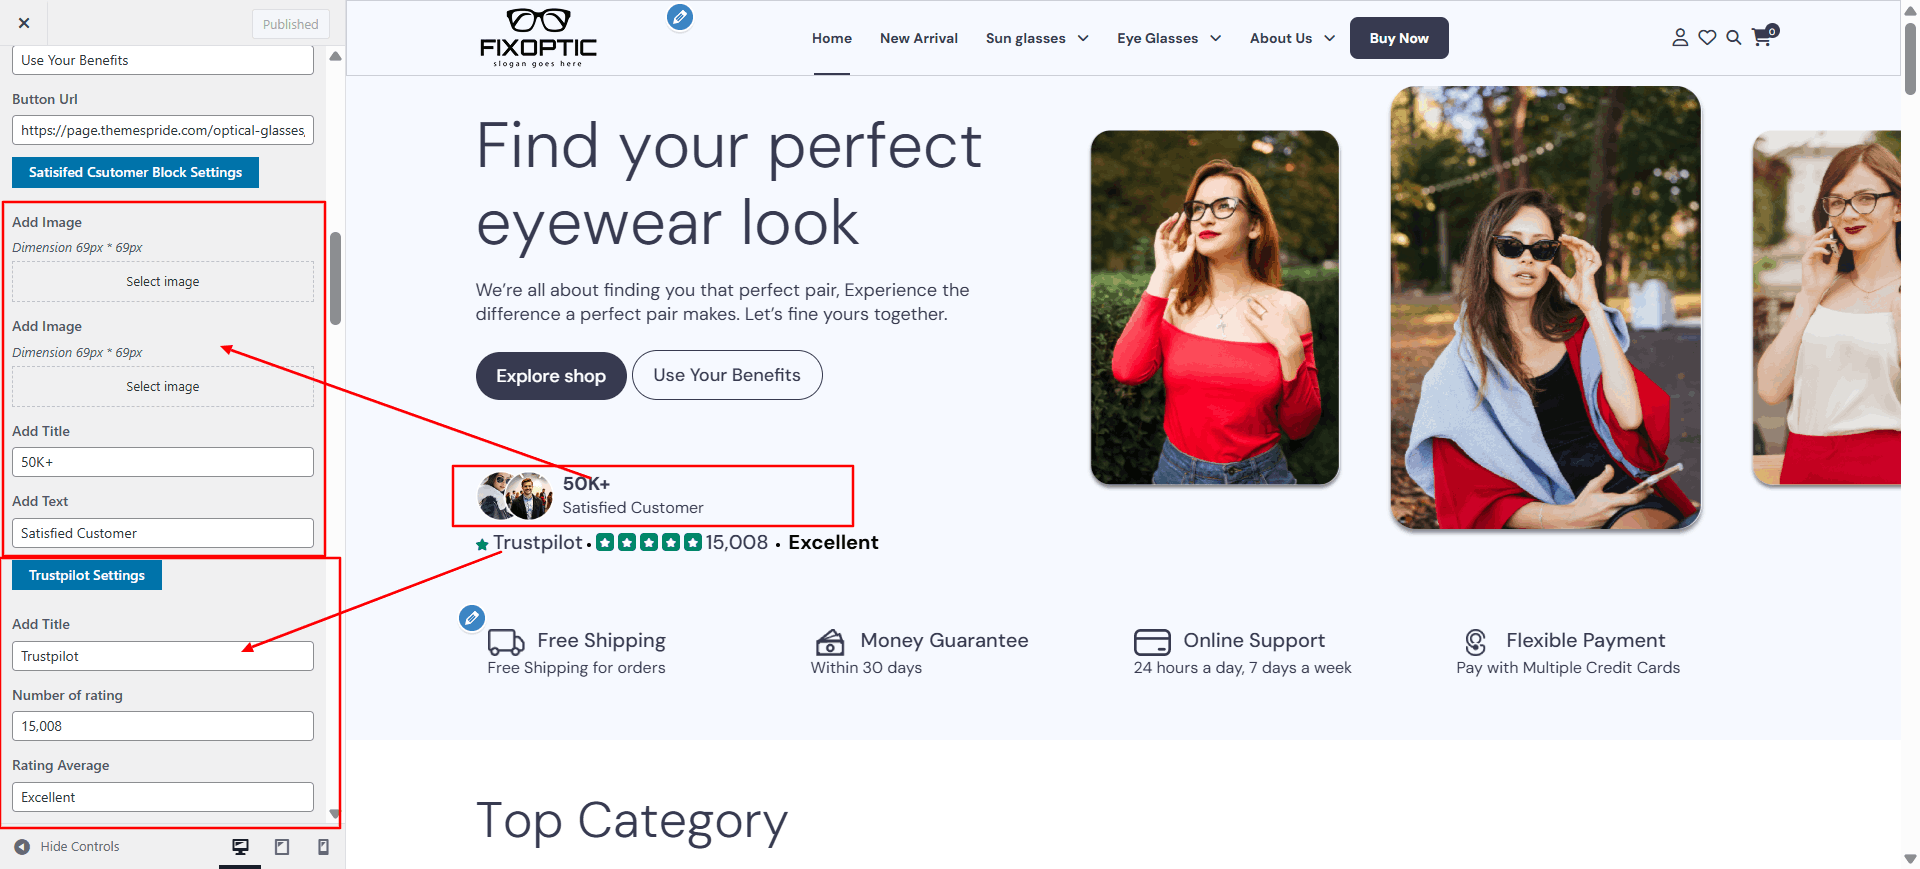
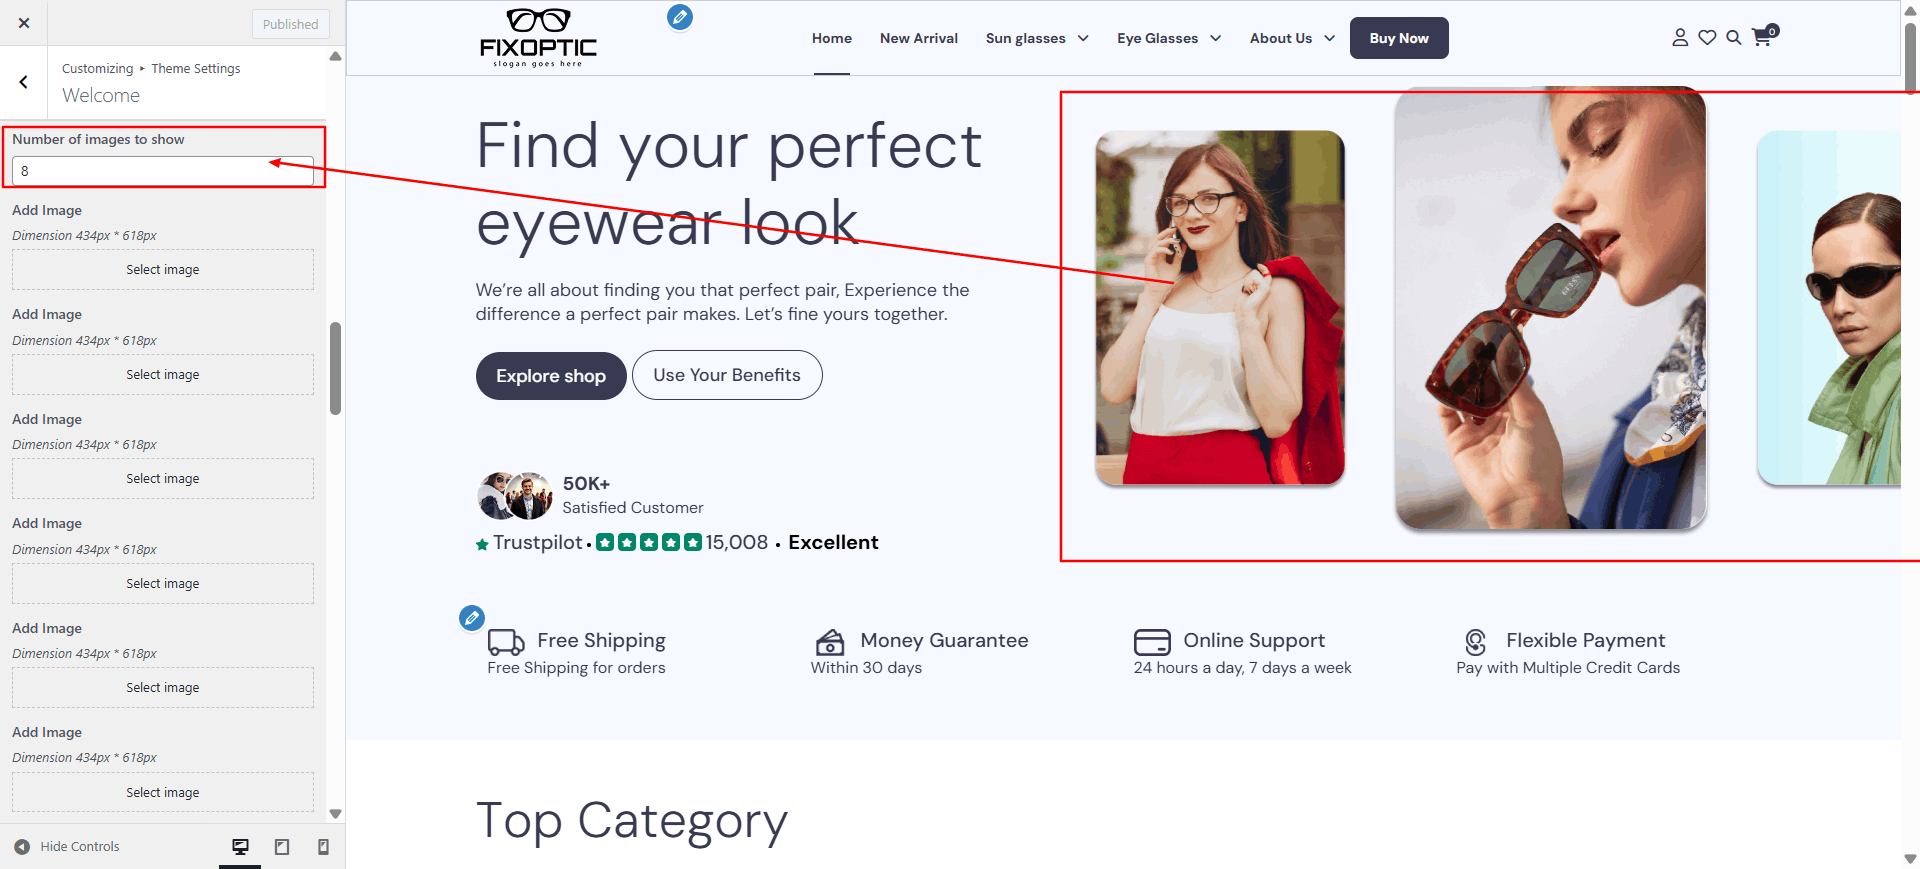
Configure "Welcome" Section
Description: Set up the welcome section with background images and welcome content.
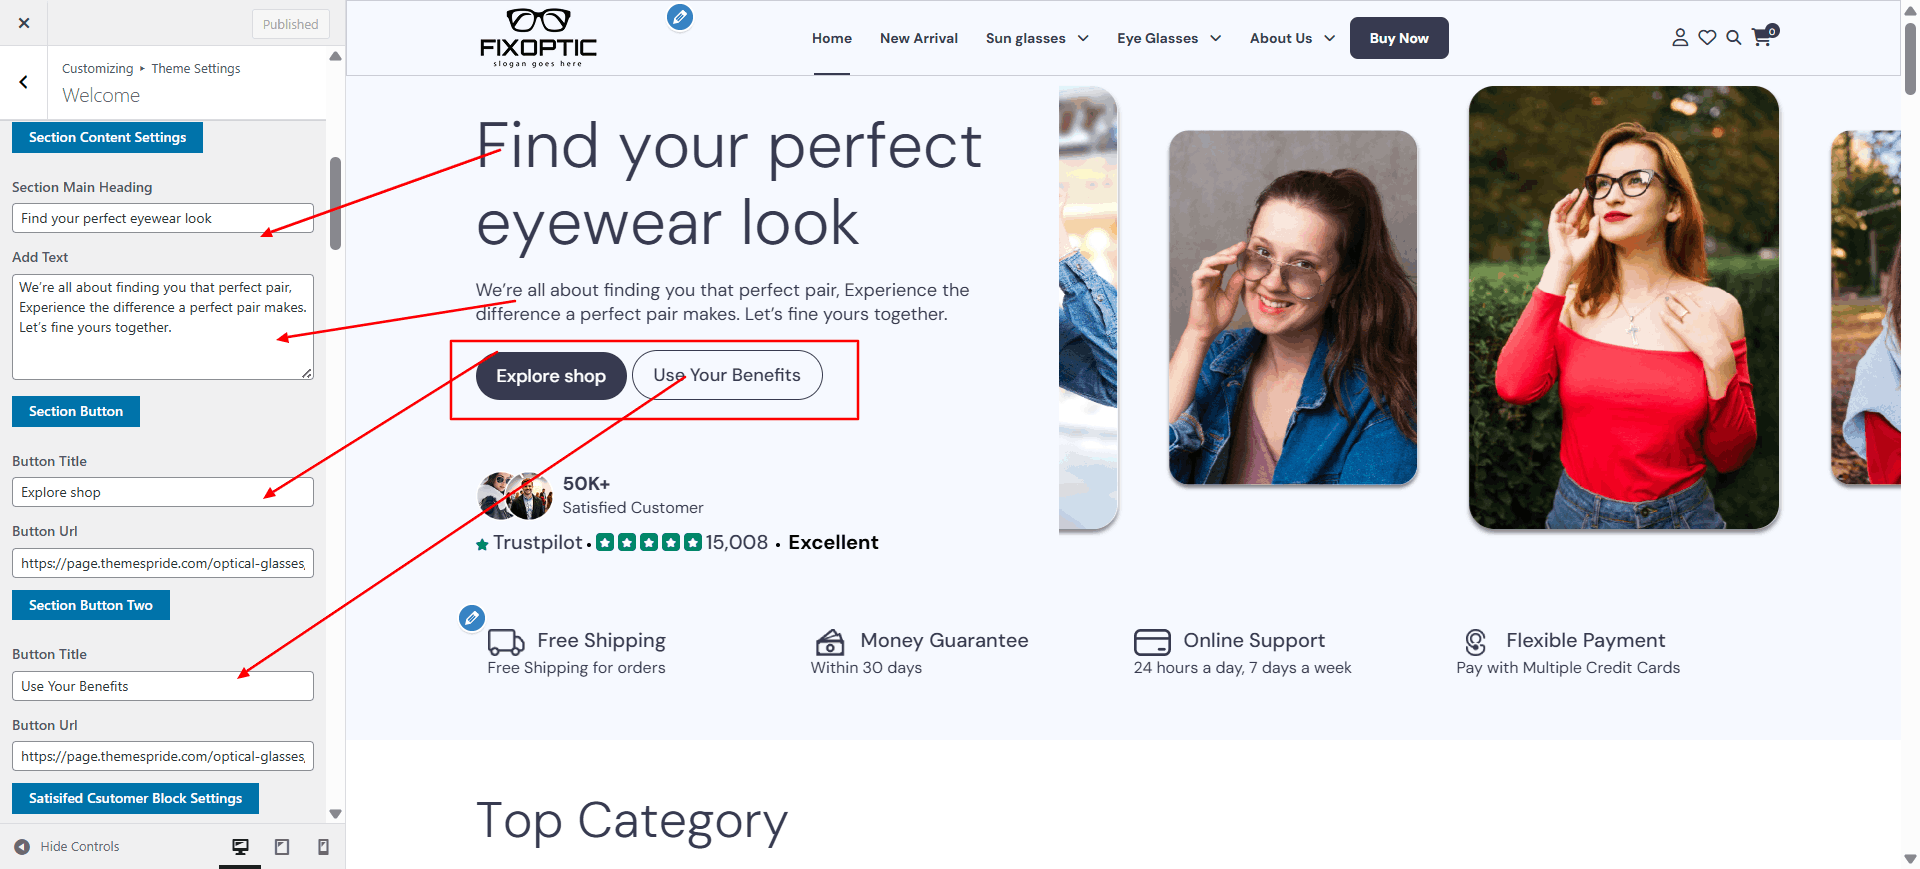
Open "Welcome" from the Theme Settings panel in the Customizer.
Update background visuals using "Background Color" and
Update the content as specified below.
Scroll down to see all the color customization options for this section.
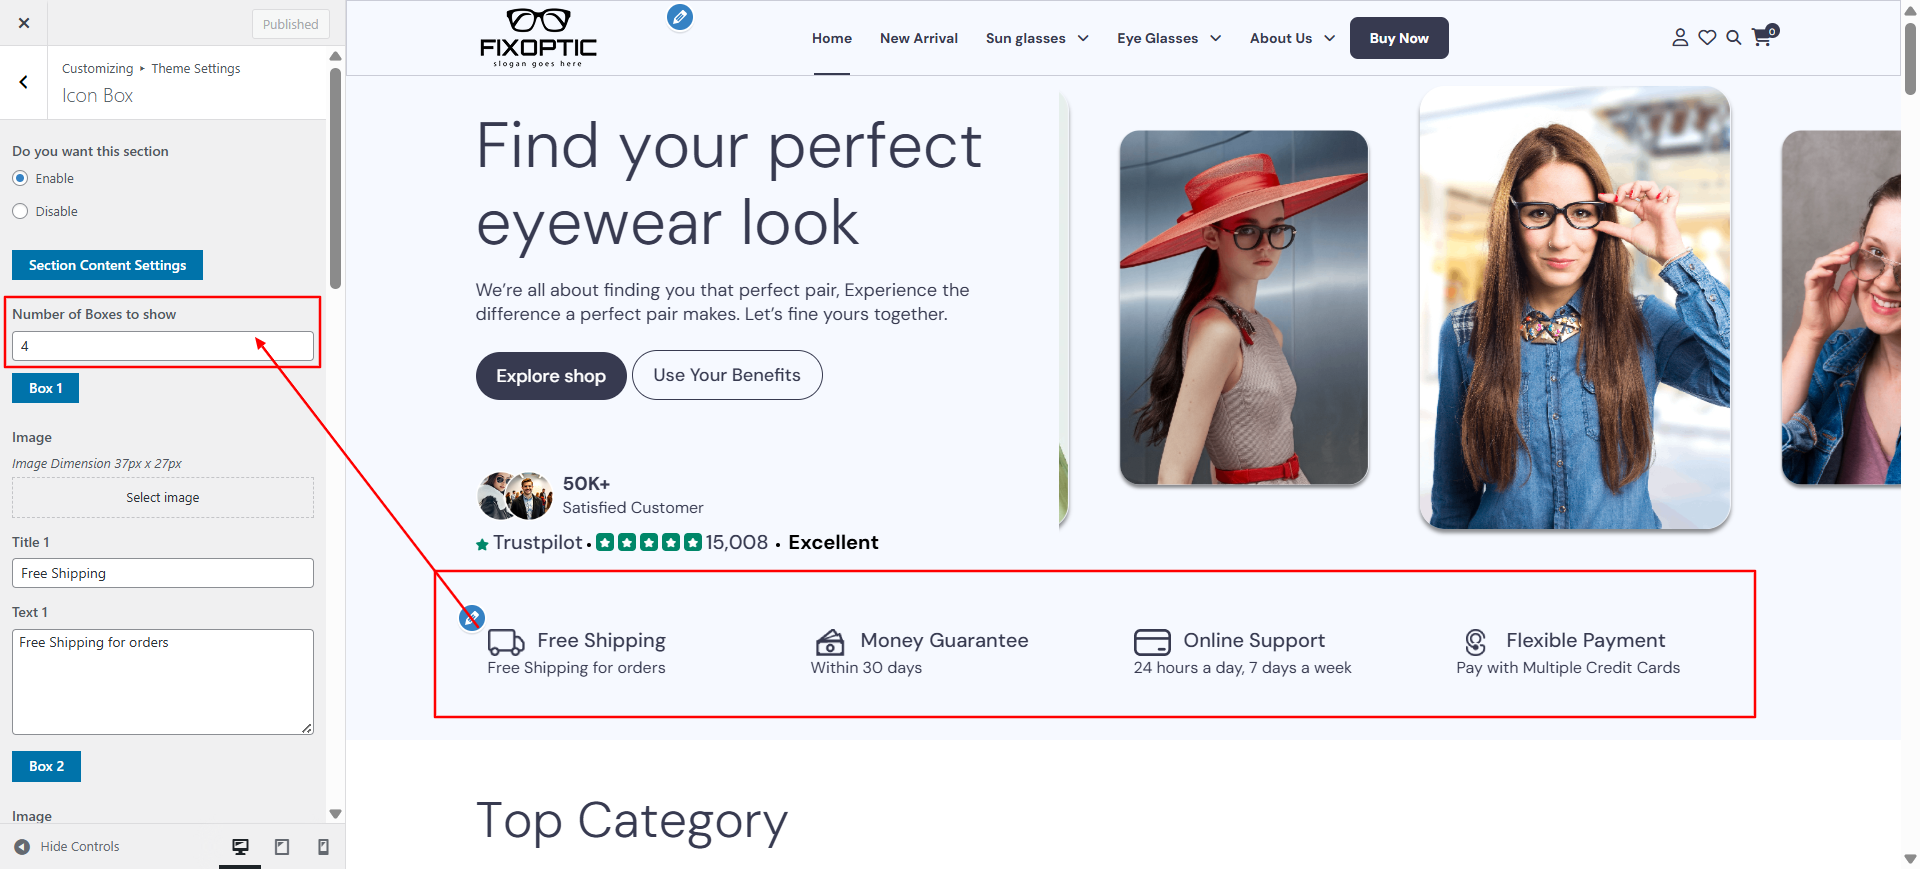
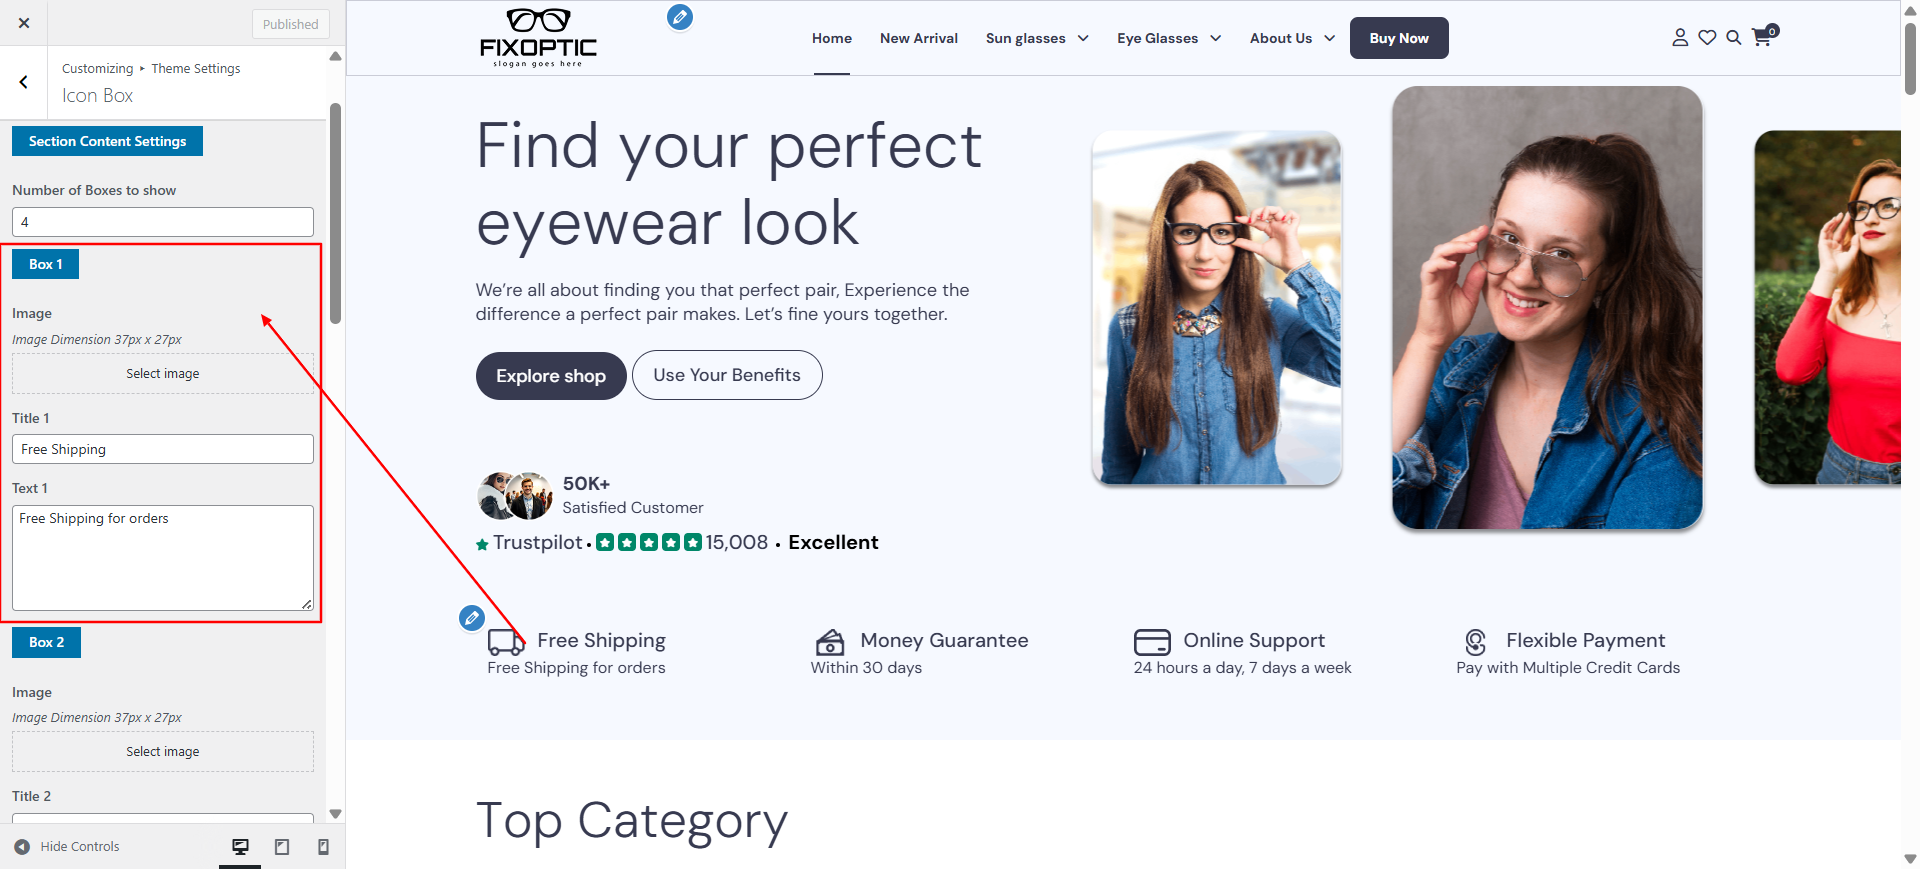
Configure "Icon Box" Section
Description: Set up the Icon Box section with background images and Icon Box content.
Open "Icon Box" from the Theme Settings panel in the Customizer.
Update the content as specified below.
Scroll down to see all the color customization options for this section.
Configure Product Categories
Description: Create and manage product categories in WooCommerce to organize your shop items.
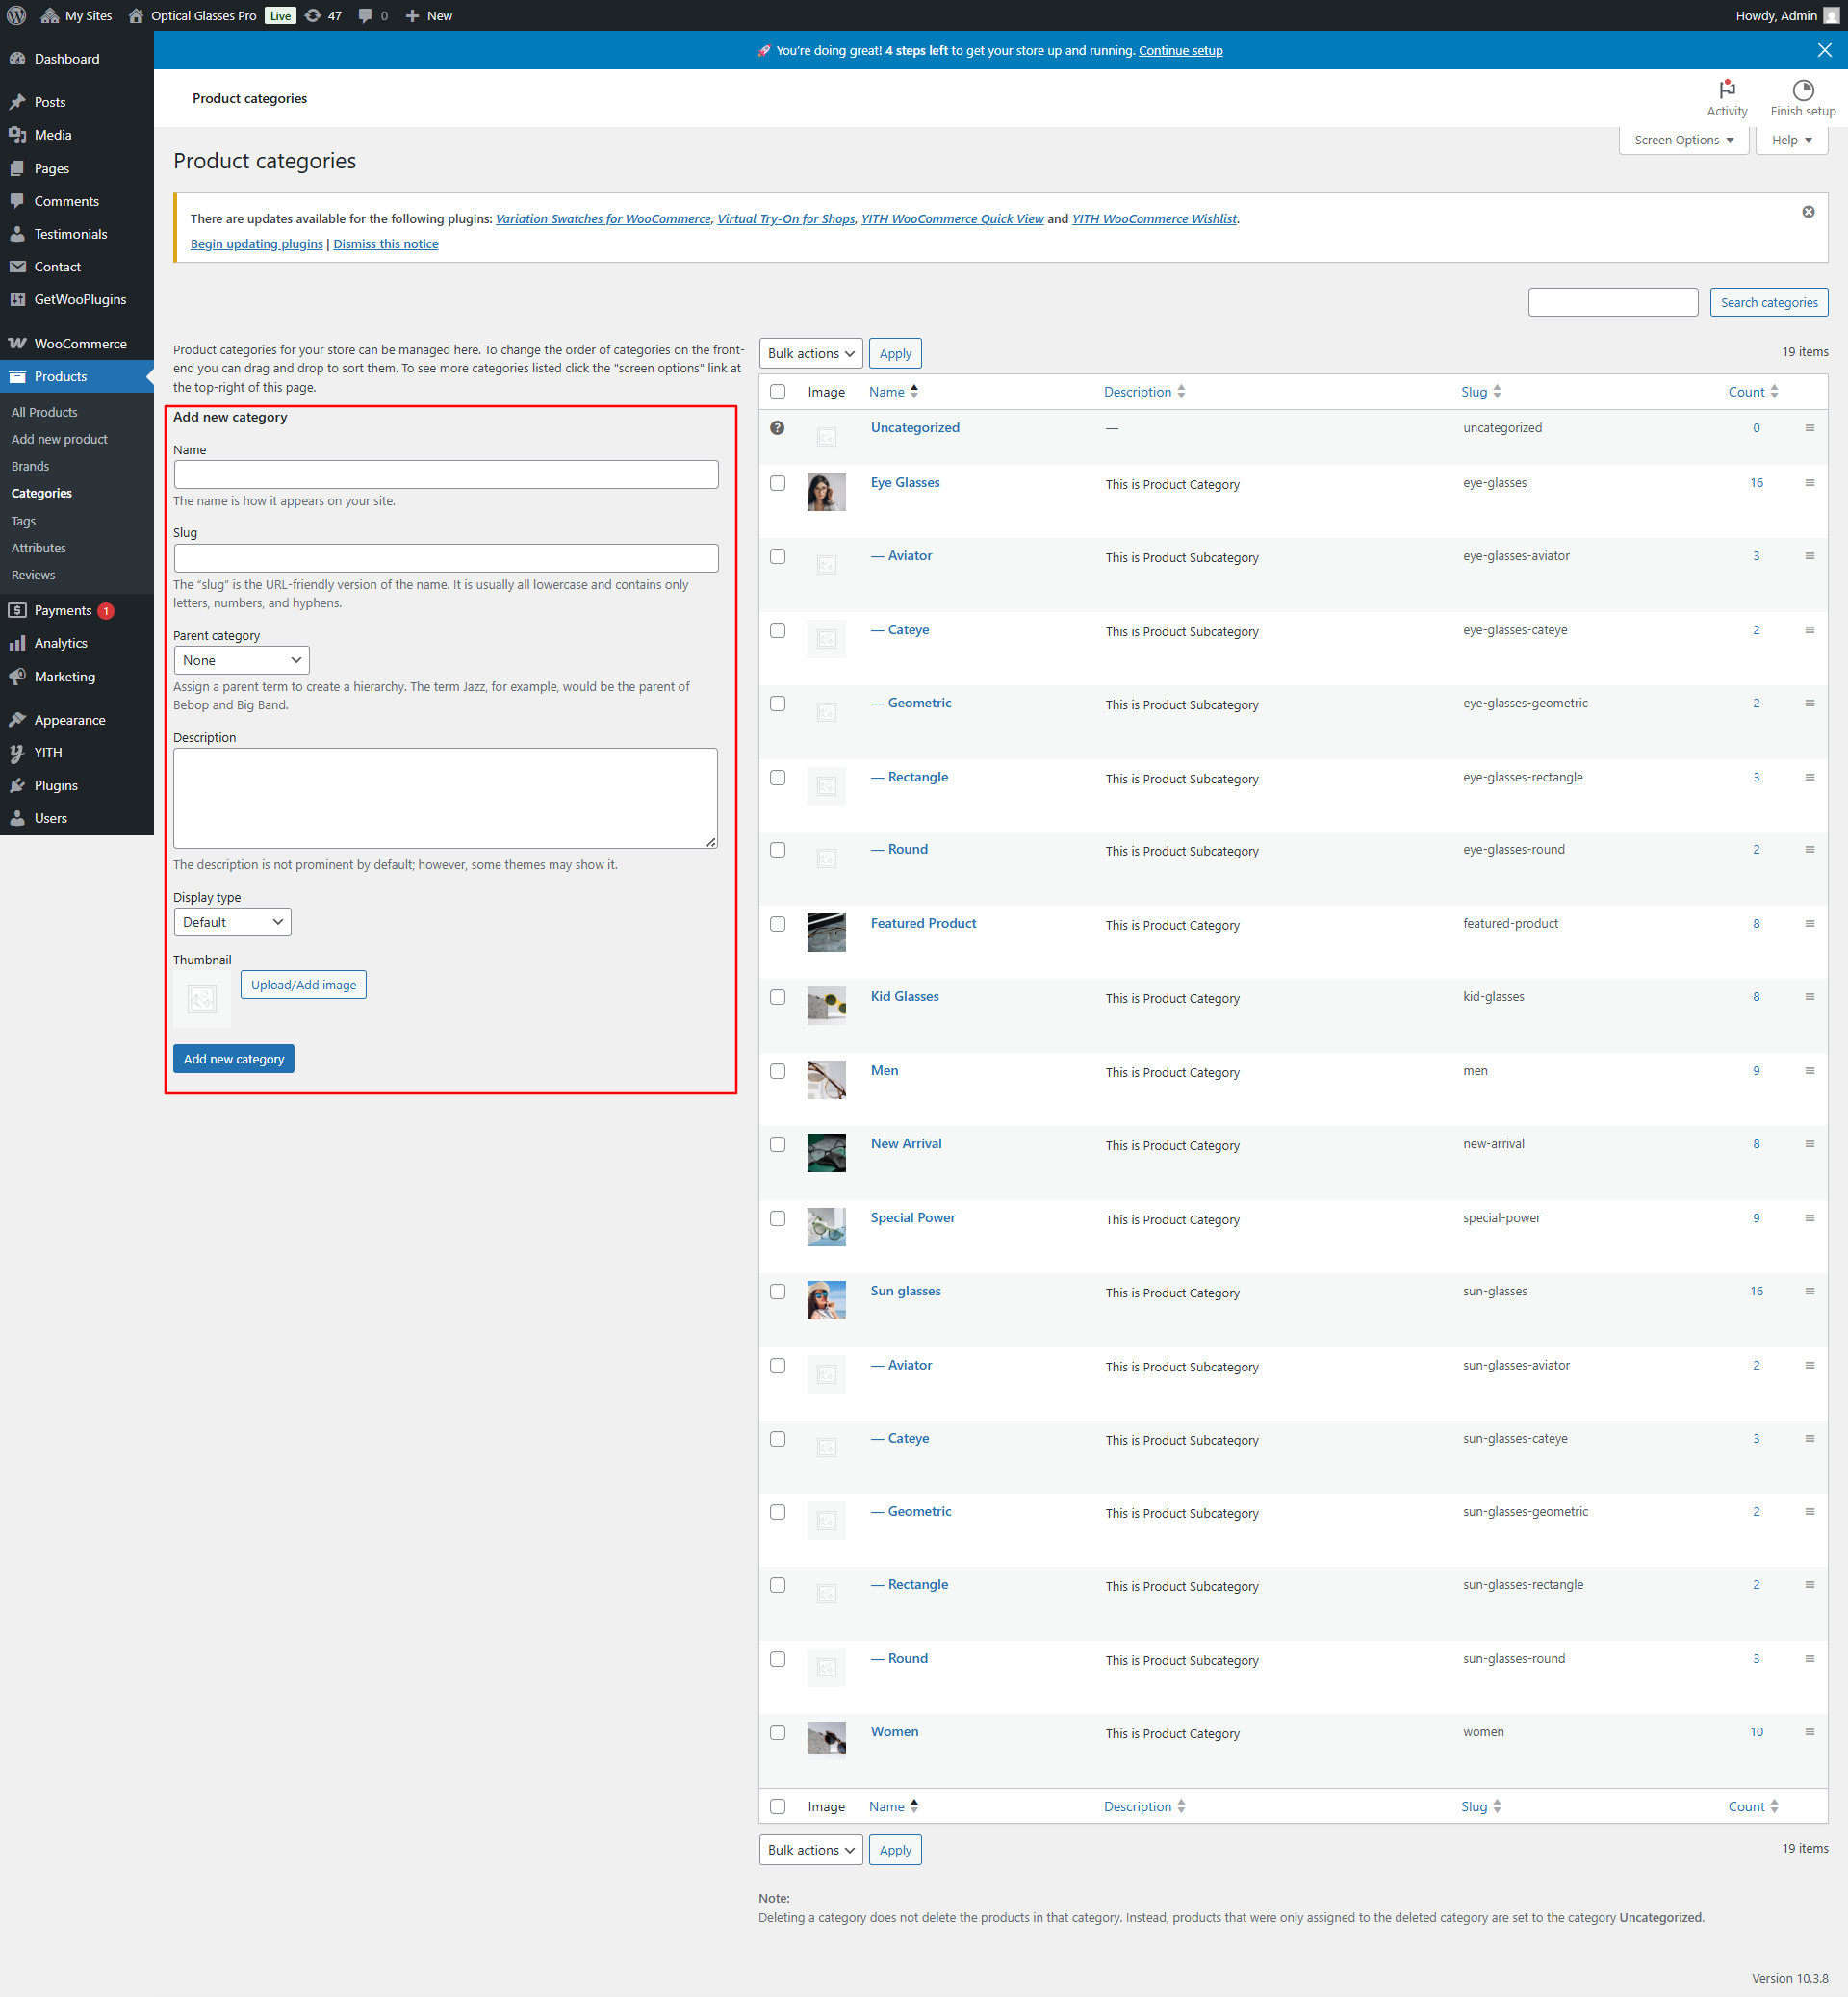
Open WooCommerce → Products → Categories from your WordPress dashboard.
Follow these steps to add a new category:
Enter the Category Name
Optionally, add a Slug for cleaner URLs.
Select a Parent Category if you want to build a hierarchy (e.g., “Clothing” → “Shoes”).
Upload a Thumbnail Image to display in the shop layout.
Click Add New Category to save.
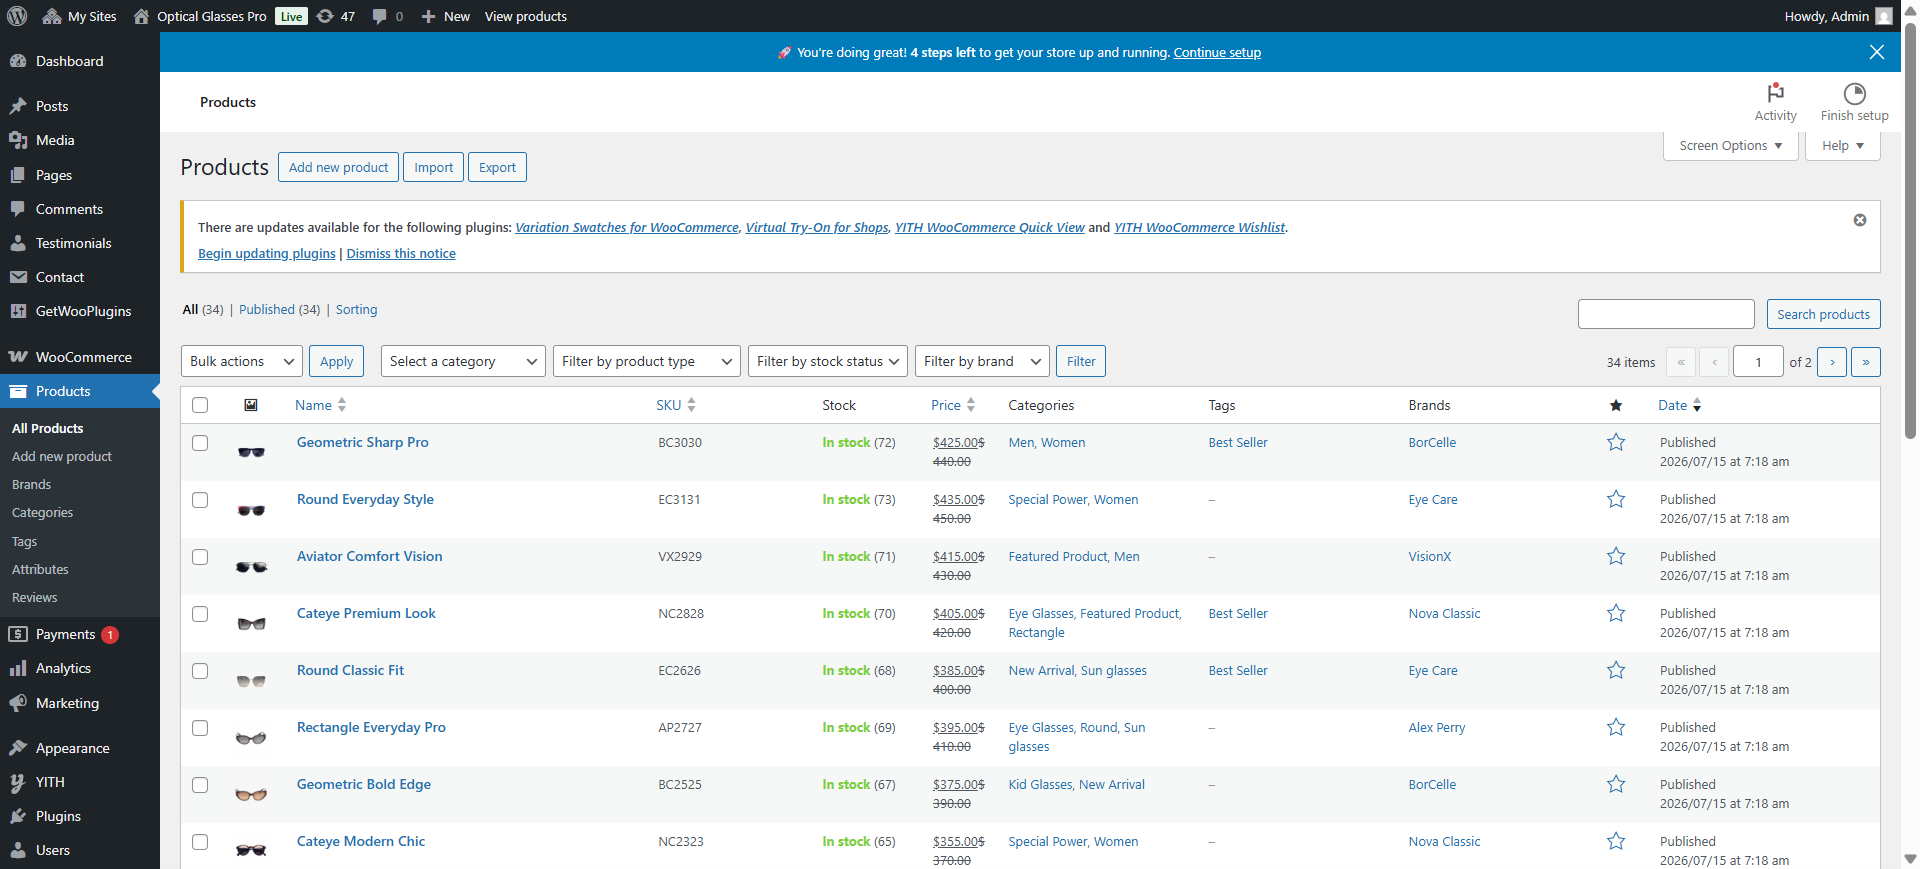
Once categories are created, assign products to them under Products → All Products by editing a product and checking the relevant category box.
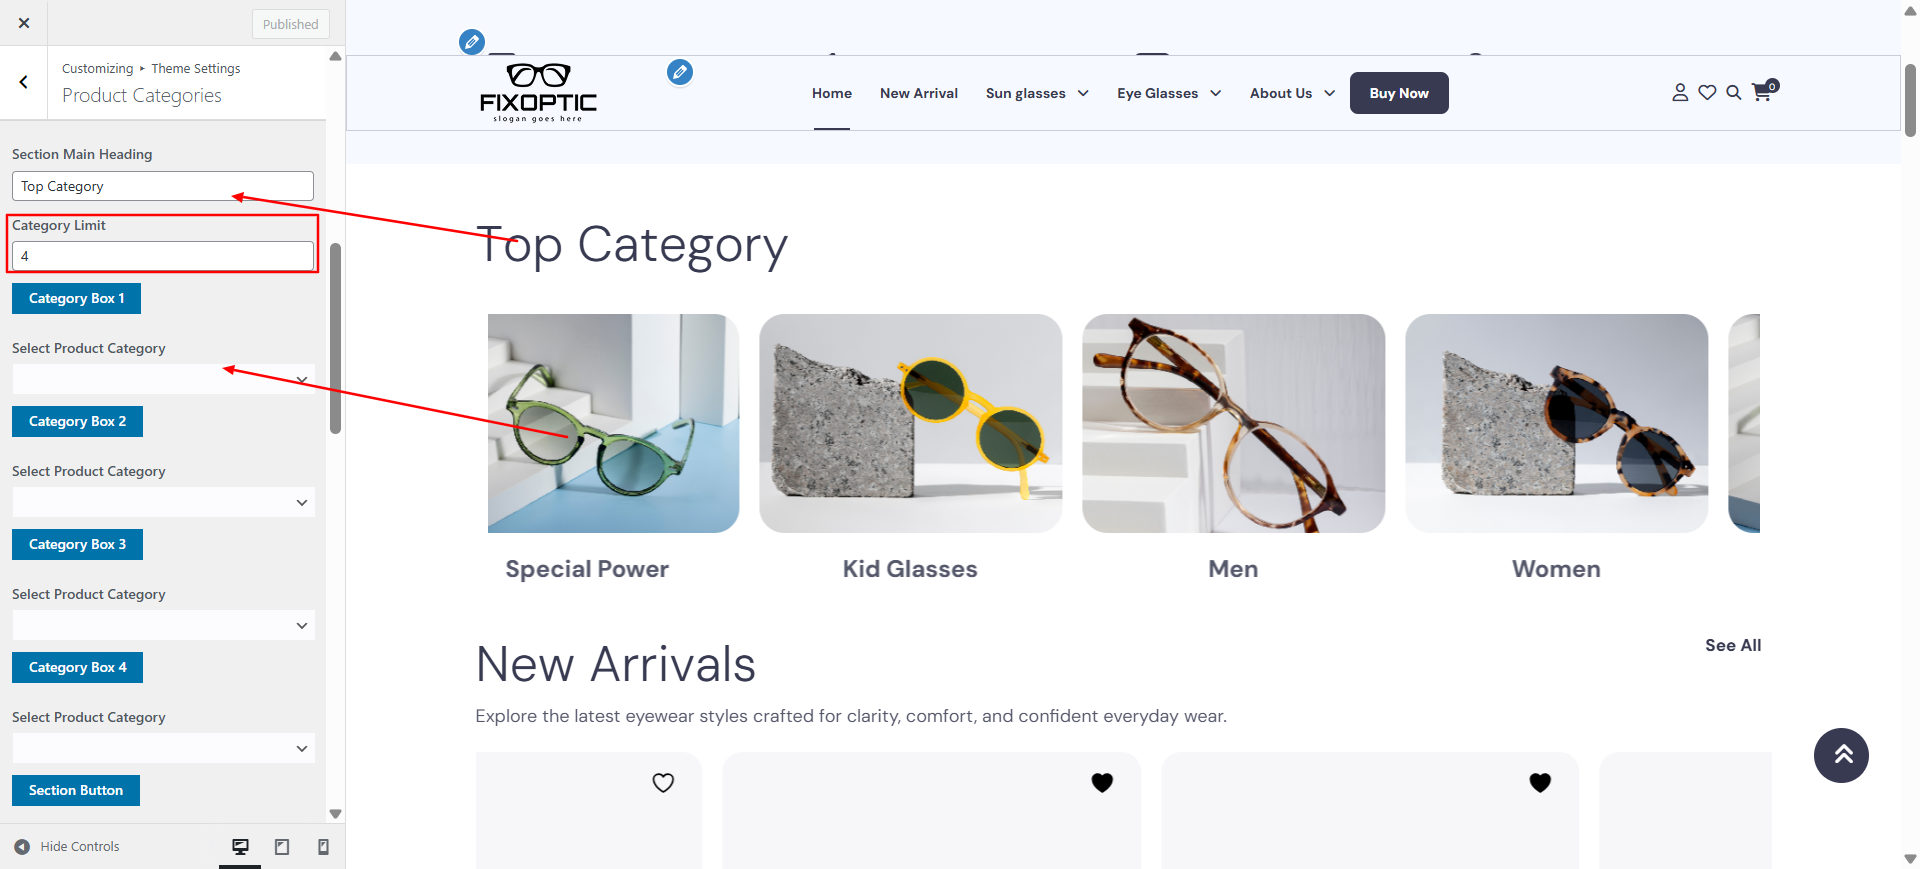
To control how categories appear on the site, go to
Appearance → Customize → Theme Settings → Product Categories.
Here you can adjust the number of categories shown, their order, and layout style.
Scroll down to explore all customization options for this section.
Configure "New Arrivals" Section
Description: Create or edit demo products in WooCommerce and display them in the New Arrivals section.
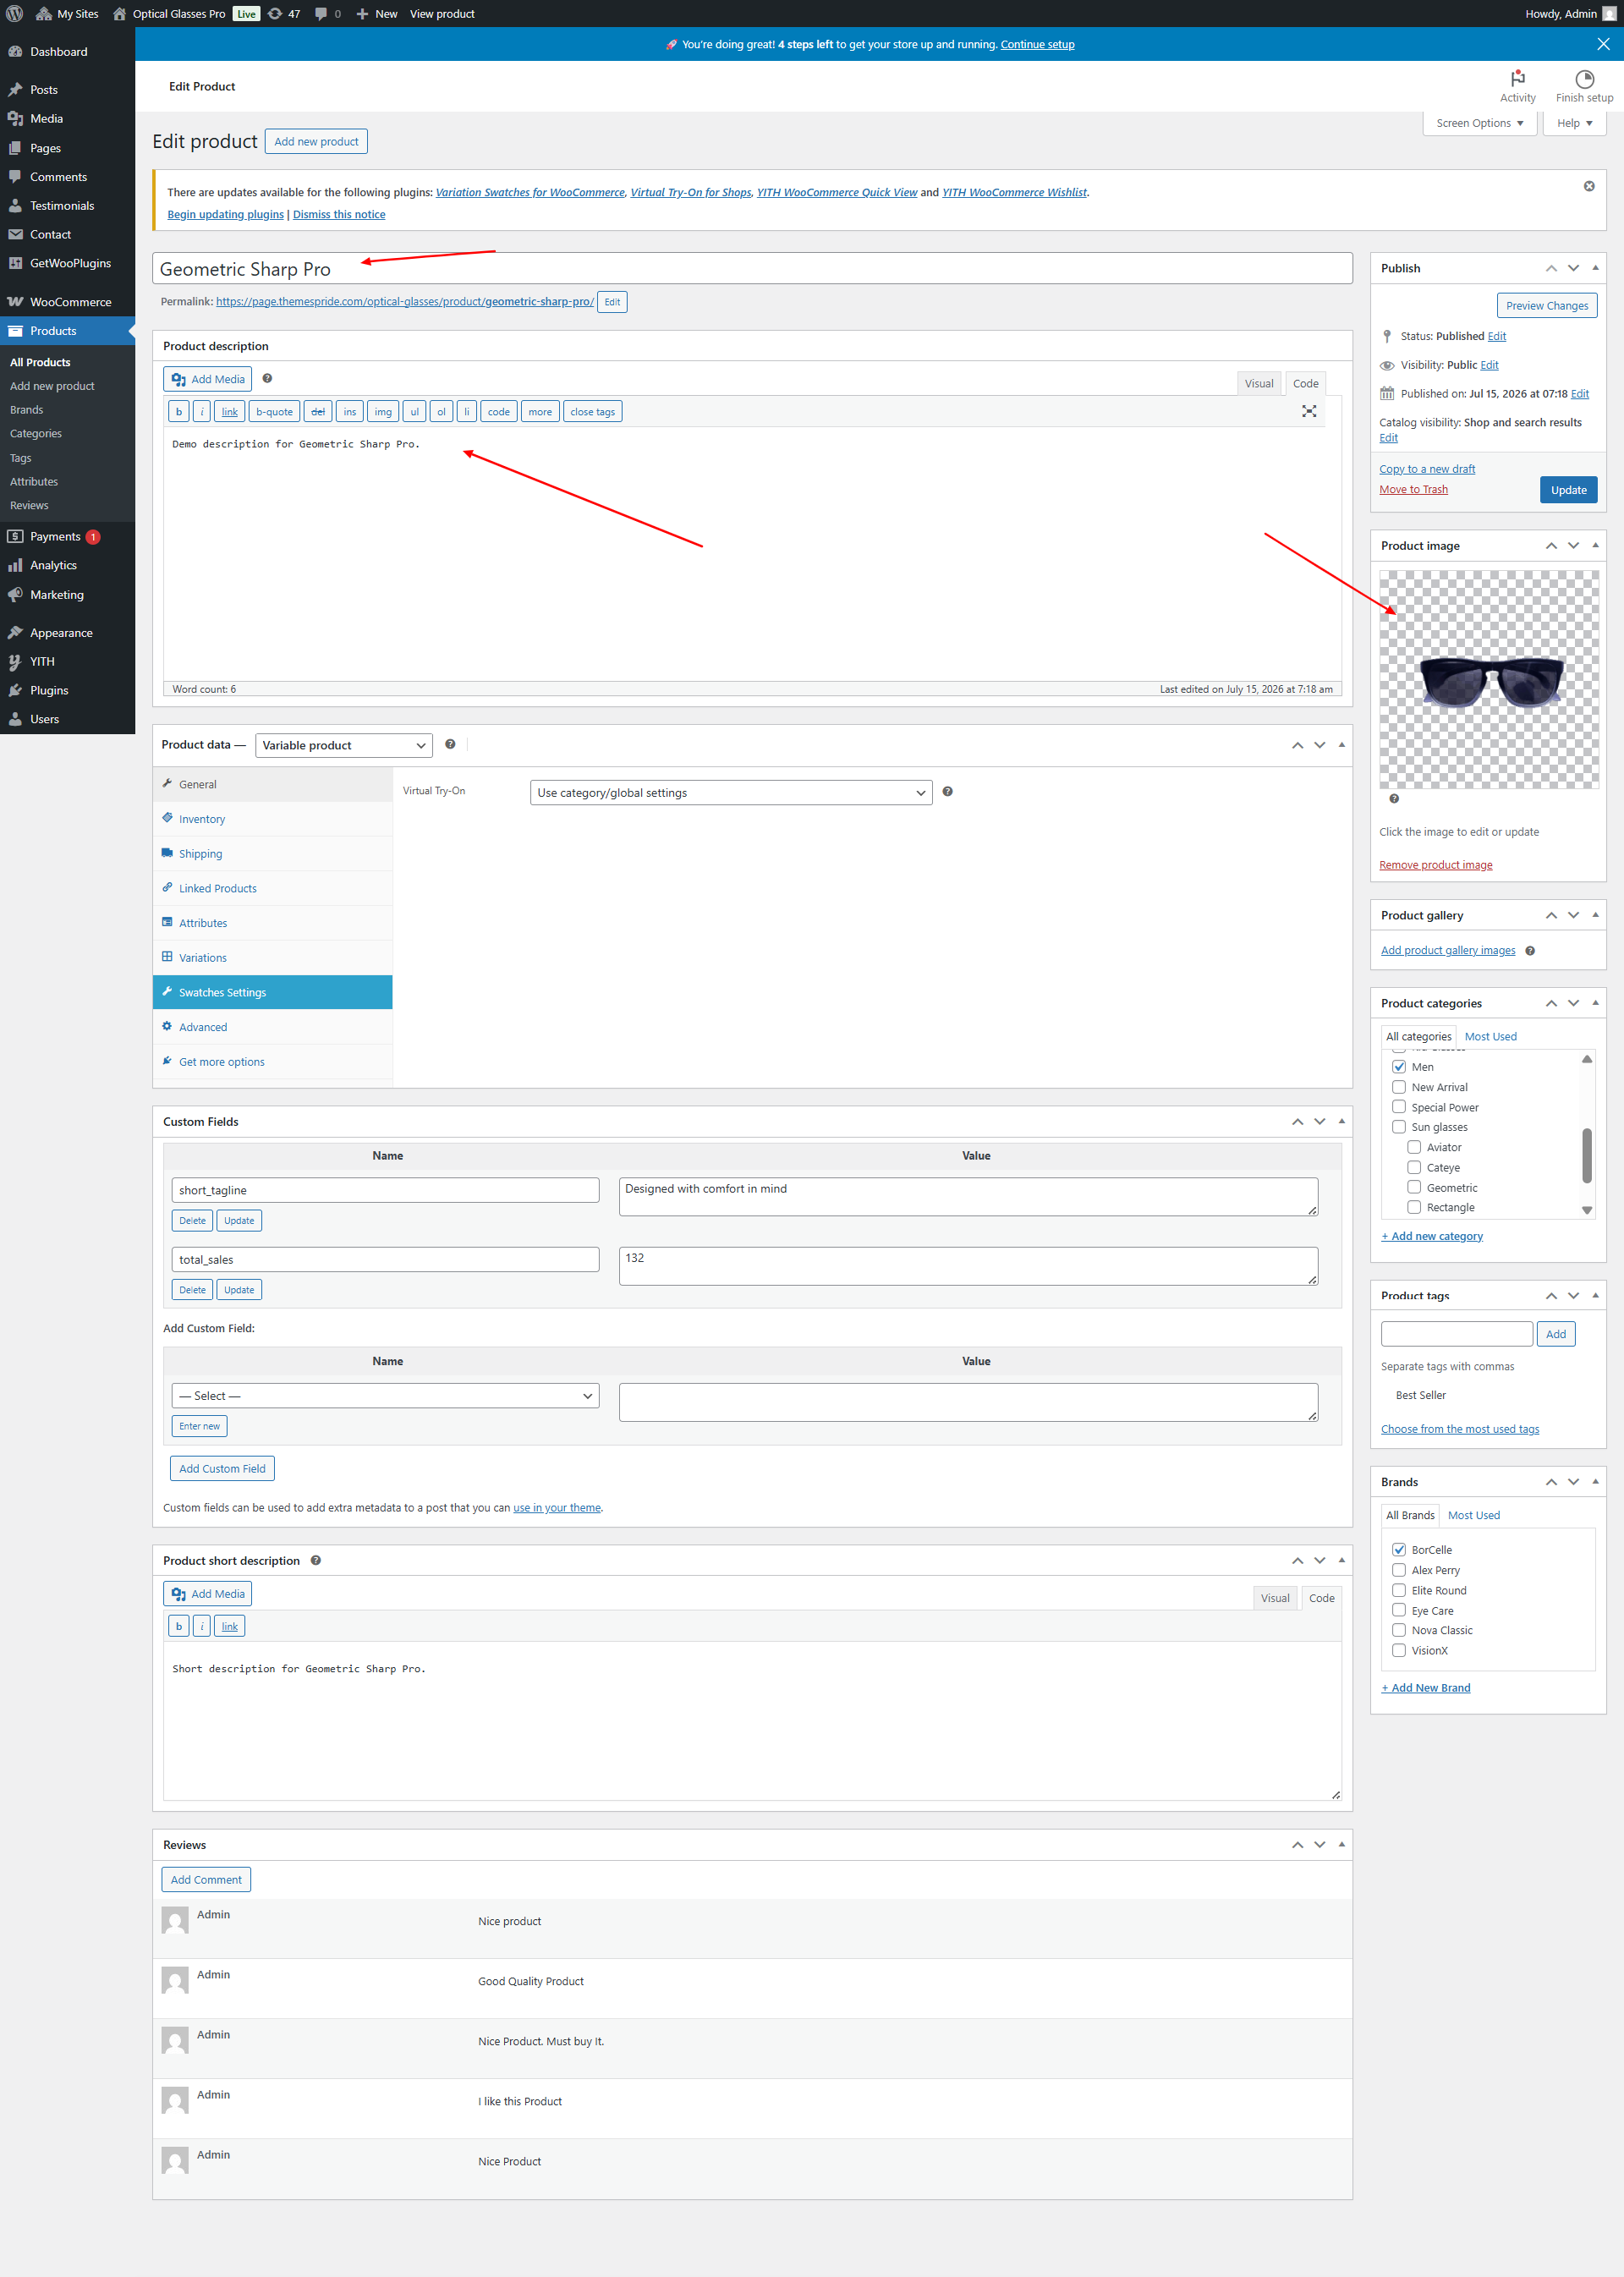
Open WooCommerce → Products → Add New from your WordPress dashboard.
Follow these steps to create a demo product:
Enter the Product Name
Add a Description for the product.
Set the Regular Price and optionally a Sale Price.
Upload a Product Image and additional gallery images.
Assign the product to a Category (e.g., “New Arrivals”).
Click Publish to save the product.
To edit an existing demo product, go to WooCommerce → Products → All Products, hover over the product name, and click Edit. Update details such as price, description, or images, then click Update.
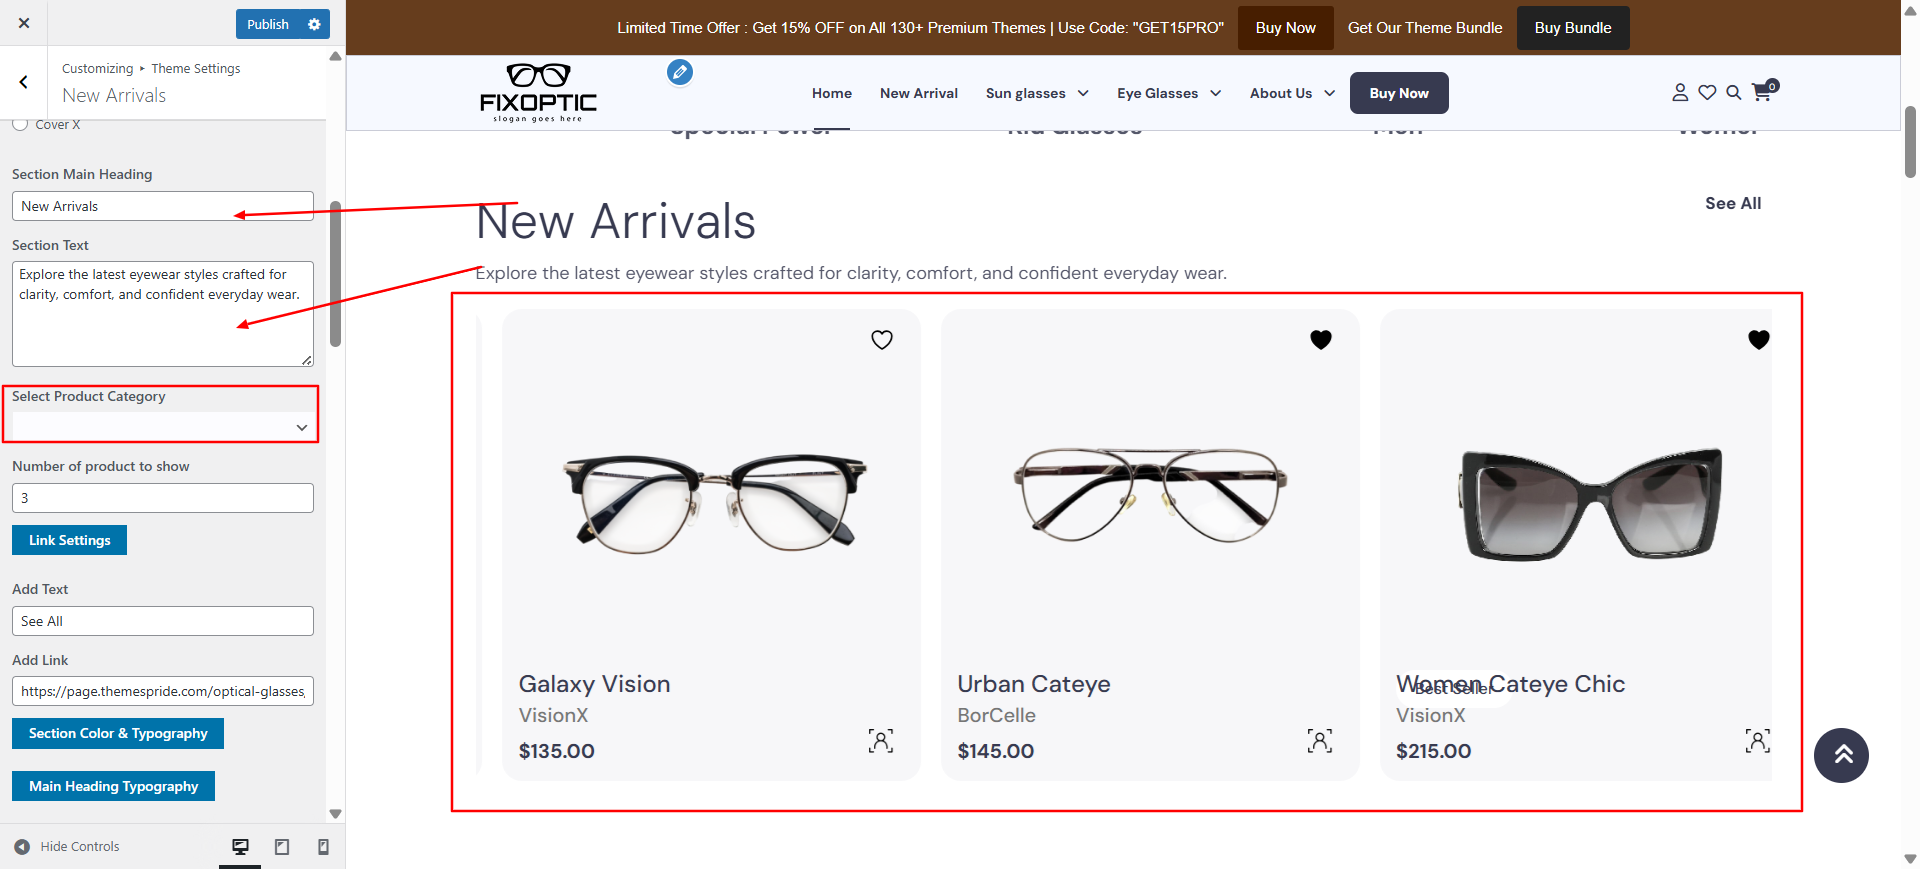
To control how demo products appear in the New Arrivals section, go to
Appearance → Customize → Theme Settings → New Arrivals.
Here you can adjust the number of products shown, their order, and layout style.
Scroll down to explore all customization options for this section.
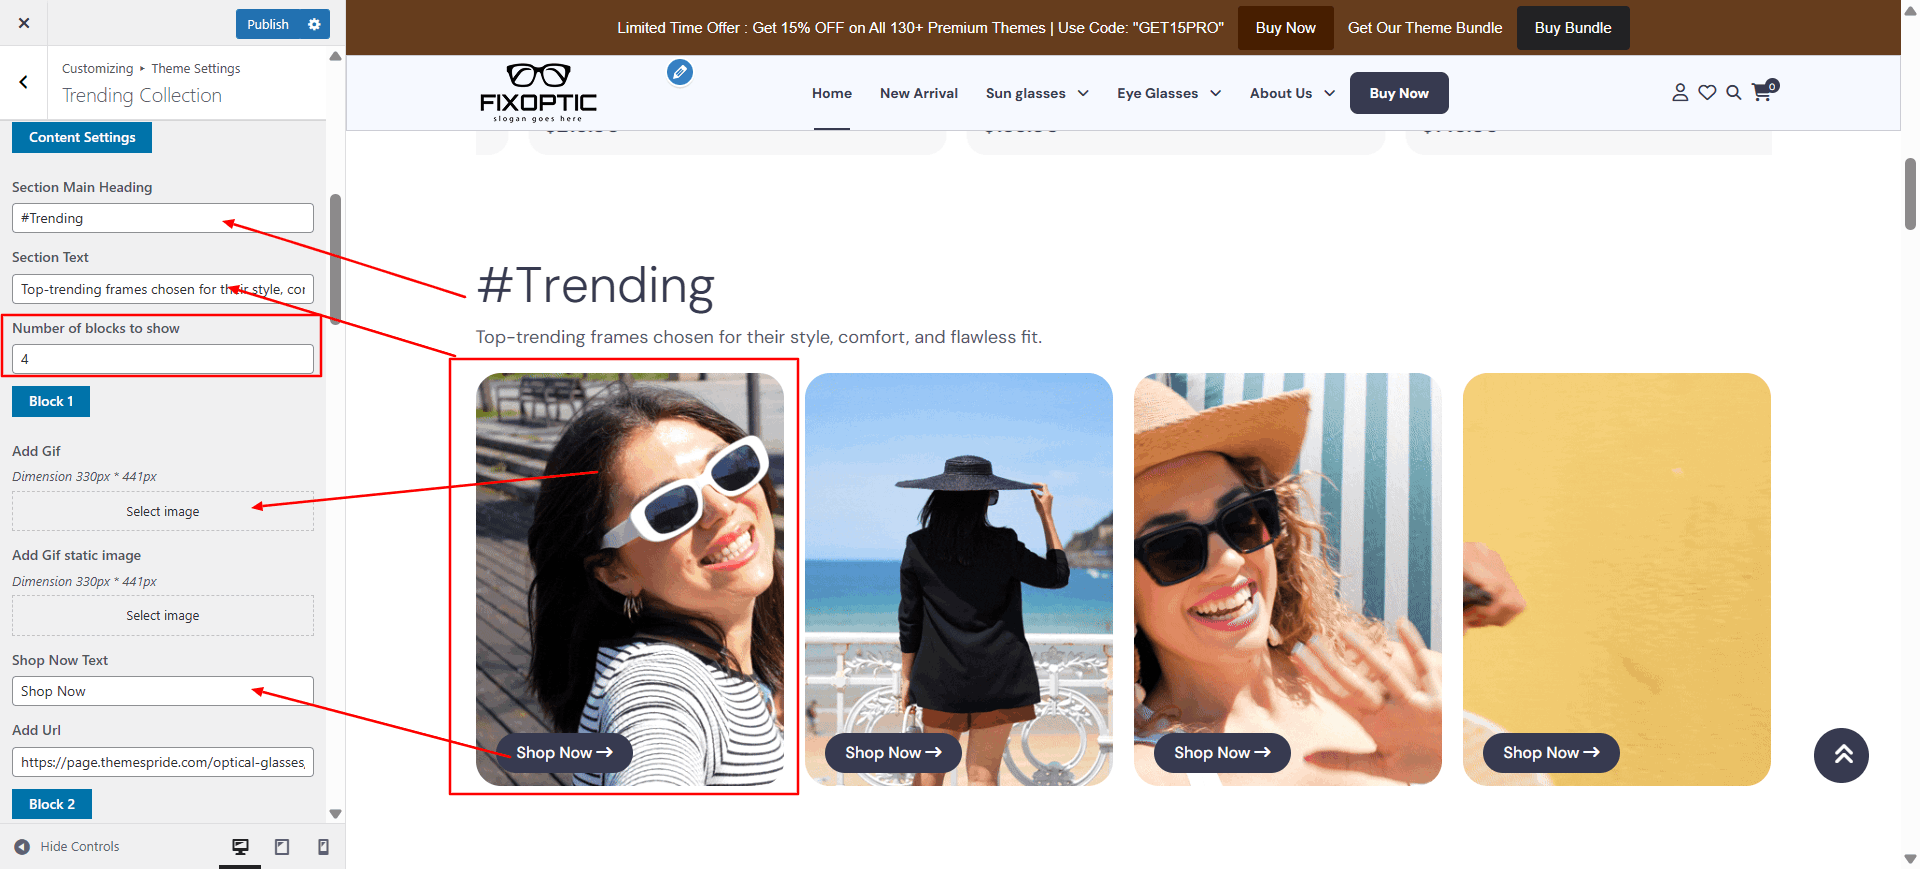
Configure "Trending Collection"
Description: Display 4 trending items with GIF animation and a Shop Now button.
Open Theme Settings → Trending Collection in the Customizer.
Scroll down to access all color and button customization options for this section.
Configure "Eyeglasses" Section
Description: Present curated eyeglasses with background and content options.
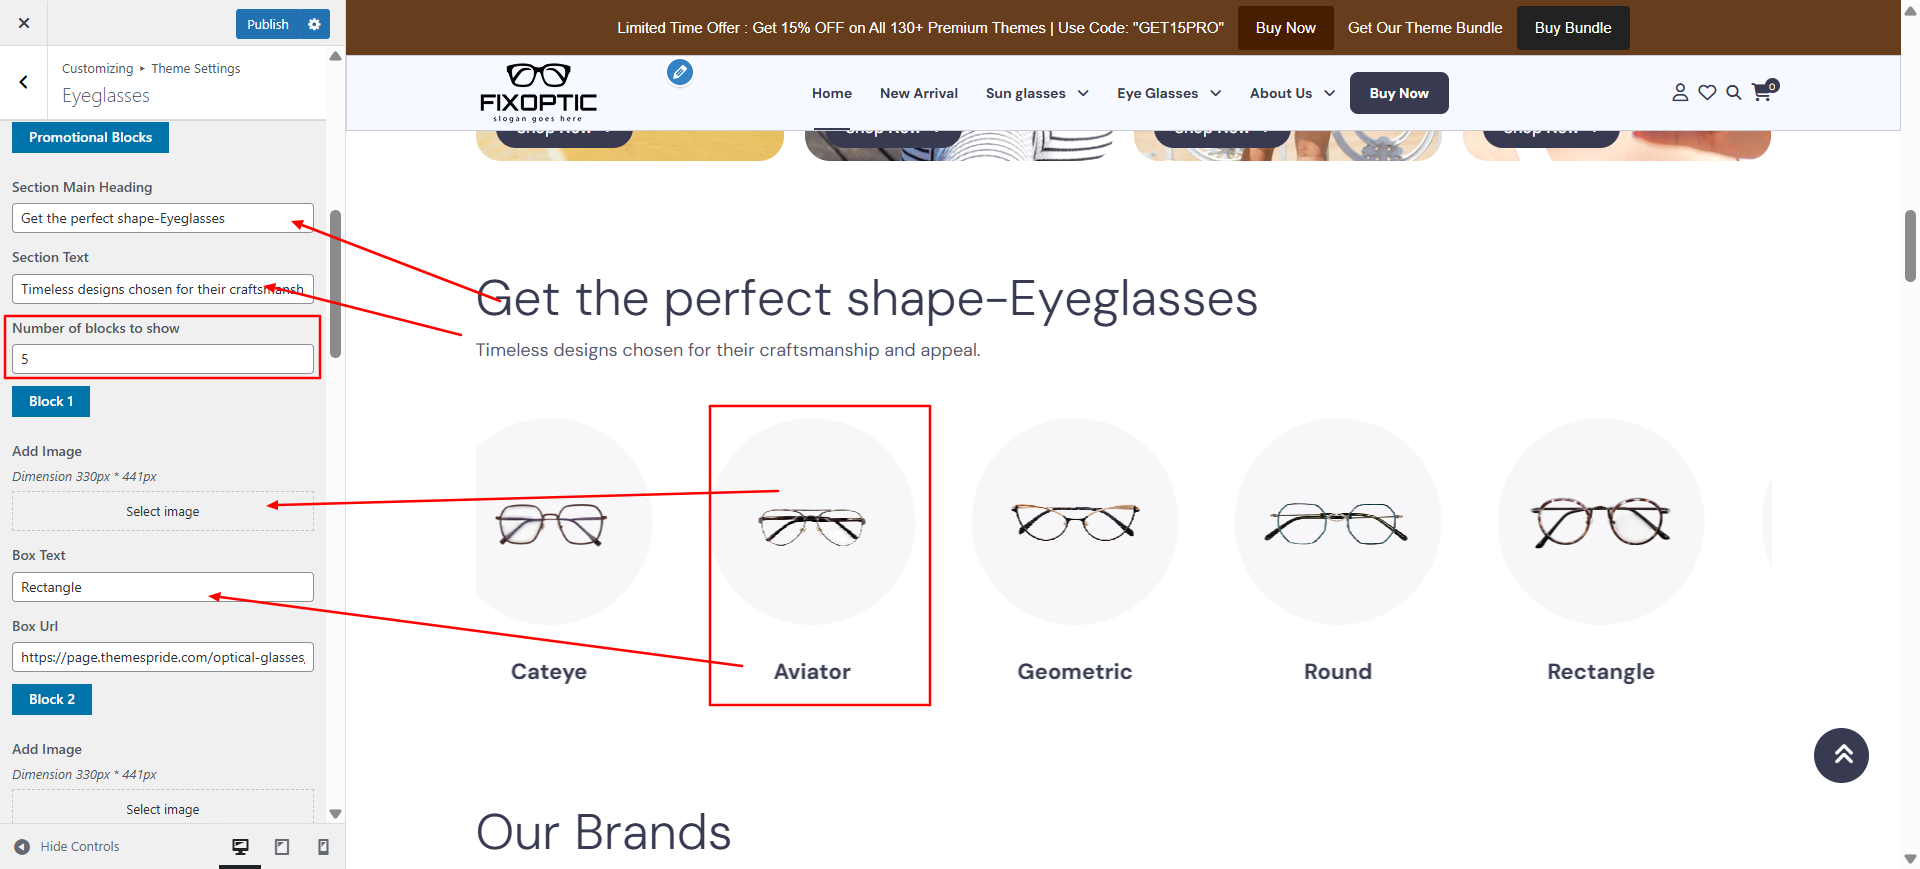
Open "Eyeglasses" from the Theme Settings panel in the Customizer.
Update background visuals using "Background Color" and "Background Images".
Adjust the number of boxes to show, and fill in each box with your content.
Scroll down to see all the color customization options for this section.
Configure "Our Brands" Section
Description: Present curated Our Brands with background and content options.
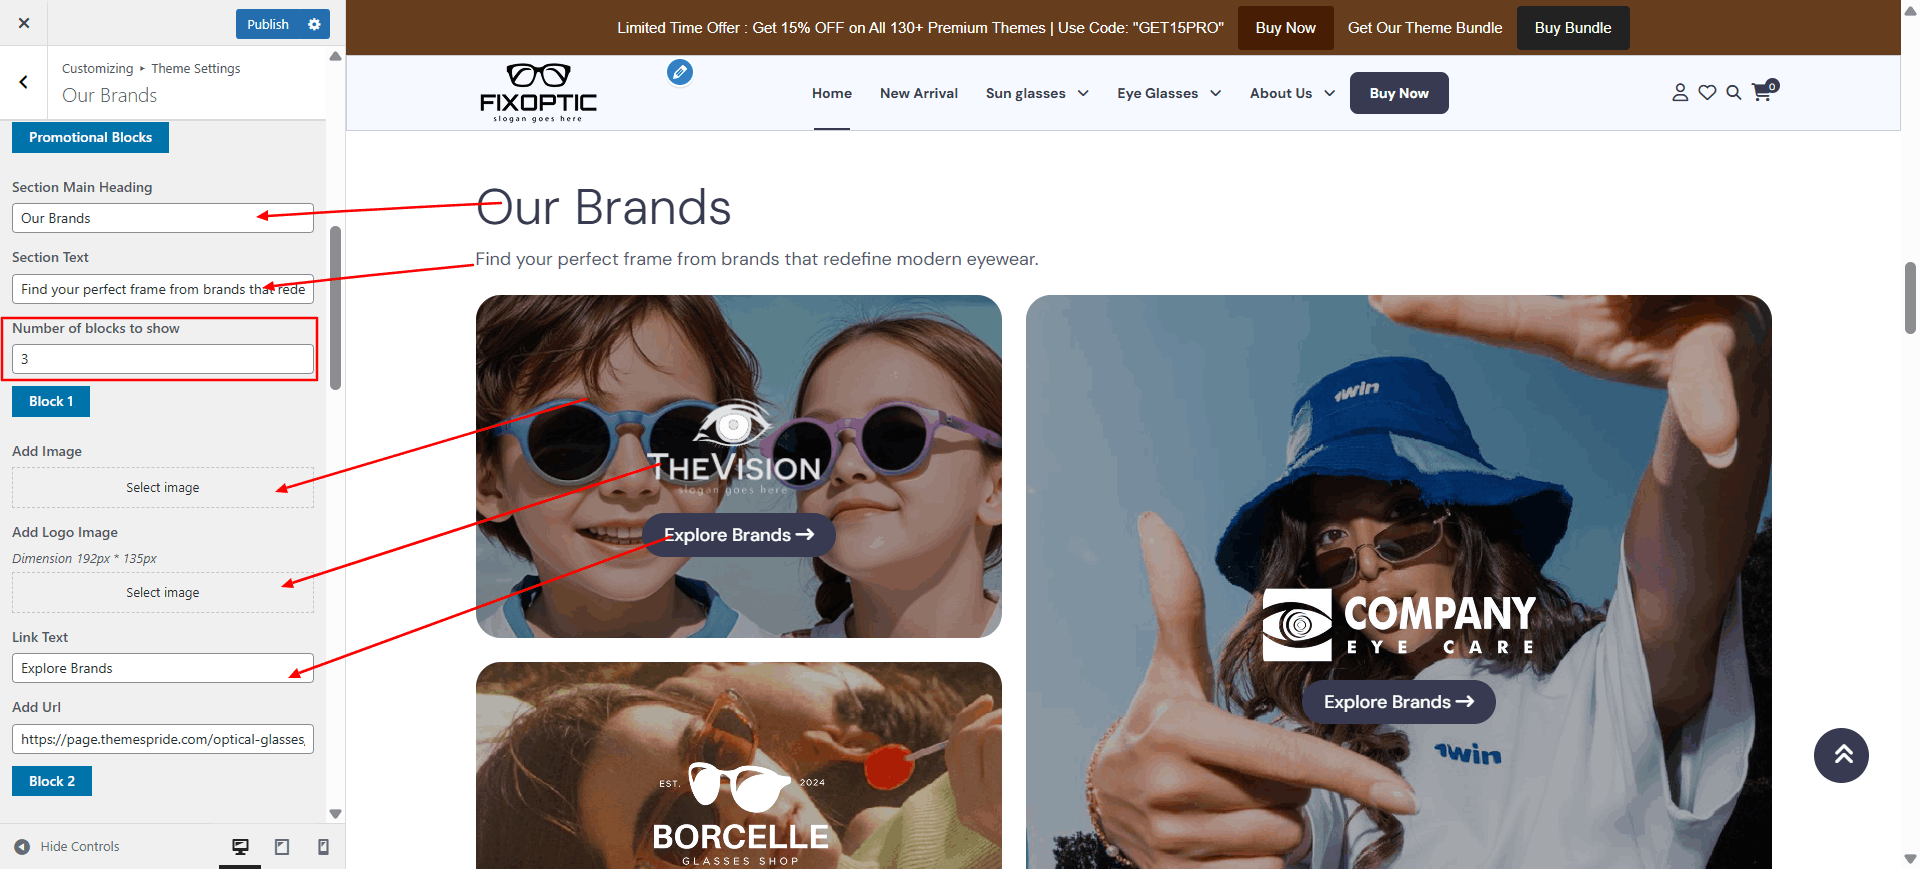
Open "Our Brands" from the Theme Settings panel in the Customizer.
Update background visuals using "Background Color" and "Background Images".
Adjust the number of boxes to show, and fill in each box with your content.
Scroll down to see all the color customization options for this section.
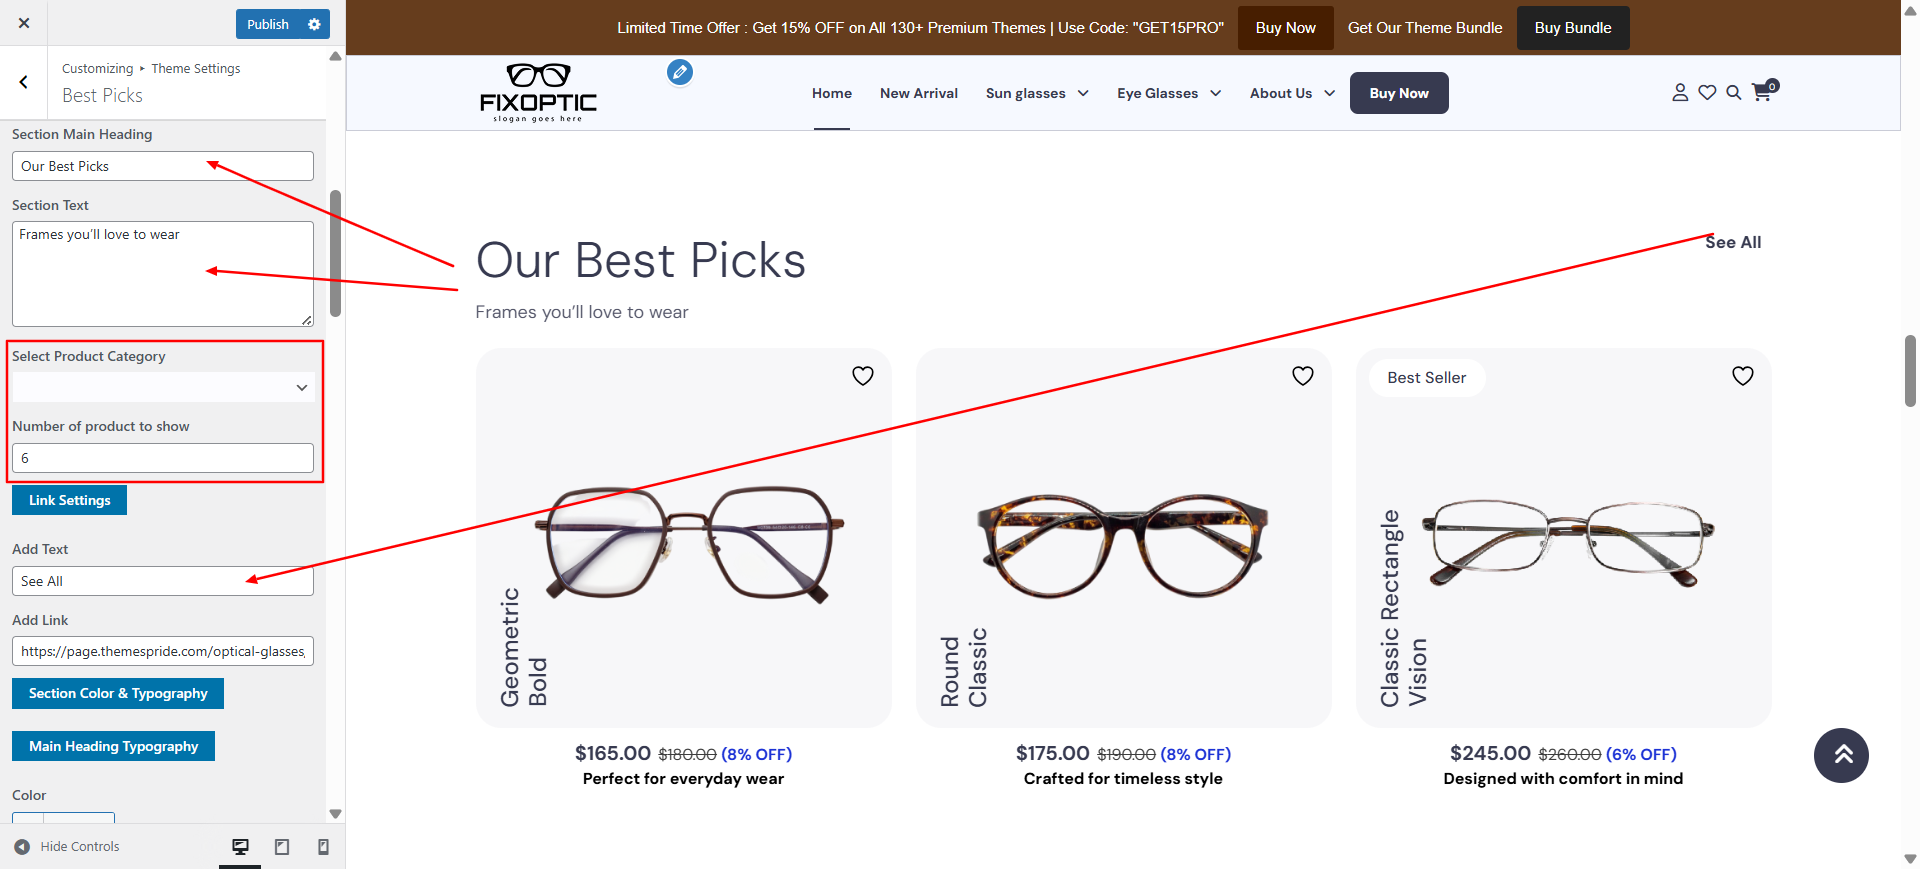
Configure "Best Picks" Section
Description: Create or edit demo products in WooCommerce and display them in the Best Picks section.
Open WooCommerce → Products → Add New from your WordPress dashboard.
Follow these steps to create a demo product:
Enter the Product Name
Add a Description for the product.
Set the Regular Price and optionally a Sale Price.
Upload a Product Image and additional gallery images.
Assign the product to a Category (e.g., “Best Picks”).
Click Publish to save the product.
To edit an existing demo product, go to WooCommerce → Products → All Products, hover over the product name, and click Edit. Update details such as price, description, or images, then click Update.
To control how demo products appear in the Best Picks section, go to
Appearance → Customize → Theme Settings → Best Picks.
Here you can adjust the number of products shown, their order, and layout style.
Scroll down to explore all customization options for this section.
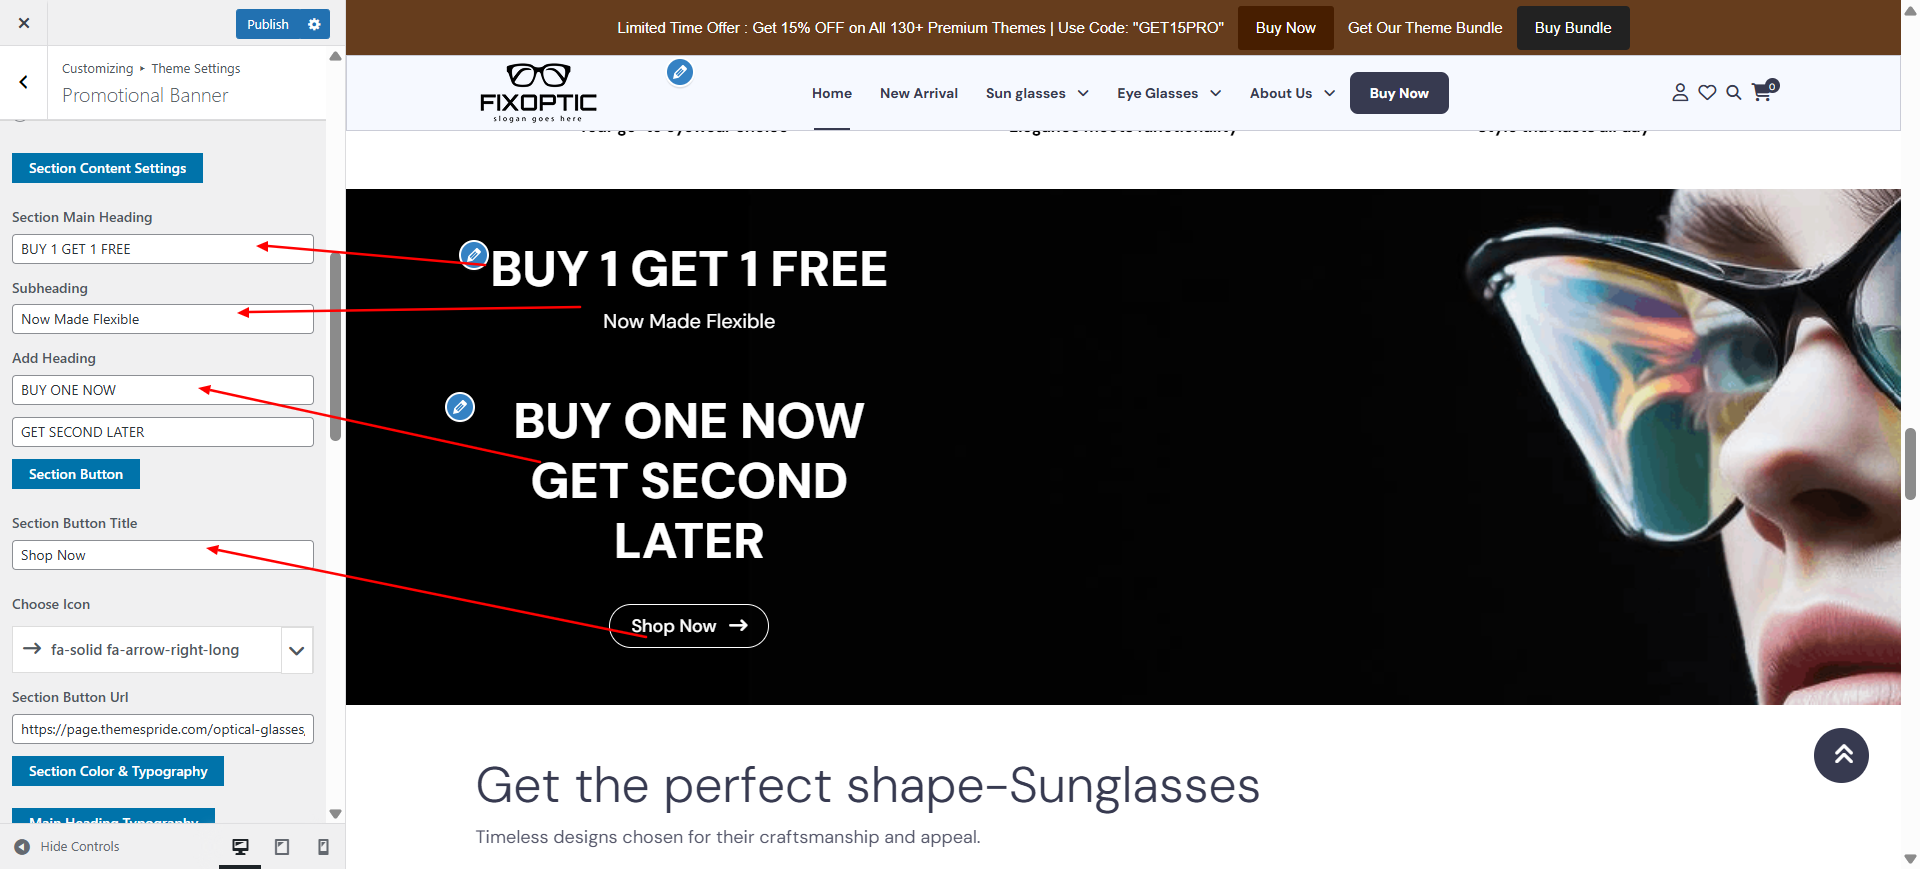
Configure "Promotional Banner" Section
Description: Showcase your Offer's and discount in this section.
Open "Promotional Banner" from the Theme Settings panel in the Customizer.
Update the content as specified below.
Scroll down to see all the color customization options for this section.
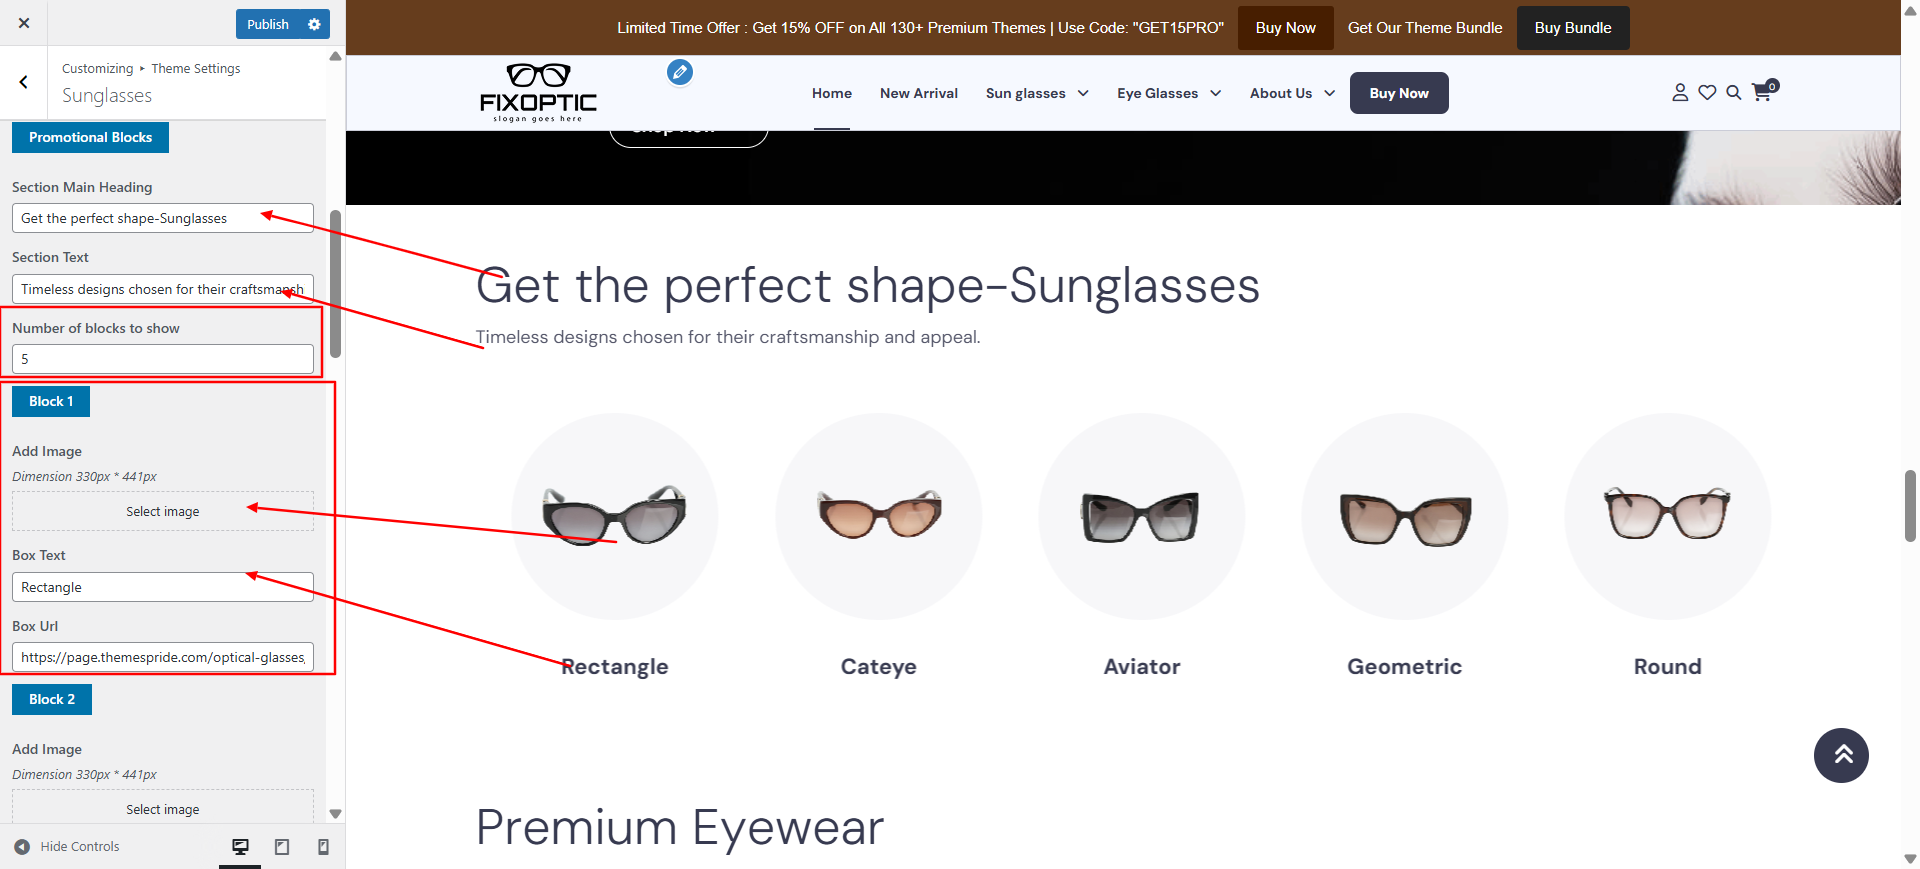
Configure "sunglasses" Section
Description: Present curated sunglasses with background and content options.
Open "Sunglasses" from the Theme Settings panel in the Customizer.
Update background visuals using "Background Color" and "Background Images".
Adjust the number of boxes to show, and fill in each box with your content.
Scroll down to see all the color customization options for this section.
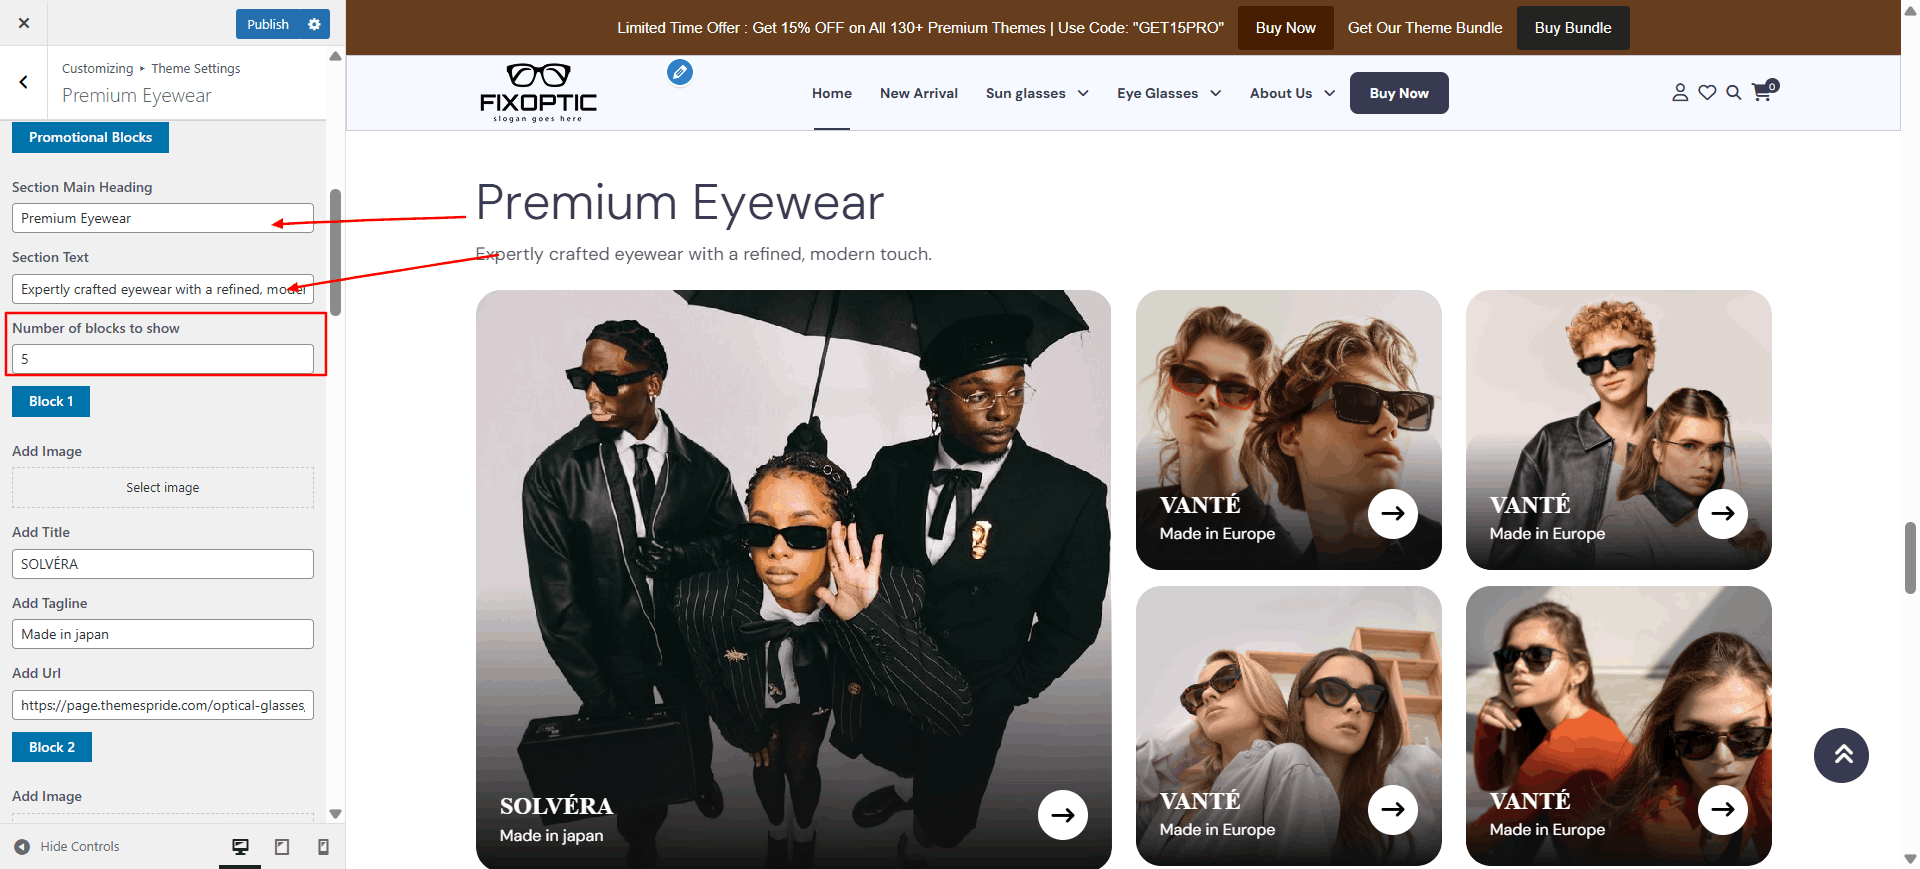
Configure "Premium Eyewear" Section
Description: Present curated Premium Eyewear with background and content options.
Open "Premium Eyewear " from the Theme Settings panel in the Customizer.
Update background visuals using "Background Color" and "Background Images".
Adjust the number of boxes to show, and fill in each box with your content.
Scroll down to see all the color customization options for this section.
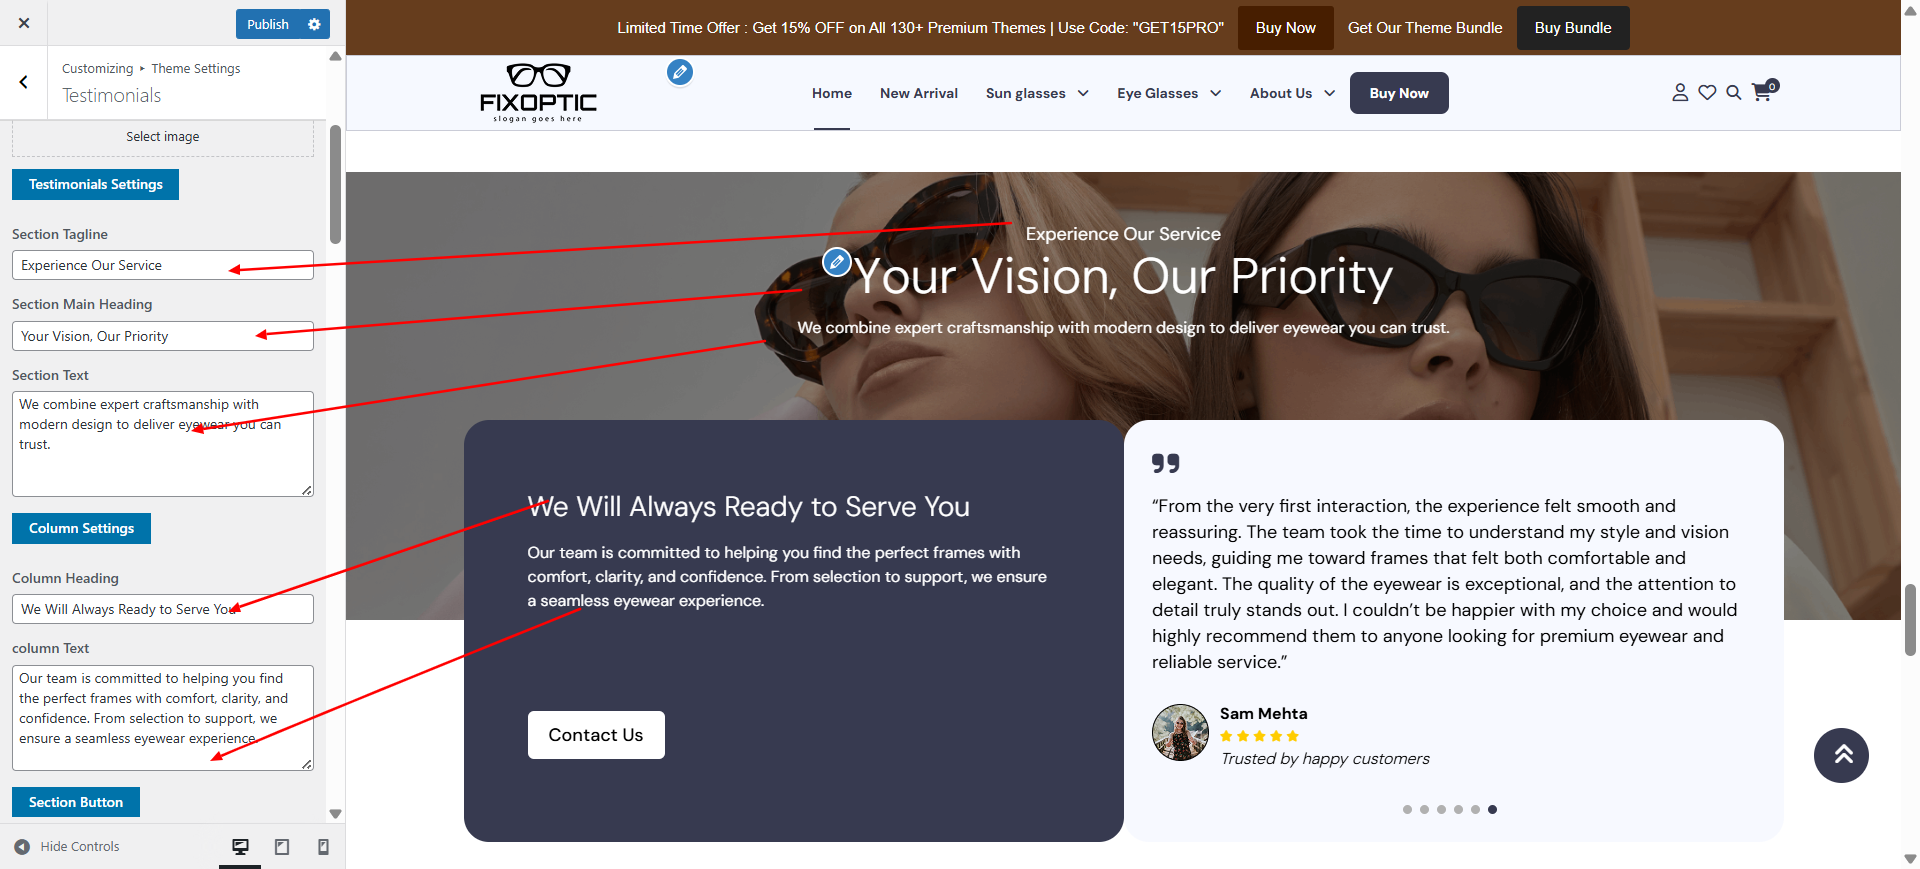
Configure "Testimonials" Section
Description: Share client testimonials and feedback to build trust.
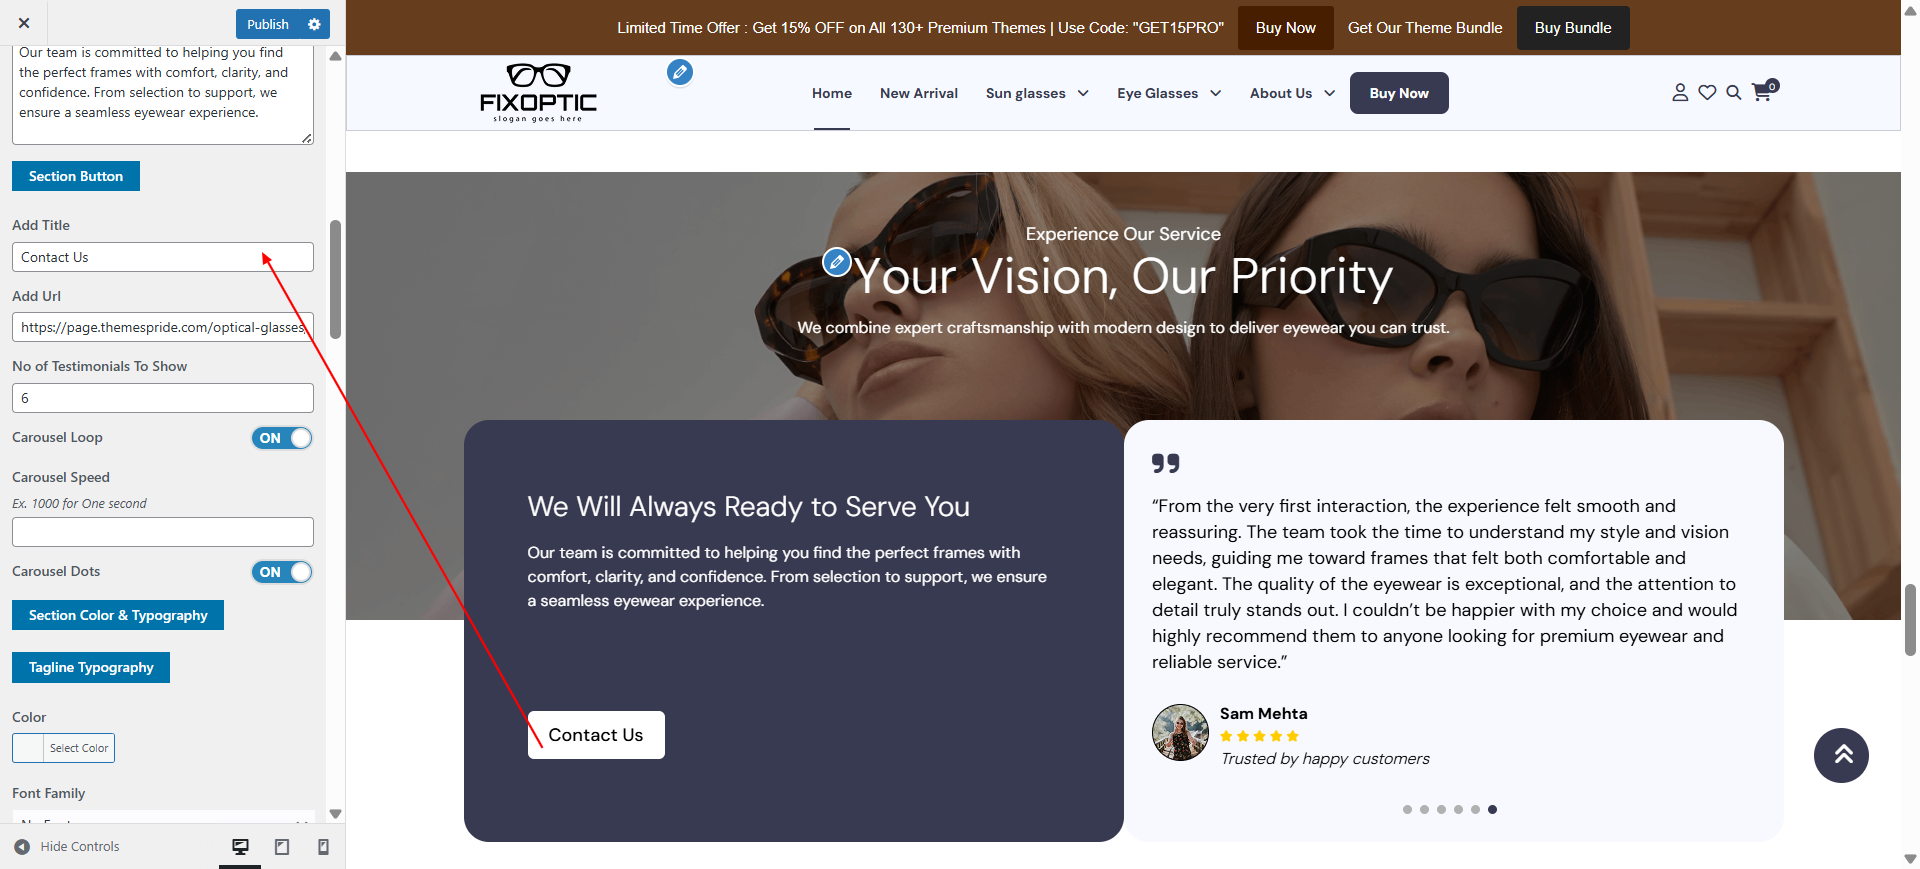
Open "Testimonials" from the Theme Settings panel in the Customizer.
Update background visuals using "Background Color" and "Background Images".
Adjust the number of Testimonials to show, and fill in each box with your content.
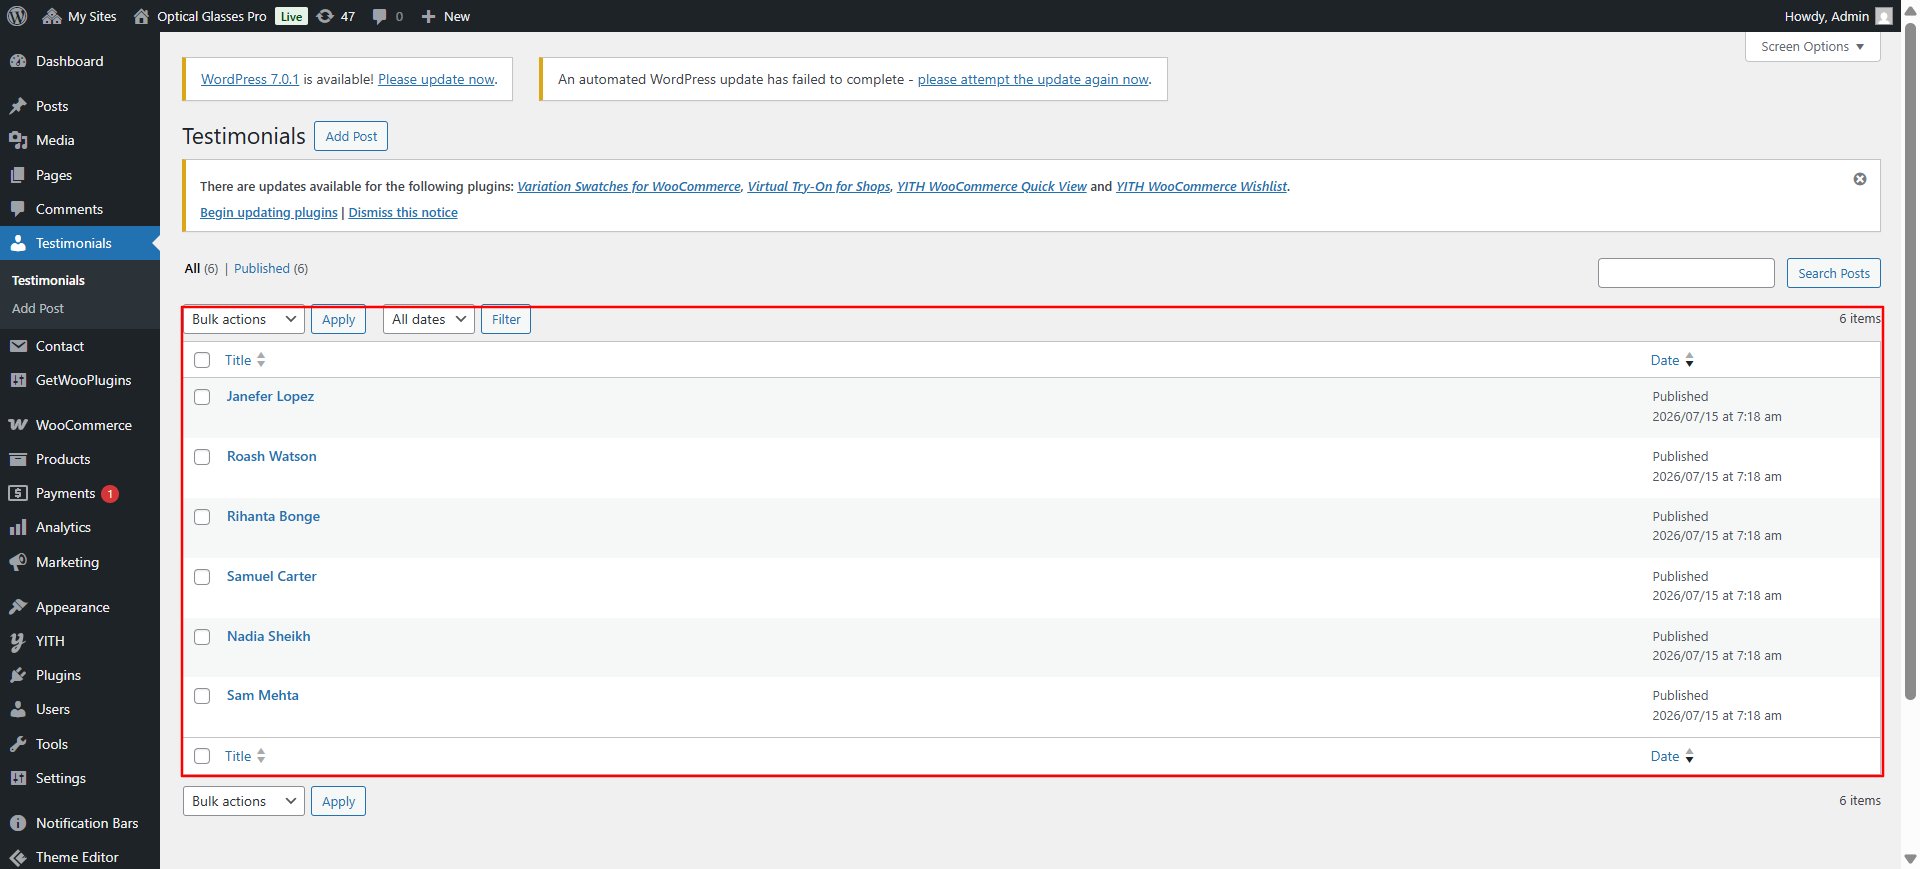
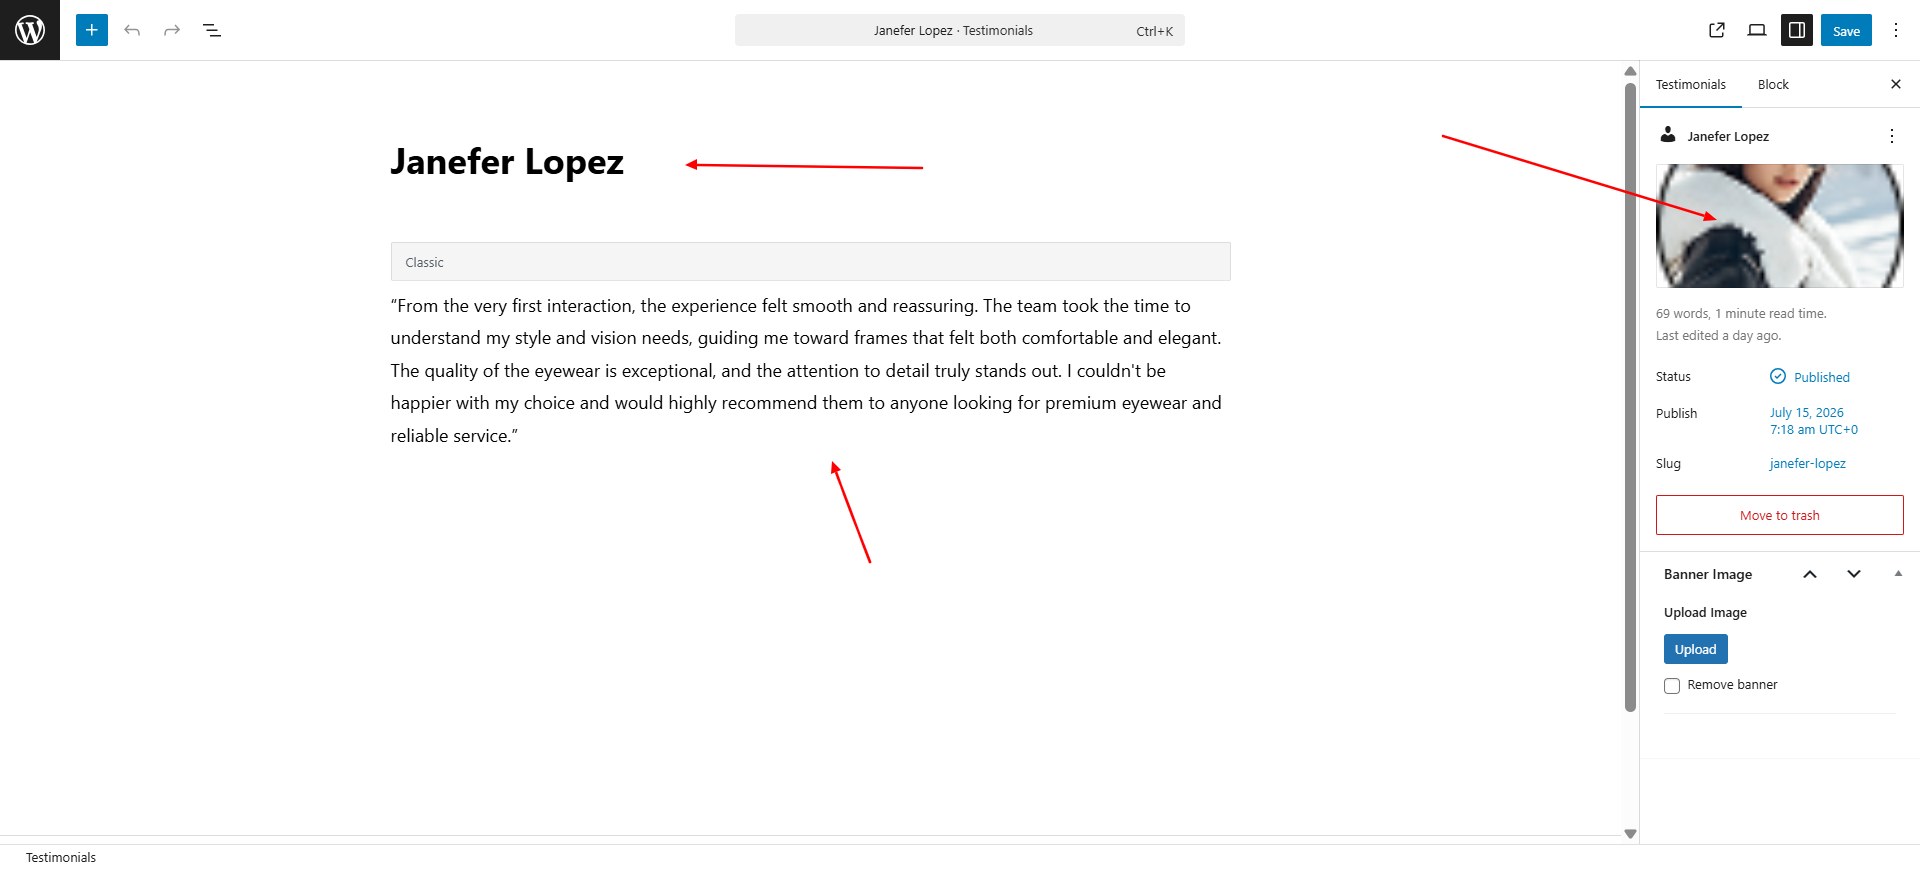
Go to Dashboard → Testimonials to view demo testimonials.
Scroll down to see all the color customization options for this section.
Configure "Blog" Section
Description: Introduce your blog here in this section.
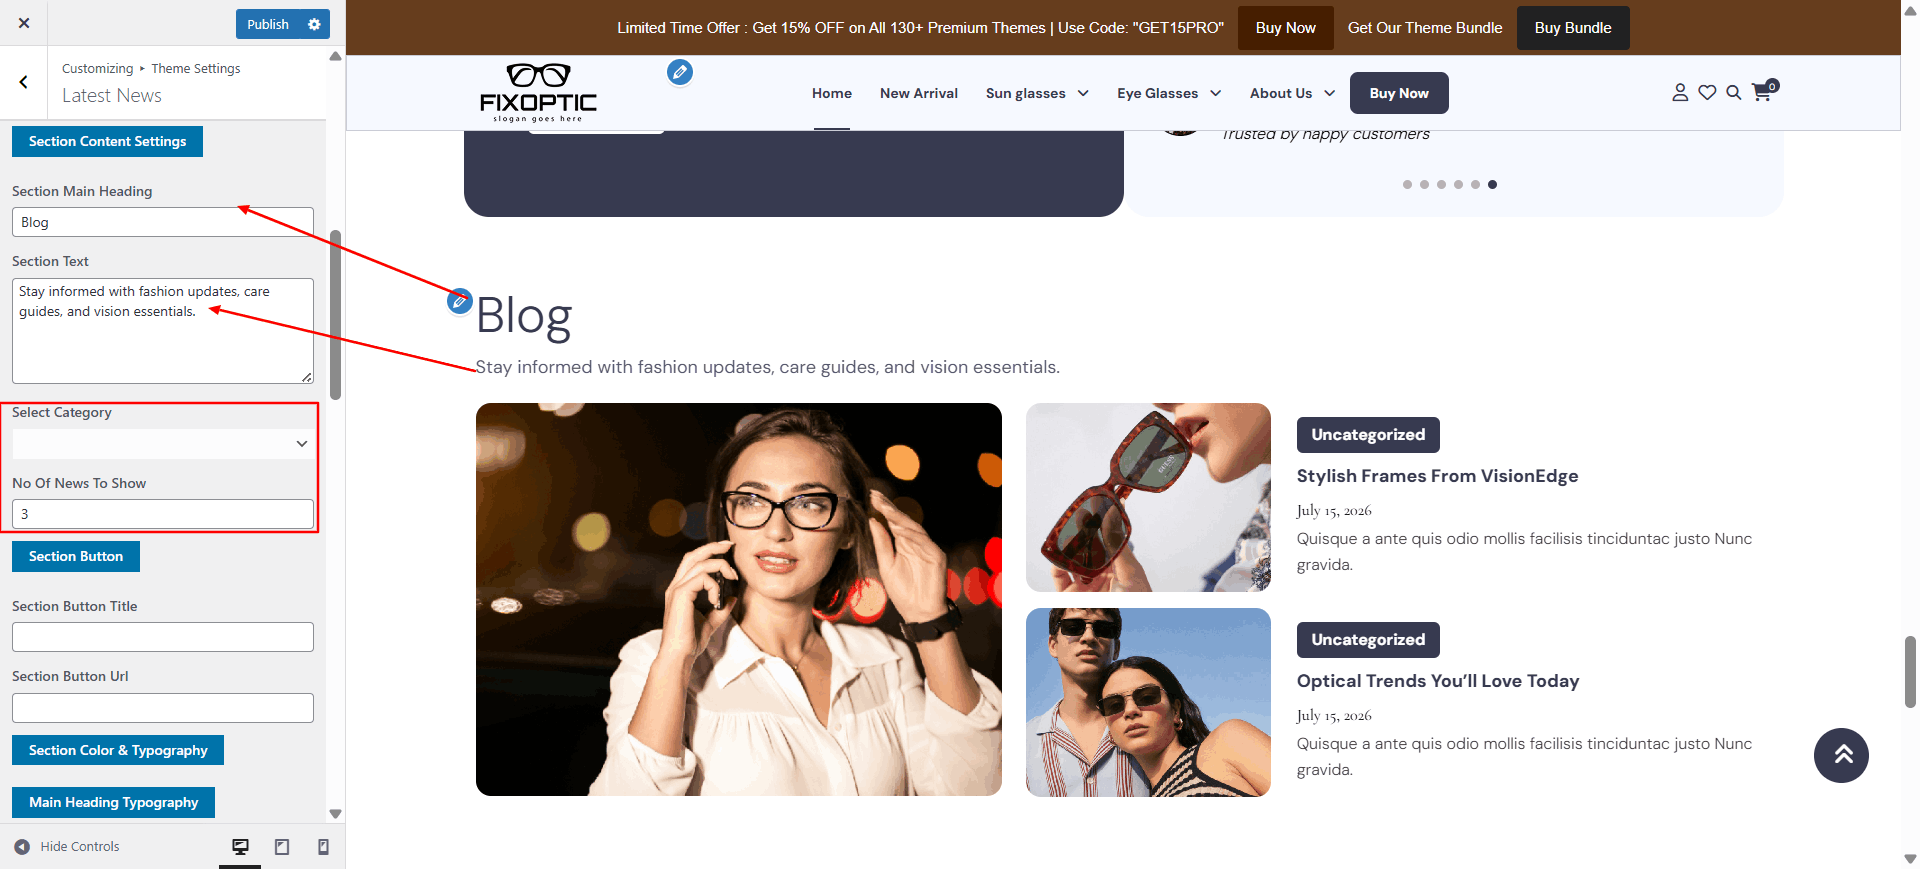
Open "Blog" from the Theme Settings panel in the Customizer.
Update background visuals using "Background Color" and "Background Images".
Adjust the number of blog to show, and fill in each box with your content.
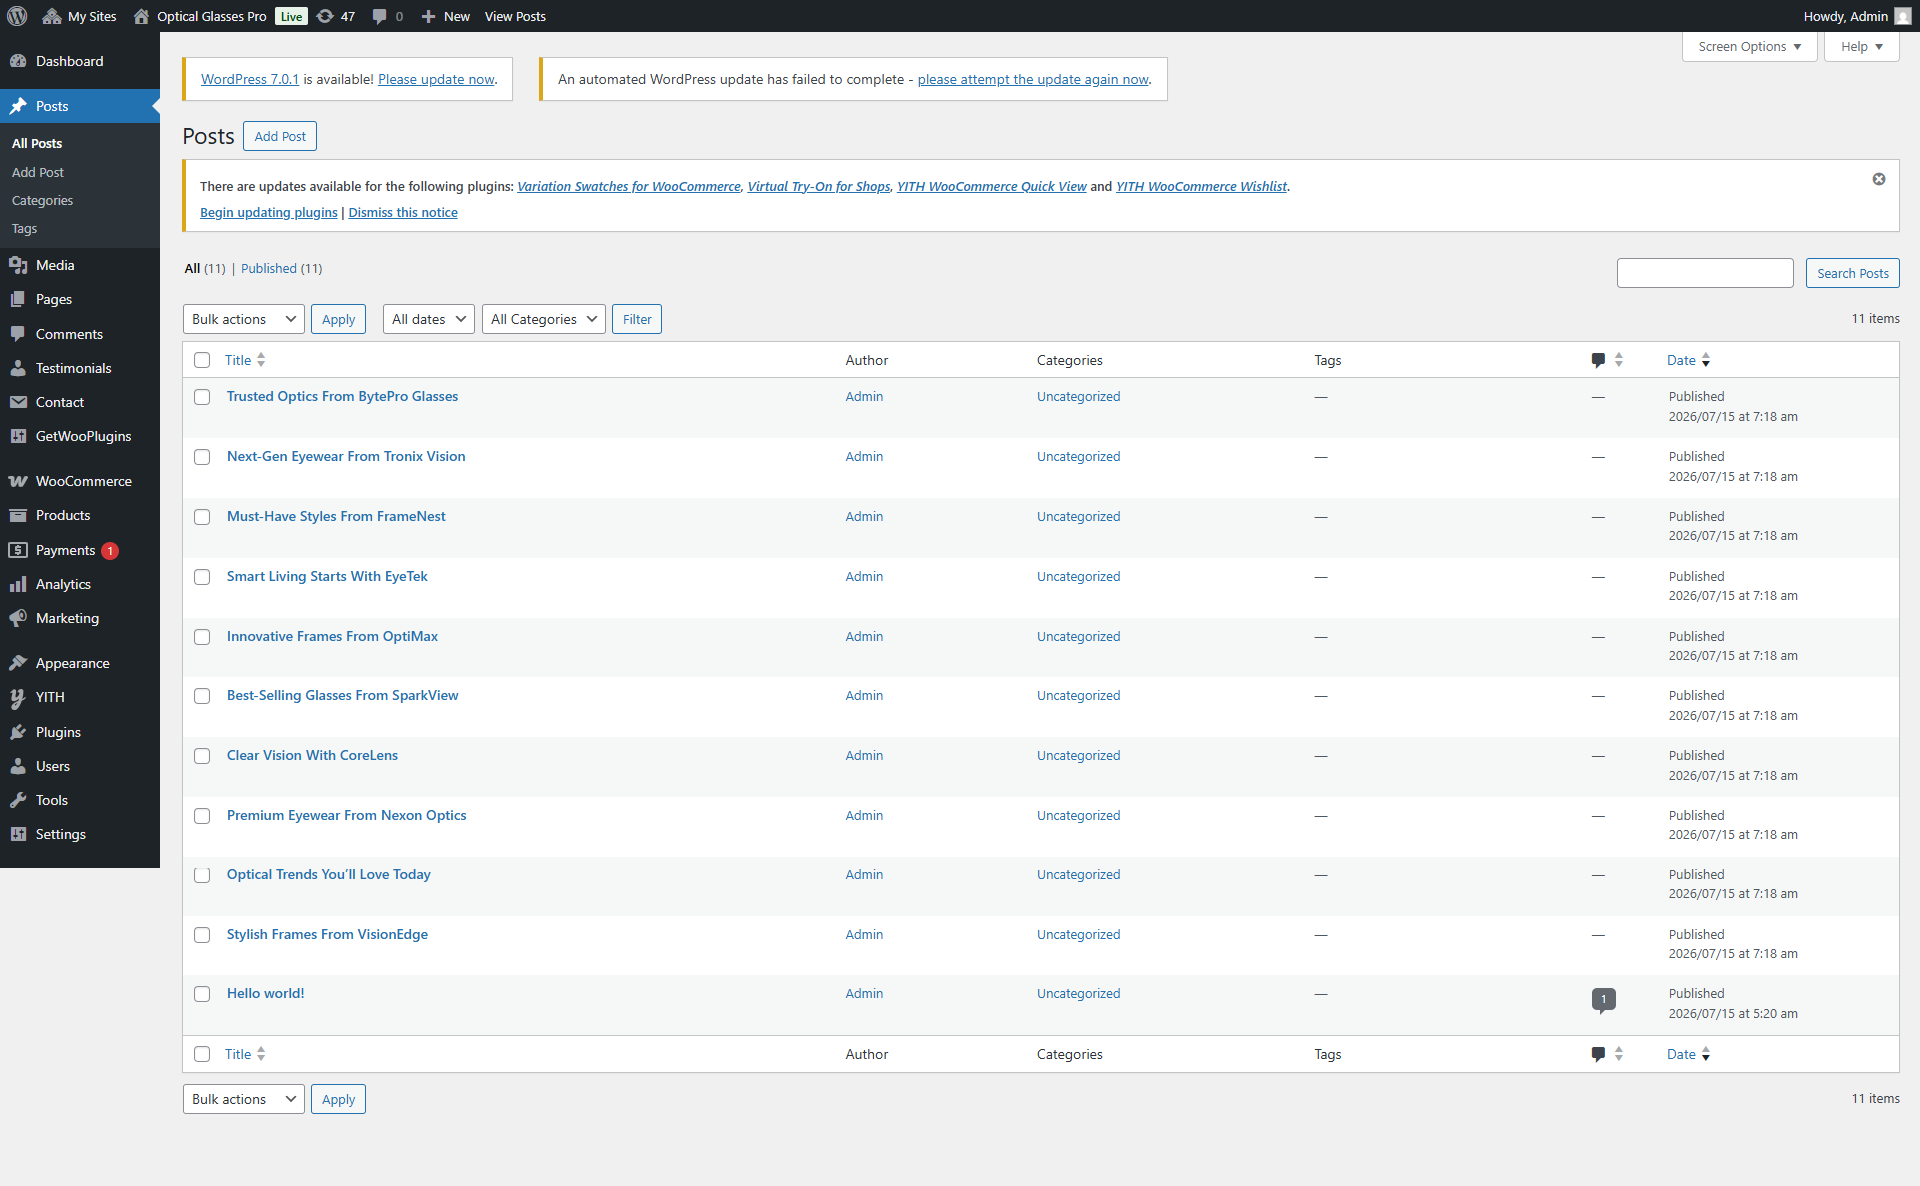
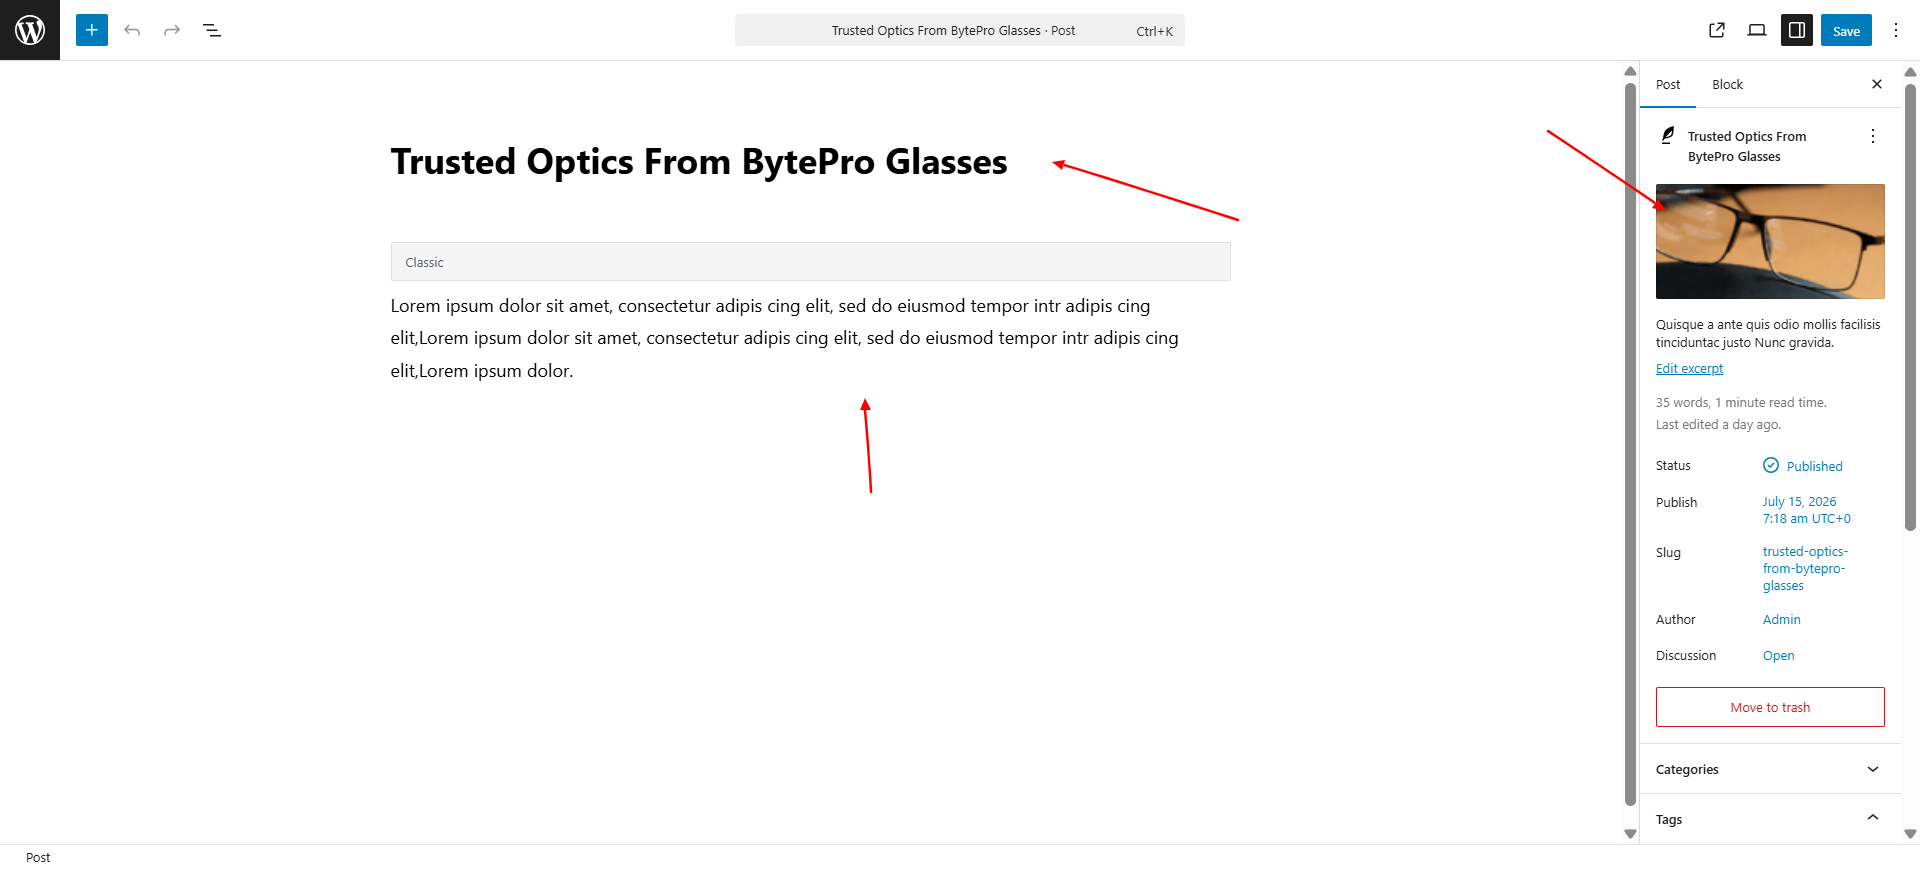
Go to Dashboard → Blog to view demo blog.
Scroll down to see all the color customization options for this section.
Configure "Instagram Feed"
Description: Add information Instagram Feed your agency, including images and background customization.
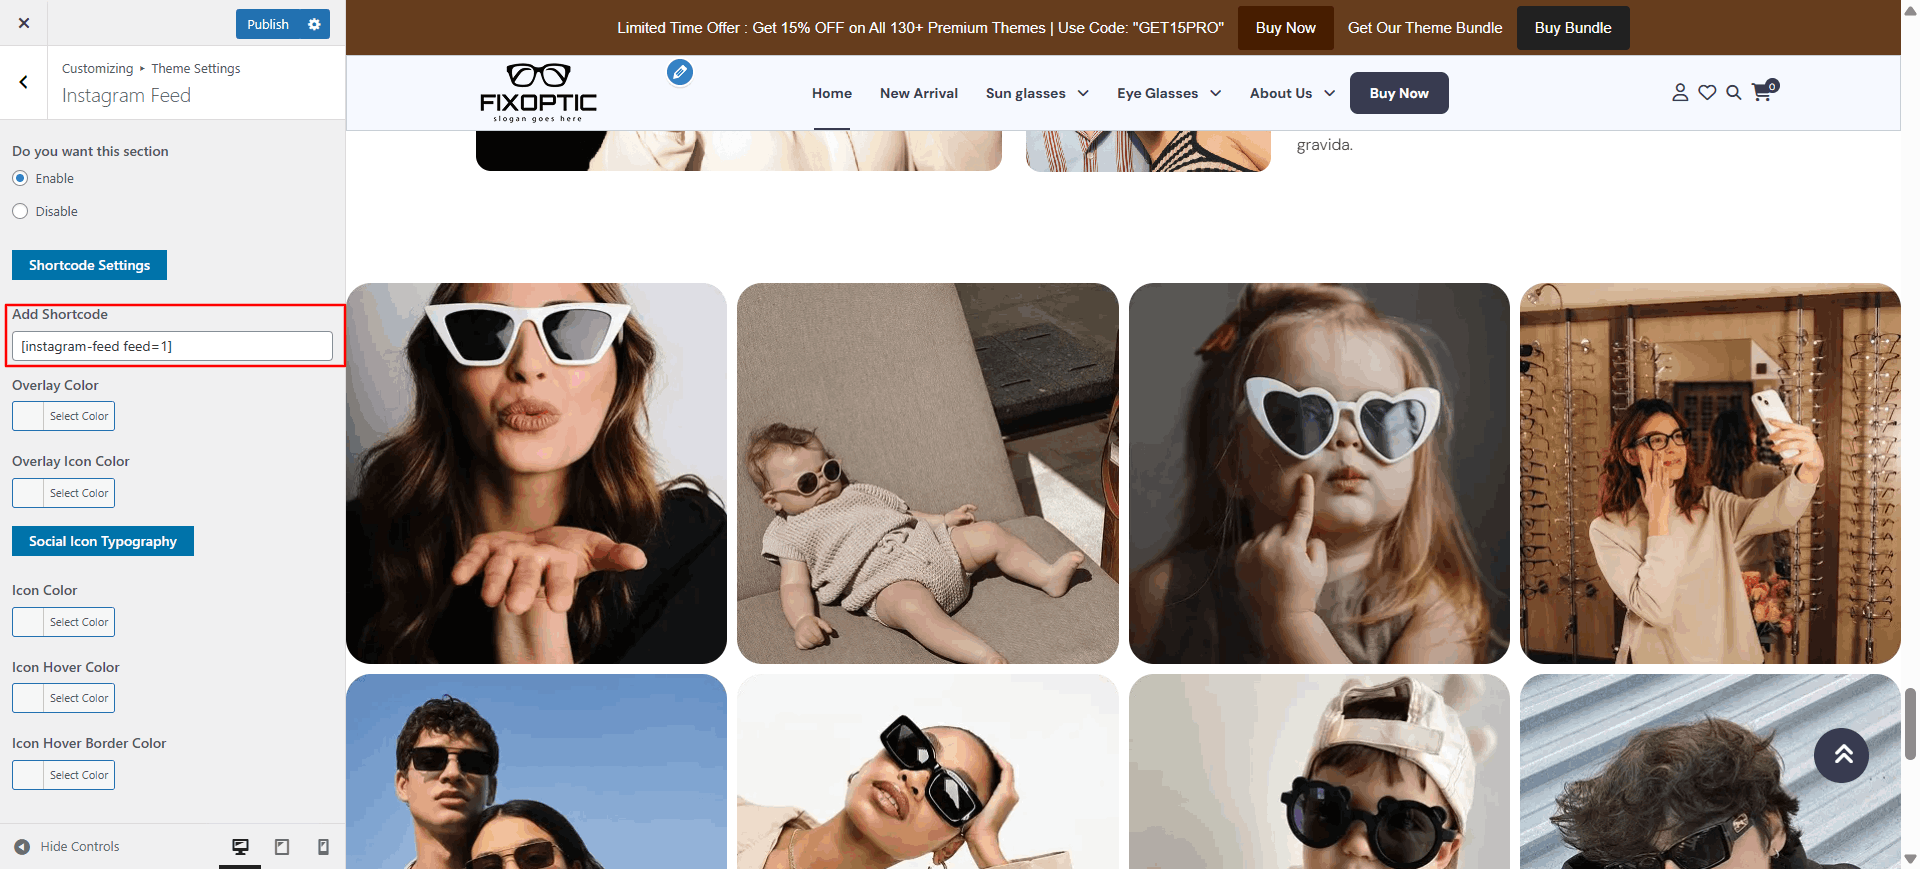
Open Theme Settings → Instagram Feed in the Customizer.
Customize background color and image settings using the available options.
Setup your instagram account and paste the shortcode here.
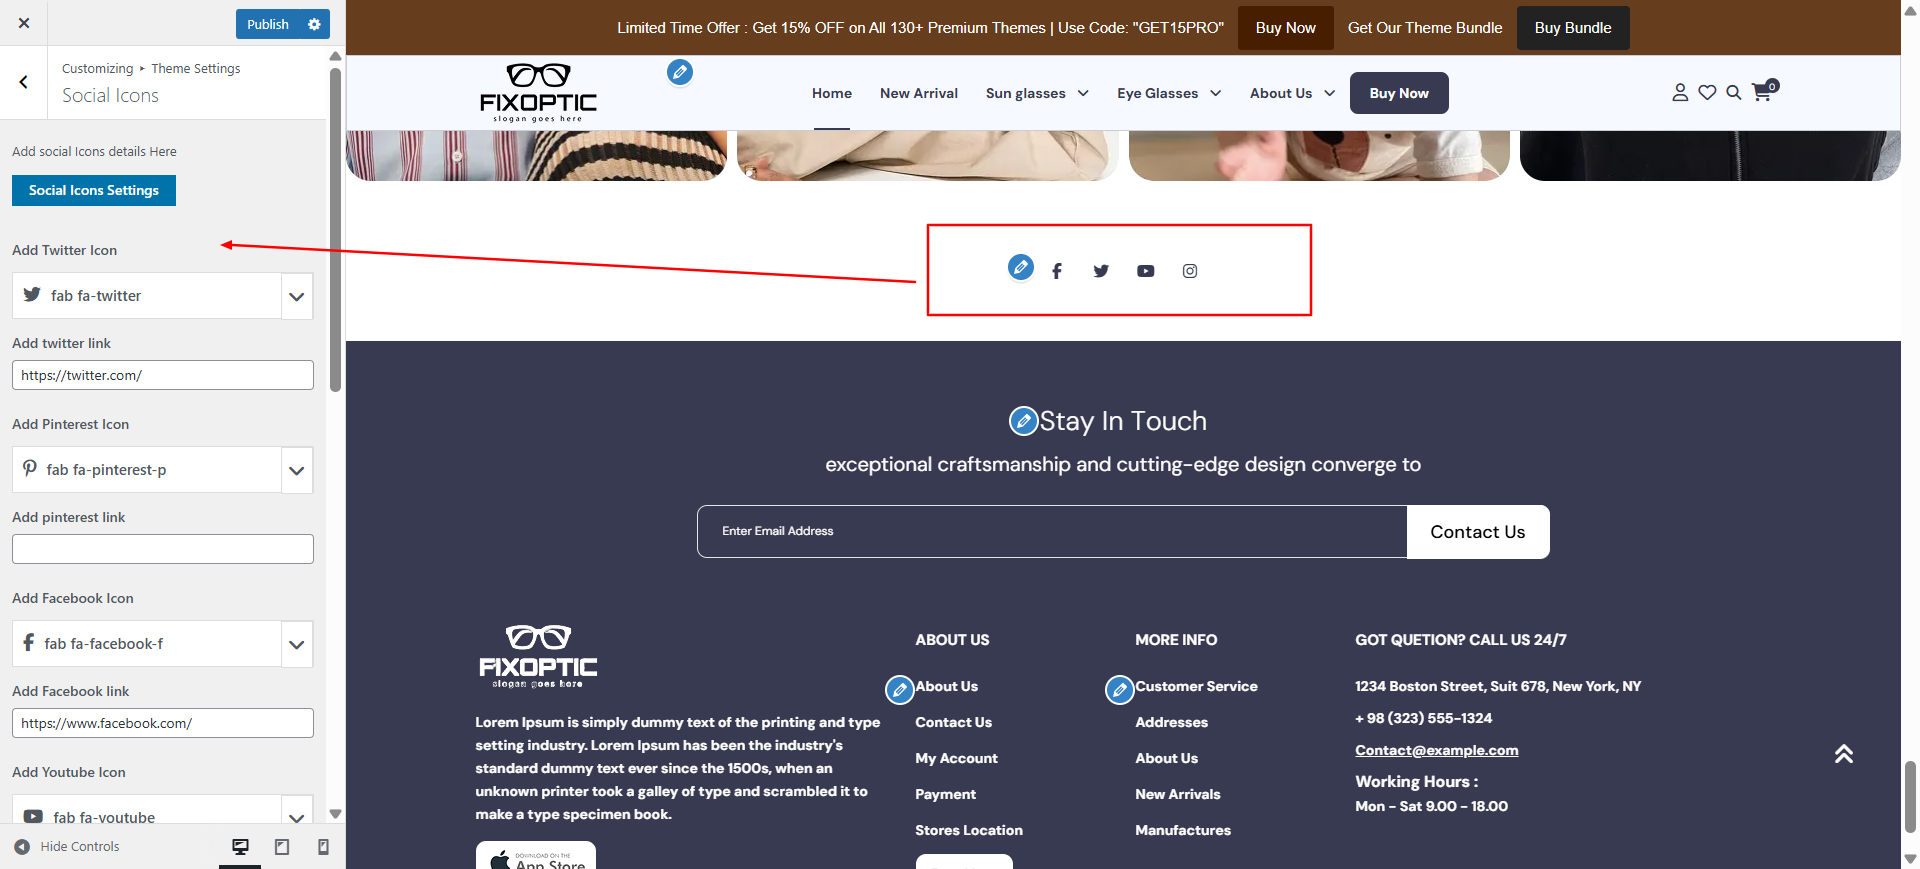
Update Social icons details.
Scroll down to access all color customization options for this section.
Configure "Newsletter"
Description: Set up a Newsletter signup form to grow your audience.
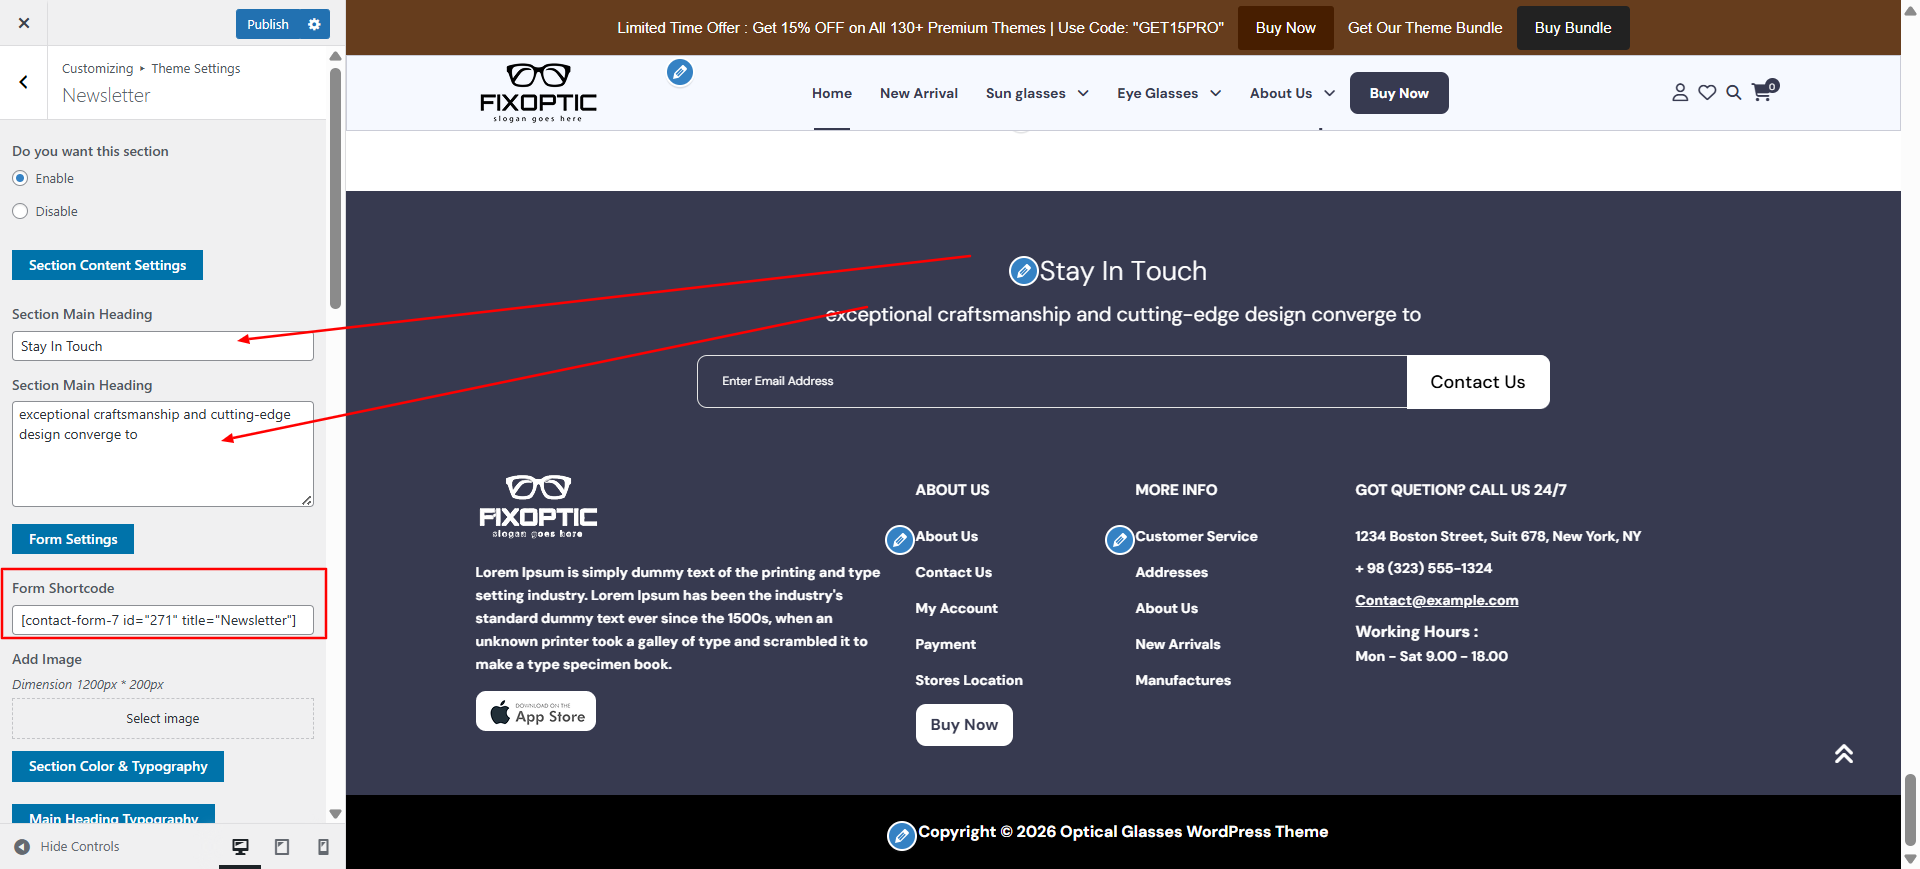
Go to Theme Settings → Newsletter in the Customizer.
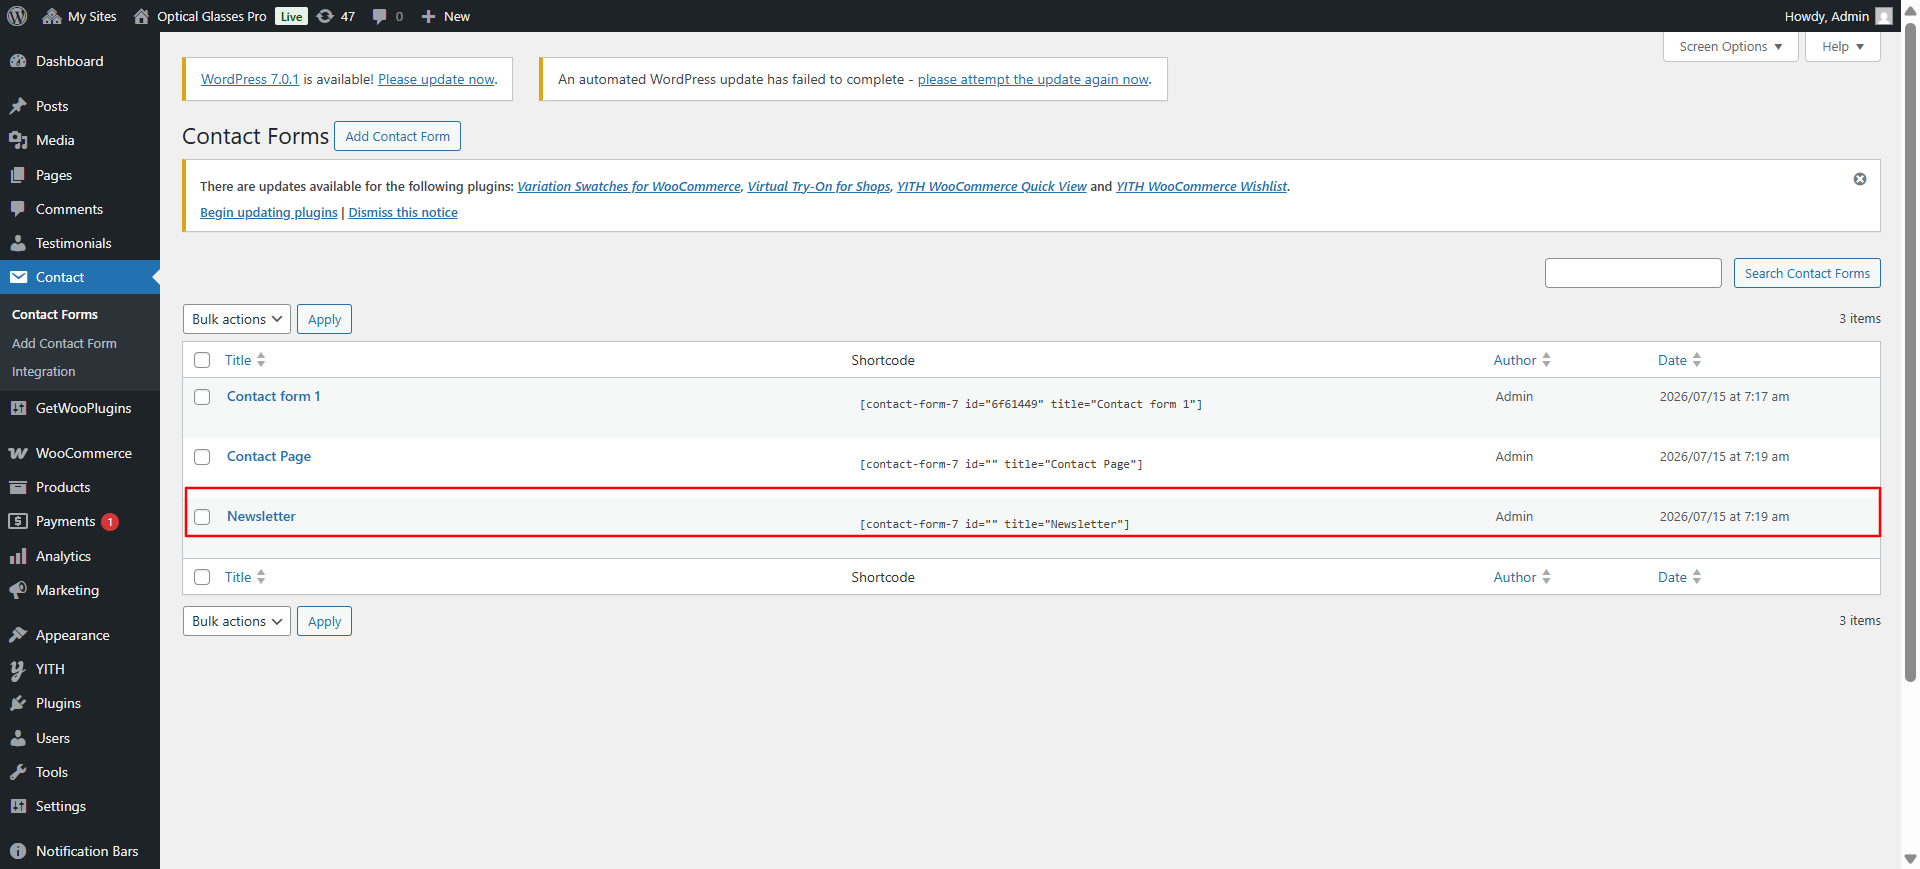
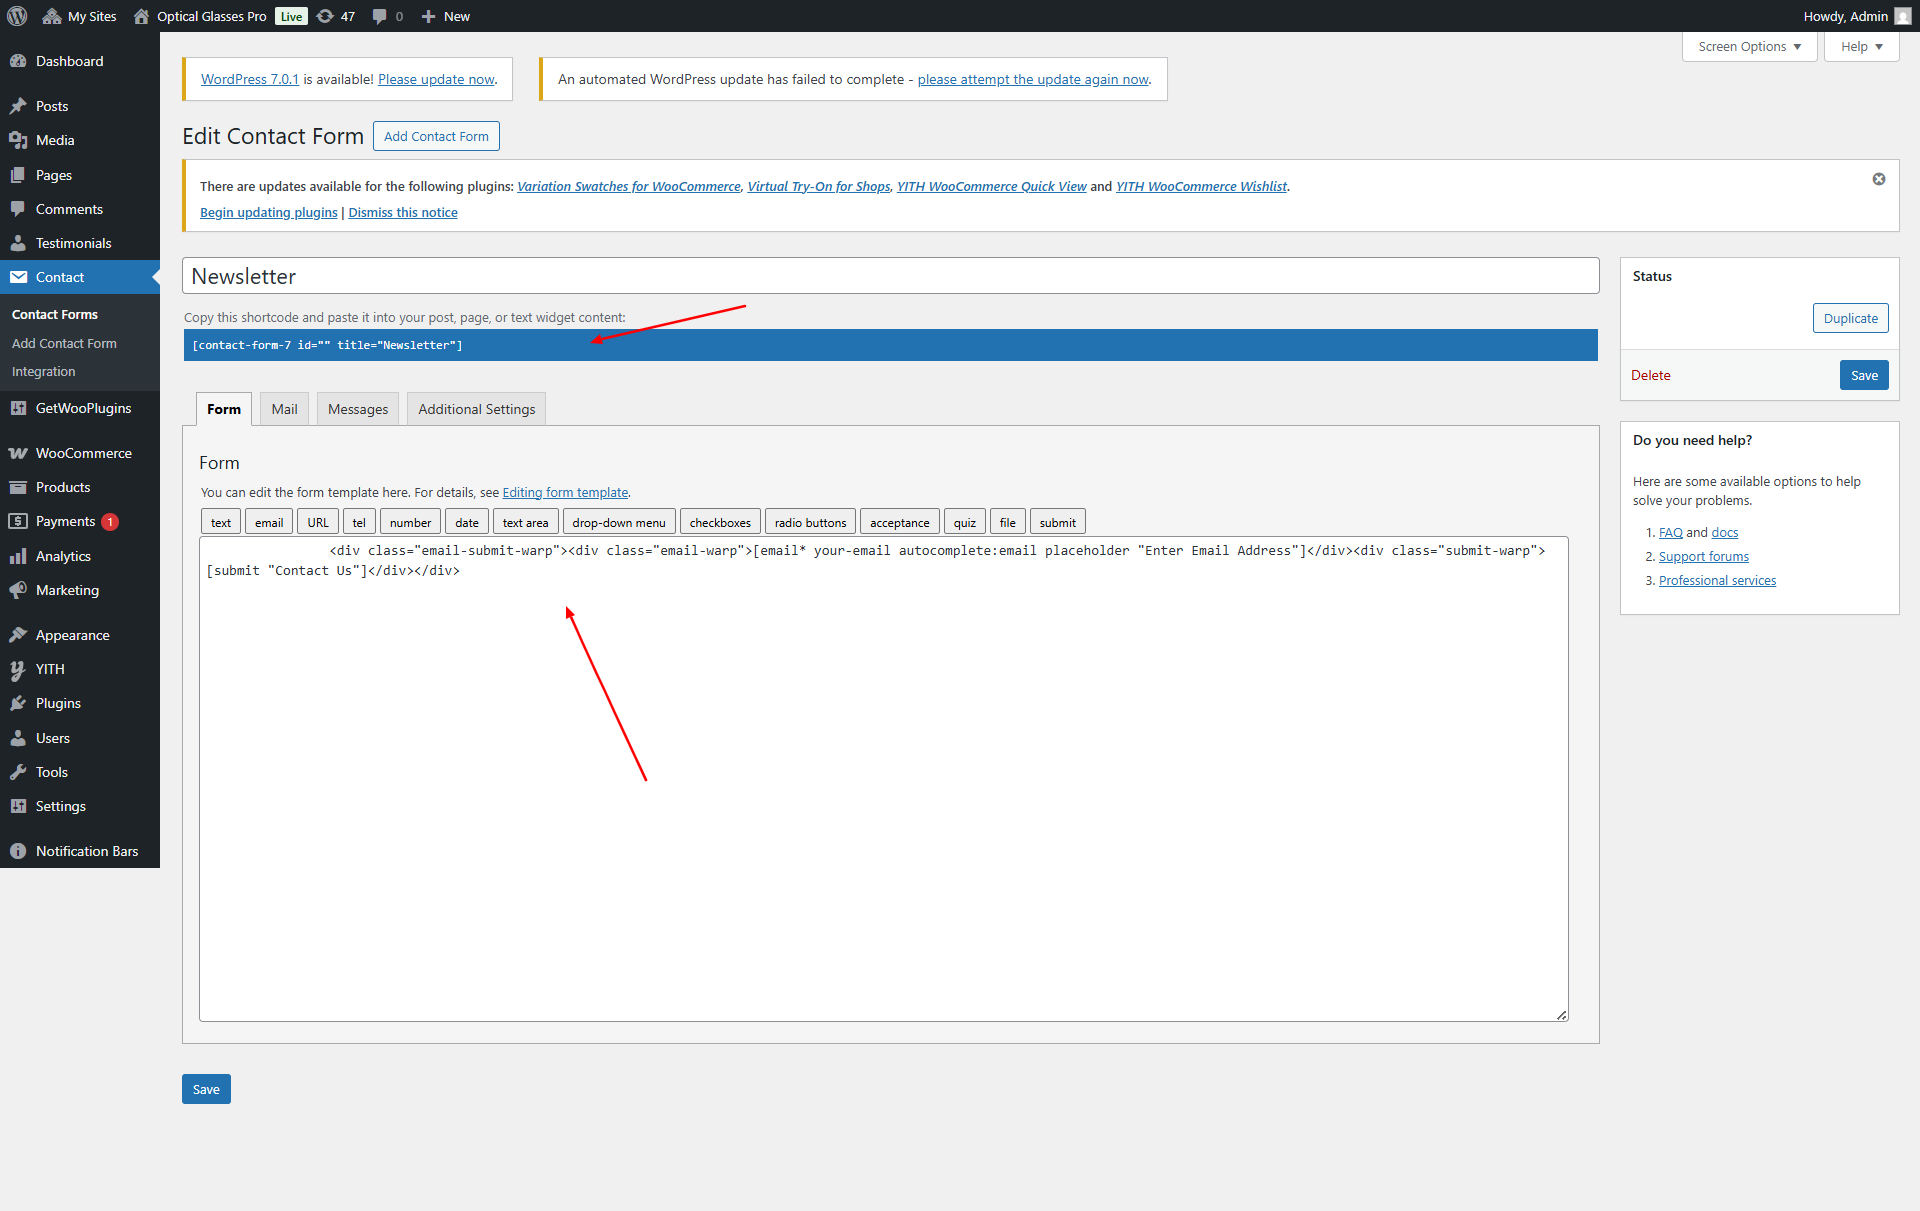
Edit the page title and insert your form shortcode.
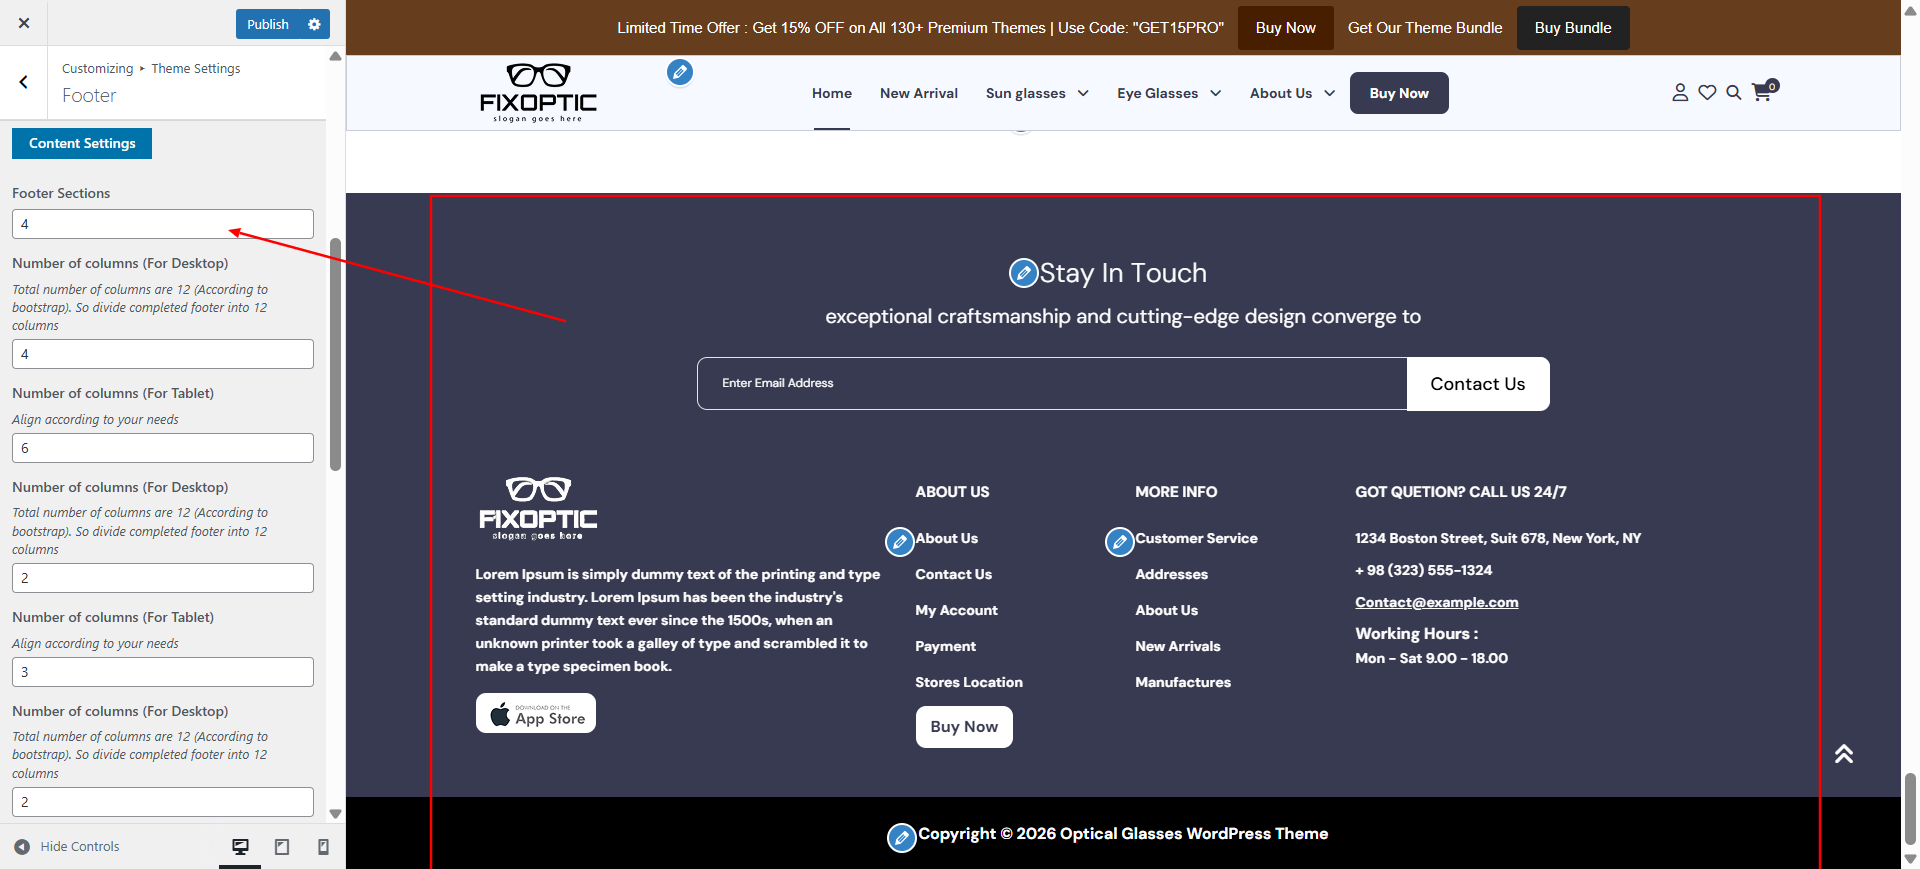
Configure "Footer"
Description: Configure the footer area, including widgets and navigation menus.
Go to Theme Settings → Footer.
Adjust the number of footer columns and set their width using Bootstrap grid values.
To update footer widget content:
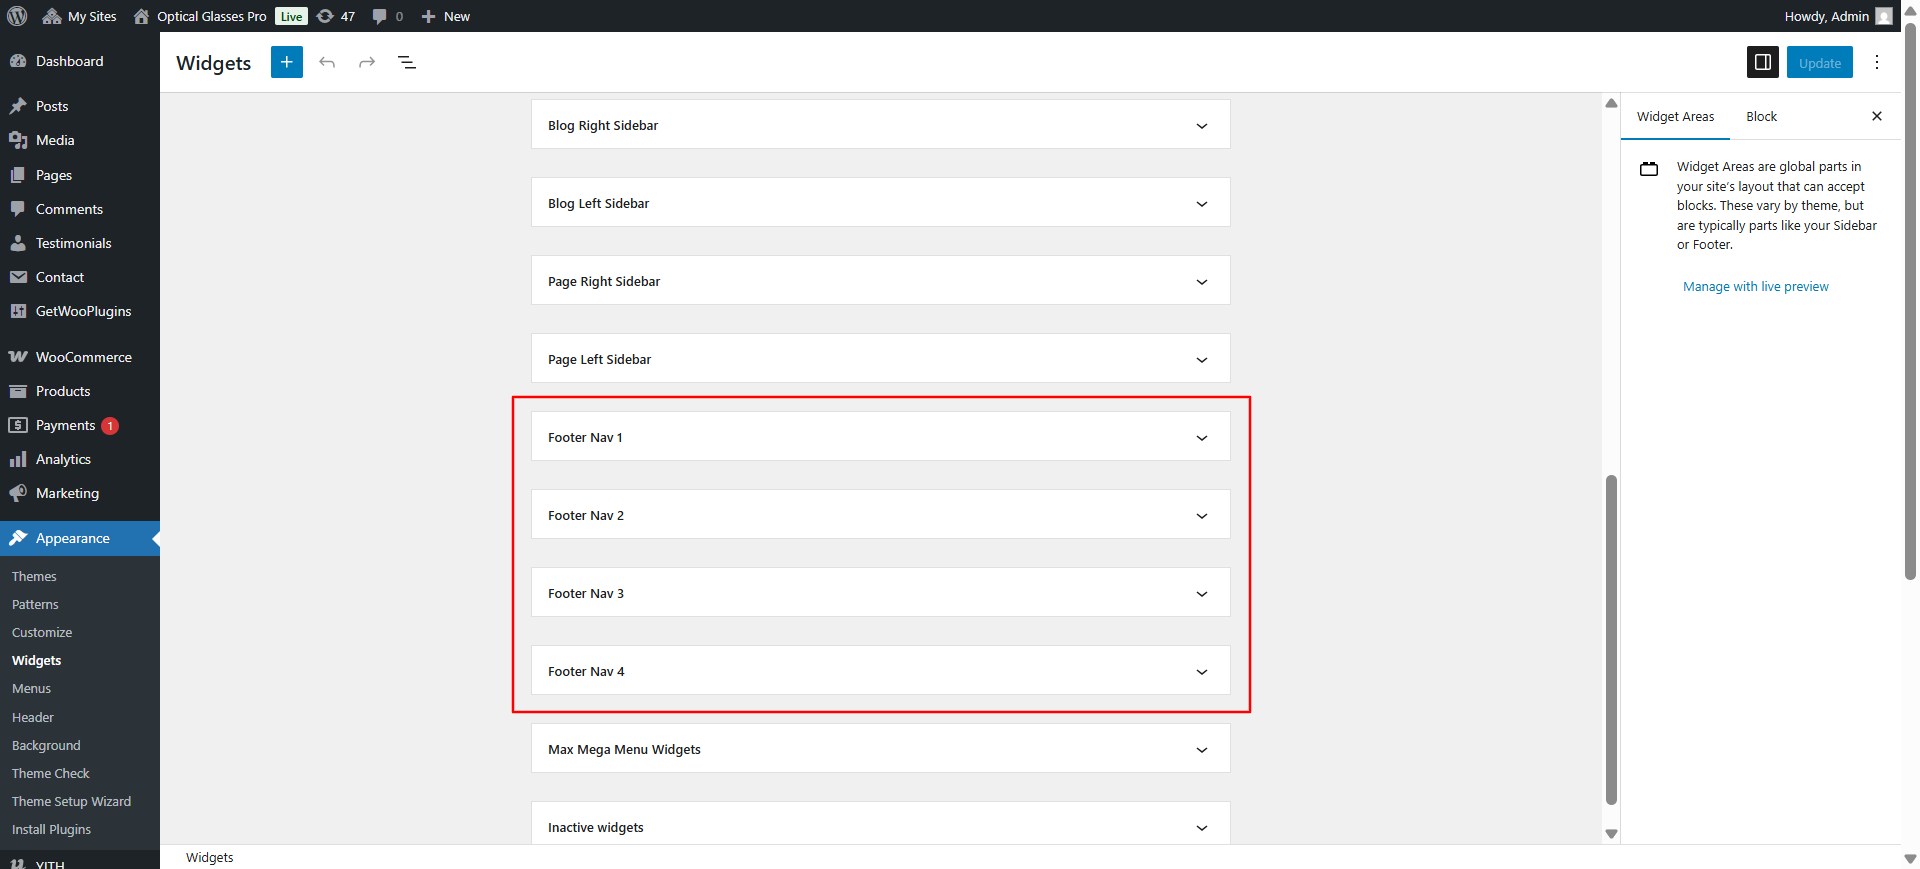
Go to Appearance → Widgets.
There are four widget areas—open and update each as needed.
For navigation menus, first create a menu via Appearance → Menus.
The Navigation Menu block in the widget will link to the selected menu.
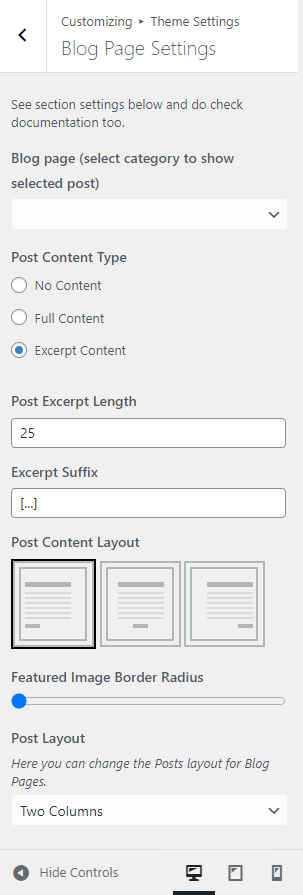
Configure "Blog Page"
Description: Manage global blog settings for your website.
This section contains global blog settings. To access it, go to Theme Settings → General Settings.
Configure "Single Post Page"
Description: Customize the layout and style of single blog post pages.
Access via Appearance → Customize → Theme Settings → Single Post Page.
Here you can customize layout, elements, and styling for single blog posts.
Configure "General Settings"
Description: Adjust overall theme configuration and settings.
This section contains overall theme configuration. Access it via Theme Settings → General Settings.
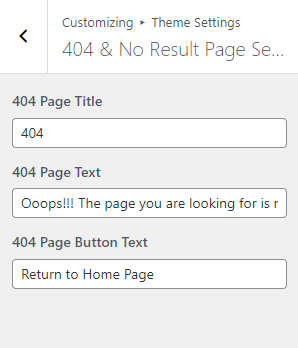
Configure "404 Page"
Description: Personalize the 404 error page content and design.
Go to Theme Settings → 404 Page Settings.
Here you can customize the content and design of your 404 error page.
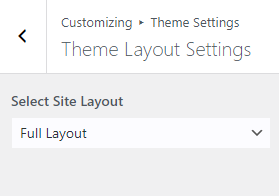
Configure "Theme Layout"
Description: Switch between full-width and boxed layout modes for your site.
Go to Theme Settings → Theme Layout Settings to switch between full-width and boxed layout modes.
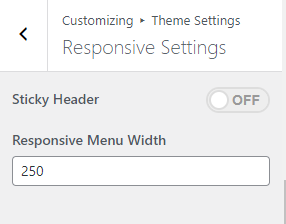
Configure "Responsive Settings"
Description: Configure responsive settings for optimal viewing on all devices.
Access via Theme Settings → Responsive Settings.
You can:
Disable the sticky menu on mobile or tablet views
Set the mobile menu sidebar width to fit your design preference